Book Safe
A hollowed out book that works as a keyboard controlled locking safe.
Introduction:
This project was used to introduce a friend of mine to microcontrollers and circuits. I wanted something that used a variety of microcontroller functionalities and used only parts that I had lying around. I ended up using a PS2 numpad as the key entry mechanism since it was what I happened to see in the thrift store, and it happened to come with the connector it mated to.
Parts:
- Large unwanted book
- Key input (We used a PS2 numpad)
- Microcontroller of choice (We used Atmega328p so we could reuse some Arduino libraries. You could use an entire arduino as well)
- Piezo Speaker
- Small servo motor
- Latching mechanism (we got the Gatehouse Polished Brass Latch from Lowes)
- Power Source (We used a 9V battery, clip, and a LM340 5V regulator with capacitors)
- 10k resistor
- 220uF capacitor
- Power transistor (irf1405)
Tools:
- Wood glue
- Coping saw+drill and/or exacto knife
- Soldering iron
- AVR programmer, or a microcontroller with a bootloader (like an Arduino).
Circuit Design:
Here is the schematic of the circuit we ended up using:
I left the decoupling capacitors off without any ill effect, and you could most likely get away without a pull up resistor on the reset circuit. The 220uF capacitor was a must though. Without it the servo would cause large dips in the voltage causing the microcontroller to reset. Originally, I had the microcontroller drive the speaker through a resistor, but this turned out to be too quiet to hear through the book. To fix this I added a MOSFET to allow a larger current than the microcontroller could output directly.
Software Design:
Writing the code turned out to be extremely easy. The arduino IDE comes with libraries to handle producing tones and controlling servos. I was also able to find a library for PS2 keyboard http://www.pjrc.com/teensy/td_libs_PS2Keyboard.html . A couple of things to note using these libraries:
- The IRQpin specified for the keyboard corresponds to the external interrupt number of the pin you attach the keyboard’s clock signal to. I originally specified the digital pin number which was incorrect.
- I found that my servo would oscillate around its set point. To prevent this from happening I detached the servo in software when it wasn’t in use.
Click here for the full commented code Arduino Code
Since I didn’t want to actually waste an Arduino on this project, I ended up soldering the components directly to an Atmega328p. I had an AVR programmer so I could have just directly programmed the hex file produced by the Arduino IDE, but I decided to burn on a boot loader to make future updates easier. I followed the guide here http://arduino.cc/en/Tutorial/ArduinoToBreadboard using the minimal configuration. Unfortunately, the board.txt file that site supplies seems to be for an older version of the software. Here is an updated version that I made: boards.txt. To use it add the contents of that file to the end of the hardwarearduinoboards.txt in your Arduino IDE folder and restart the IDE. Then select “ATmega328 on a breadboard (8 MHz internal clock)” as your board.
Build:
Glue the first inch or so of the book’s pages together. This will be the space that will house the electronics, so make it big enough for the motor and microcontroller. Clamps help a lot.
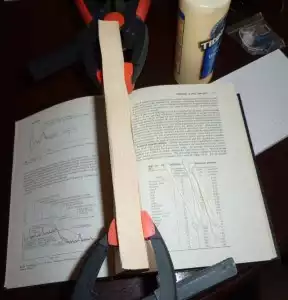
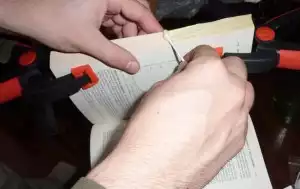
Once the glue is dry, cut out the inner section of the pages. We left about an inch border. We drilled into the pages so we could thread a coping saw. Cutting through the pages was slow going, and for the second cavity, we ended up using an exacto knife. Each cavity took several hours. A dremel or band saw might make this easier.


Repeat this process for the remaining bottom pages. This should leave you with the cover, the hollow top pages, the hollow bottom pages, and the back still able to move independently.
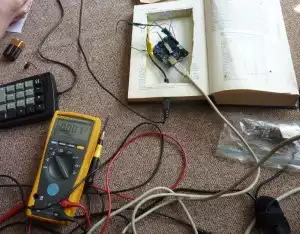
The next step we took was to get the electronics working outside of the safe. We initially used an Arduino.
Once we got the code working, we started on the electrical build. First we added the voltage regulator to the keyboard. We used a LM340 with the capacitors suggested in its datasheet’s application notes. We were able to fit the circuit inside the keyboard and soldered it to a 5V and ground pad on the circuit board. We removed the numlock LED and fed the 9V battery connection in through the hole.
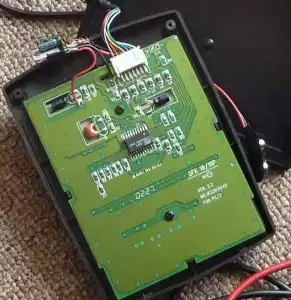
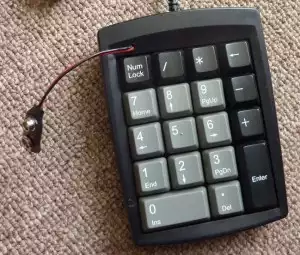
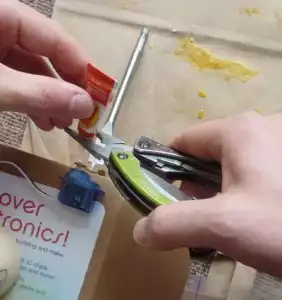
Next we attached the latch to the servo motor. This connection is probably the weakest point in the project, but we couldn’t come up with a better idea than super glue.
After that, we soldered together the electronics. We did this “dead bug style” but this should probably be done more robustly with a prototyping board or a PCB if you want to be super fancy.
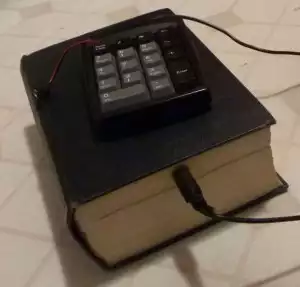
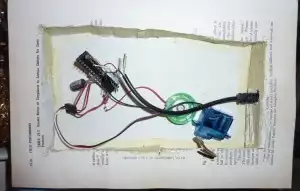 Afterward we finished the project by gluing everything down and aligning the two halves of the latch. Here is the finished product.

