
Adding Video Call Effects with OpenCV
After seeing some co-workers use snapchat filters with Zoom, I was inspired to find a simple way to program custom effects that would work with video calls. I skipped out on Halloween costuming this year, so this was a consolation activity.
Figuring out how to make a virtual camera
A brief Google showed me that the SnapChat filters worked by creating a virtual camera https://www.pcmag.com/how-to/how-to-use-snapchat-filters-on-zoom. I wanted this project to be on the quicker side, so I looked for a way to do this in Python. I knew I could do feature recognition and image manipulation with OpenCV, so I just needed to find a way to create a virtual camera that could be manipulated in python.
Initially I found pyvirtualcam and pyfakewebcam. pyvirtualcam is windows only and relies on having OBS: Open Broadcaster Software installed. pyfakewebcam is linux only and uses a virtual camera driver v4l2loopback. I got pyfakewebcam working, but hit a bunch of issue getting my webcam to work properly in Linux.
Since both of these were a bit difficult to setup, I started exploring using OBS: Open Broadcaster Software directly. OBS can have it’s output be a virtual camera, and it has a Python scripting language. I explored using the scripting language, but it has little documentation and very few examples. It mostly works by manipulating the attributes of objects that are in the broadcasting scenes, which wasn’t very well suited to my use case.
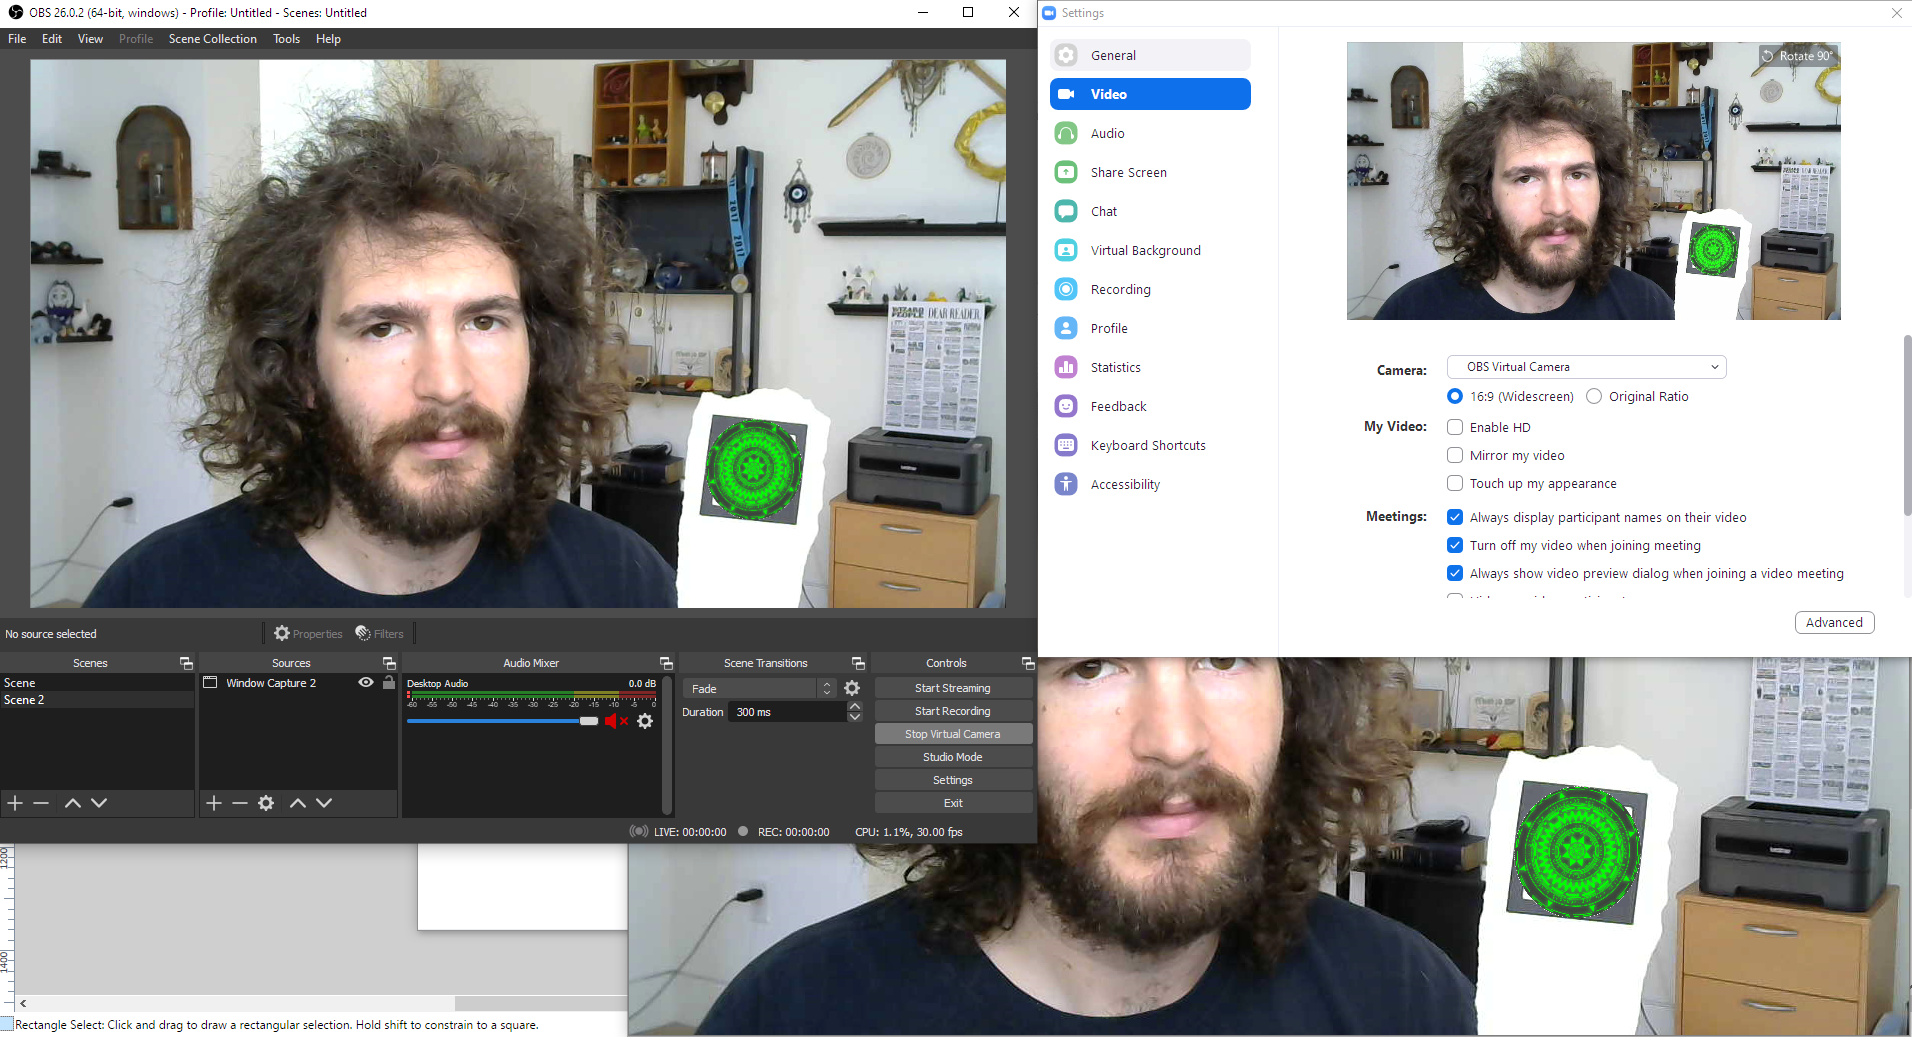
In the end I realized the easiest thing was to have OpenCV create a window with the processed camera output, have OBS capture this window and rebroadcast it as a virtual camera. That way it can be fed into Zoom or any other video chat SW.
Here’s an example of the OpenCV window being captured by OBS being captured by Zoom:
Developing the effects
The code and images I reference can be found in my github repo: https://github.com/axlan/opencv_effects. This is a pretty quick and dirty project so there’s a decent amount of error handling and optimization that could be added.
OpenCV allowed me to write this code without needing to get into the linear algebra. I spent most of my time just trying to figure out how it expected the various matrixes it passes around to be structured.
Laughing man face
I wanted to try to reproduce one of the first programming projects I did in college. It was a OpenCV app that would censor faces like this scene from the Ghost in the Shell anime:
To get things setup I installed opencv-contrib-python==4.4.0.44 and opencv-python==4.4.0. To install opencv-python on Windows I followed the guide in https://medium.com/@shachindra/installing-opencv3-4-with-python3-on-windows10-5511e3323a0 while I got opencv-contrib-python straight from pip.
I followed https://realpython.com/face-detection-in-python-using-a-webcam/ to get the basic facial recognition code.
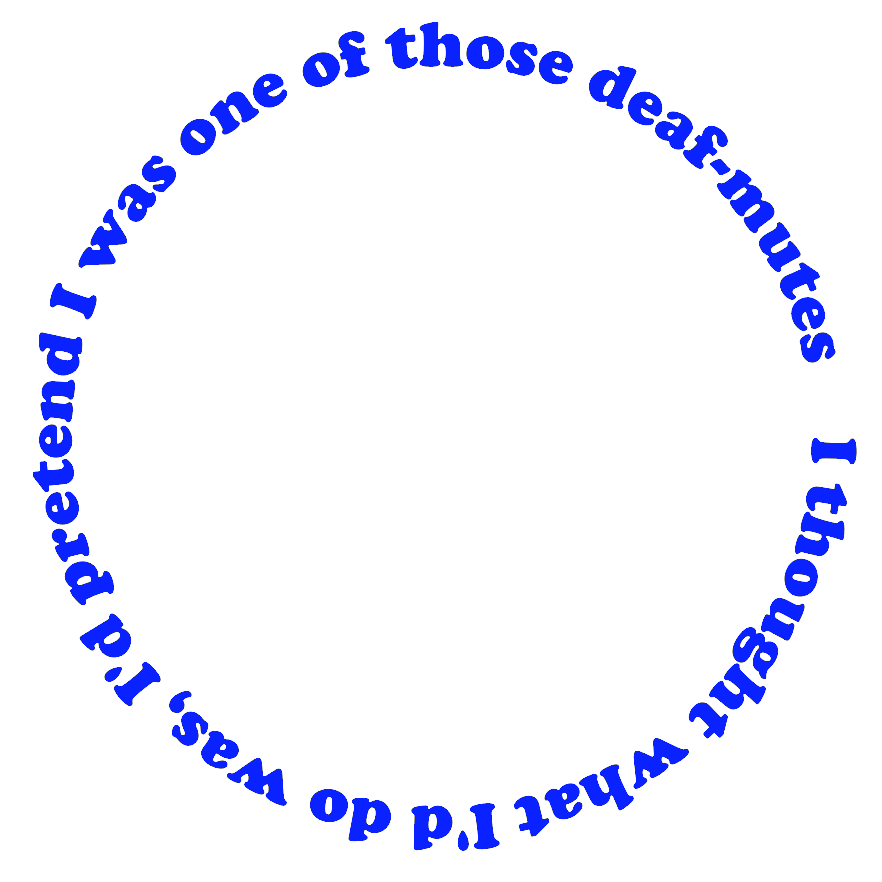
To get the animated text I decided to do it the hard way. I traced a version on the laughing man face without the text into Inkscape. I then followed this guide to create the wrapped text https://daviesmediadesign.com/how-to-wrap-text-around-a-circle-in-inkscape/.
From the SVG I made a template face, and text with the transparencies setup to get the hat to cut off a portion of the text:

From there it was an exercise in figuring out how to copy the images onto the OpenCV frame while preserving the transparency.
Magic circle animation
To go a little further I wanted to also be able to project animations onto markers in the room. I used https://www.learnopencv.com/augmented-reality-using-aruco-markers-in-opencv-c-python/ as the basis for generating and detecting markers. I hit some difficulties with their example projecting an image onto the markers in the scene, so I followed the simple example in https://stackoverflow.com/questions/42157653/problems-with-opencv-warpperspective-with-transparent-images.
To make the animation, I started with the gif:
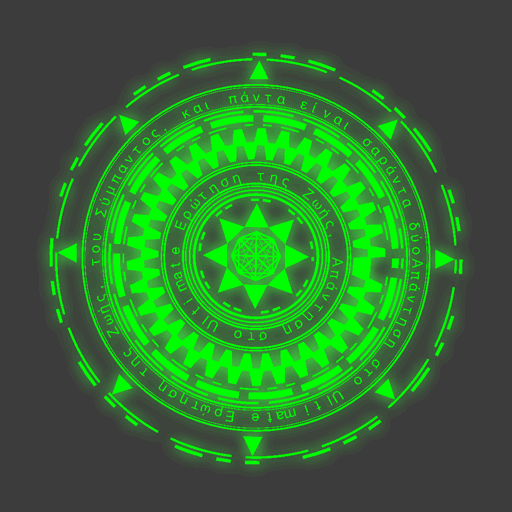
and loaded it into a gif editing program Graphics Gale. There I cropped it, replaced the gray outline with white, and exported it as a series of frames.
As I mentioned I originally had some trouble masking the image I wanted to add to the scene, so I ended up just using pure white as a transparency color.
Demo app
I put these effects together in a 175 line Python script https://github.com/axlan/opencv_effects/blob/master/effect_demo.py that allows the effects to be toggled on and off. Here’s a video showing them in action: