
A Sun Following Chair for my Cat
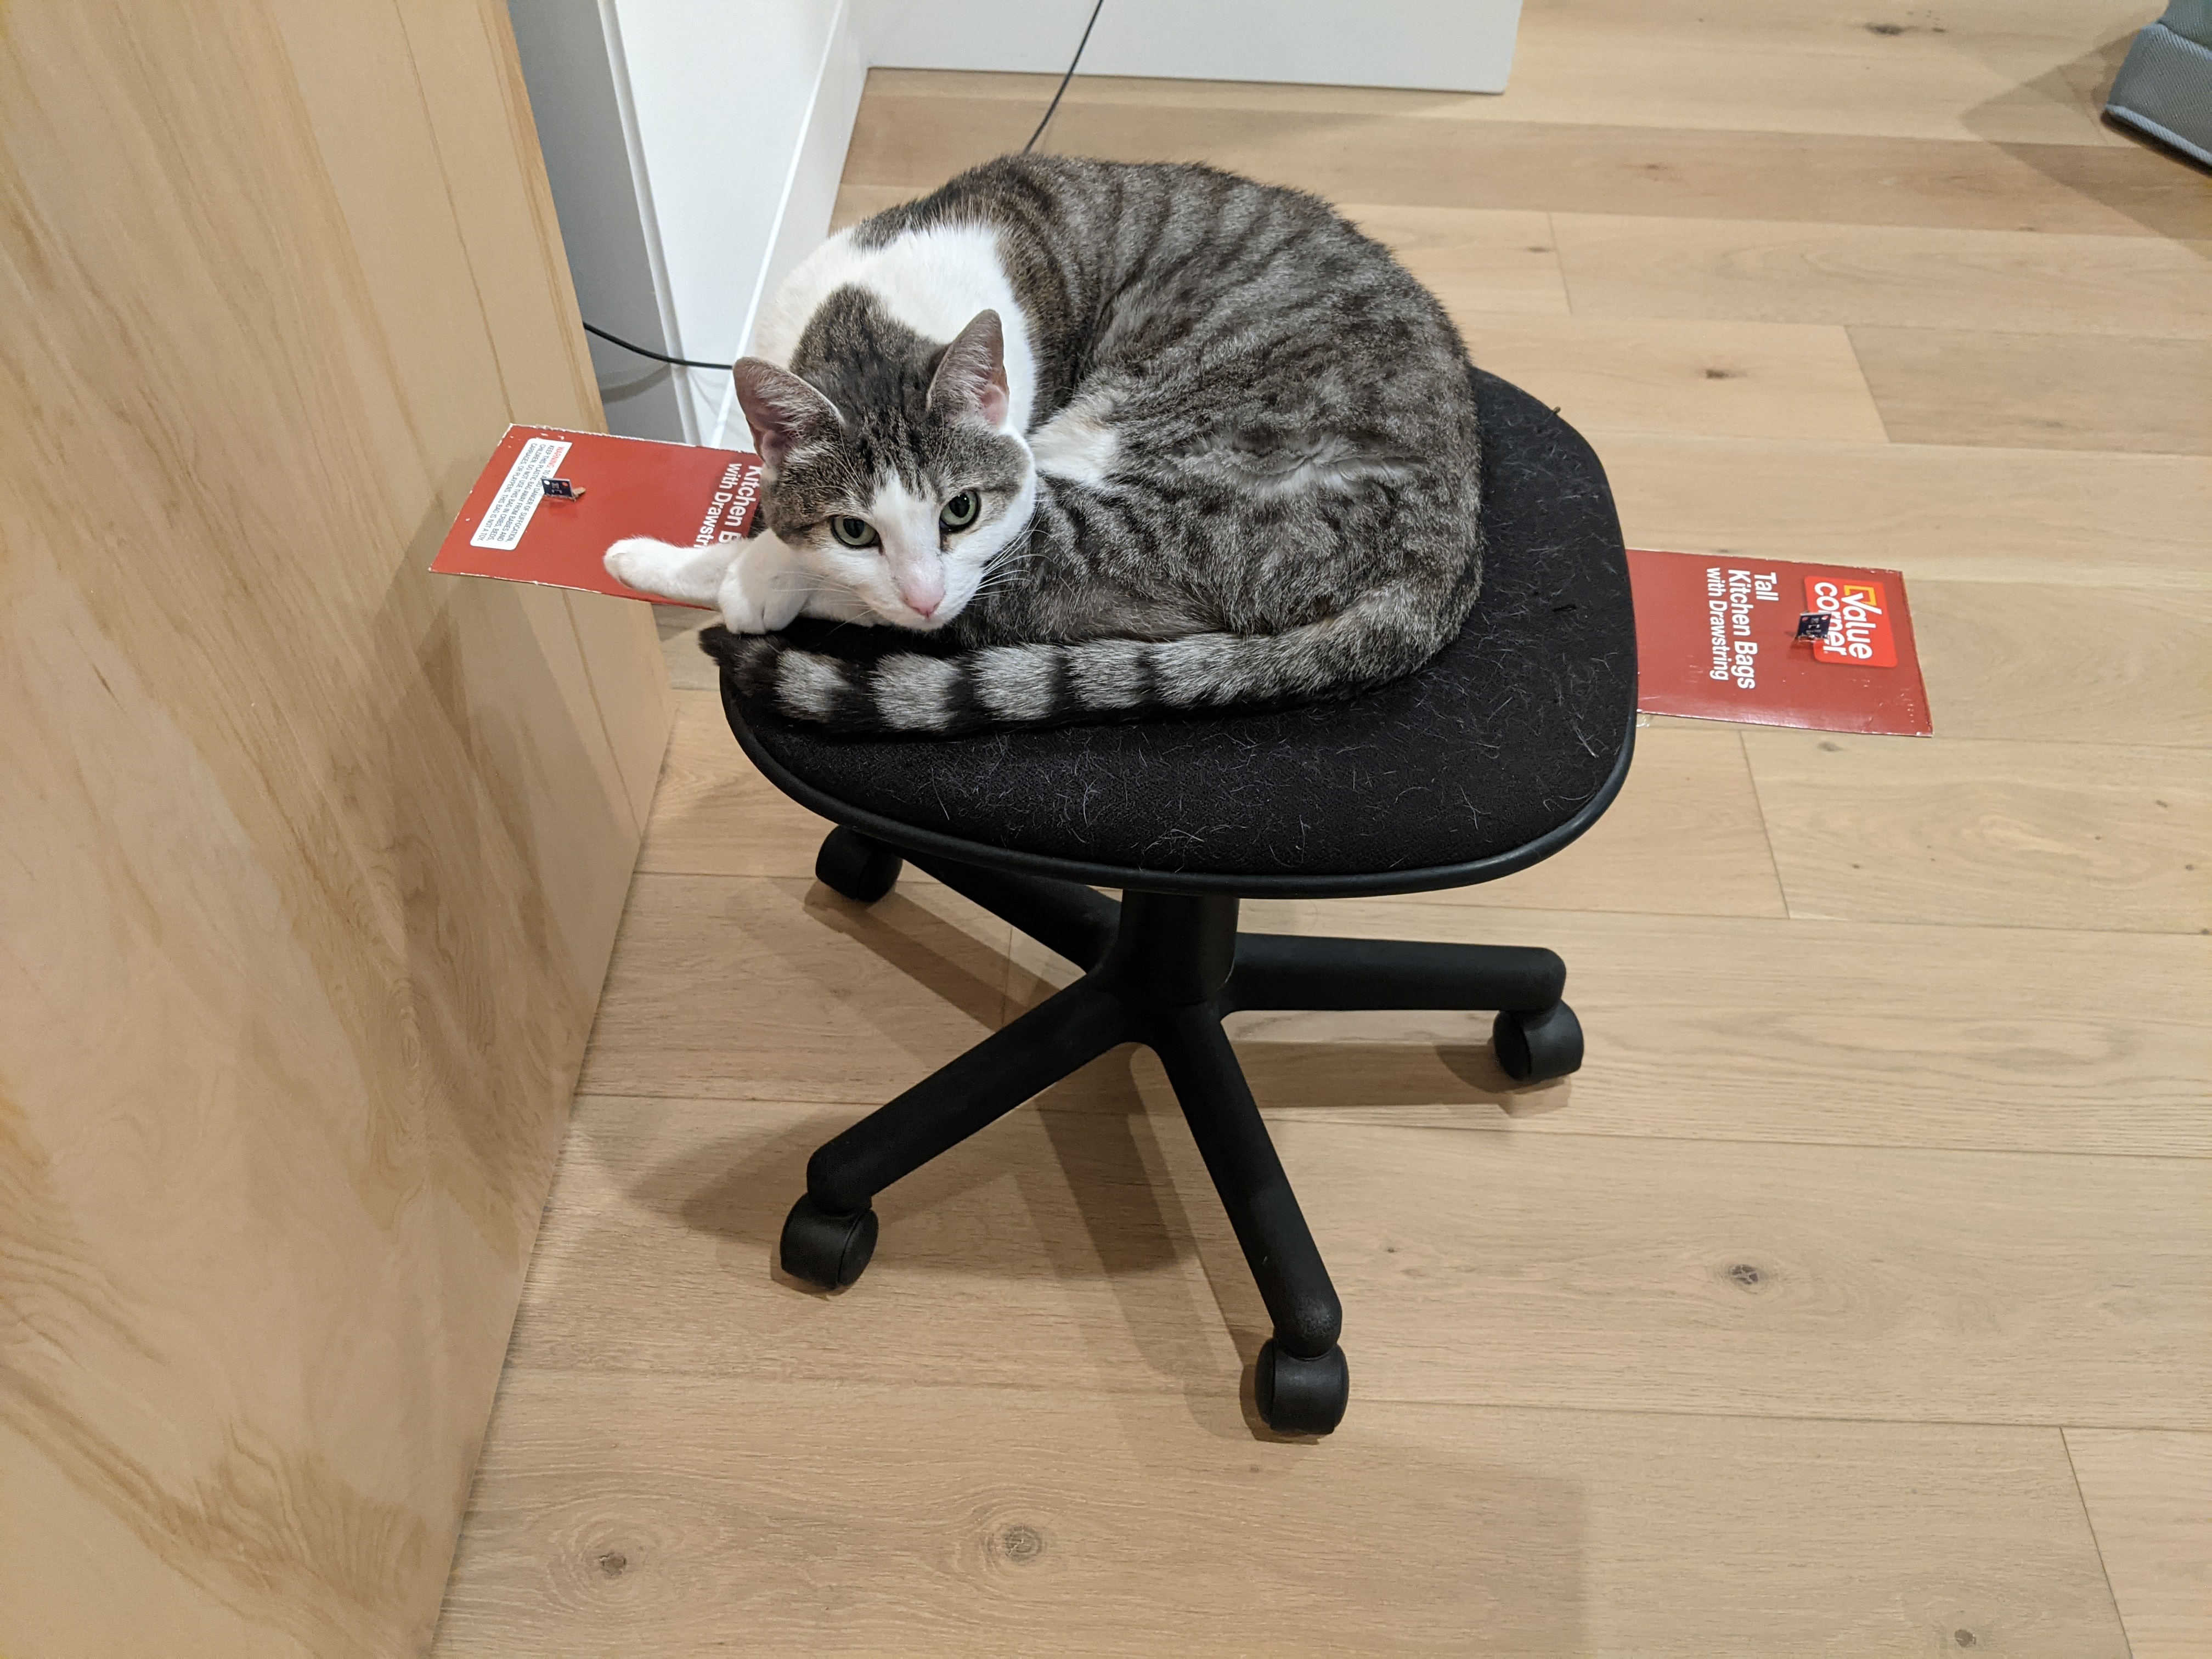
I wanted to do a quickish project over my time off for the holidays. I had a recently broken a coffee grinder, and it inspired me to automate a chair in my office to follow the sun. This seems like a weird project, but it was to placate my cat Nala, who cries when the chair isn’t in a sun beam.
To cut to the chase, here’s the finished result
All code used in this project is at https://github.com/axlan/cat_chair
If you want to use the PlatformIO projects, you need to add appropriate secrets.h files with your WiFi ssid and password.
Chair Automation
When the coffee grinder broke, I suspected it was a loose connection. When I opened it up, I was able to confirm the issue was with a build up of carbon inside the switch.
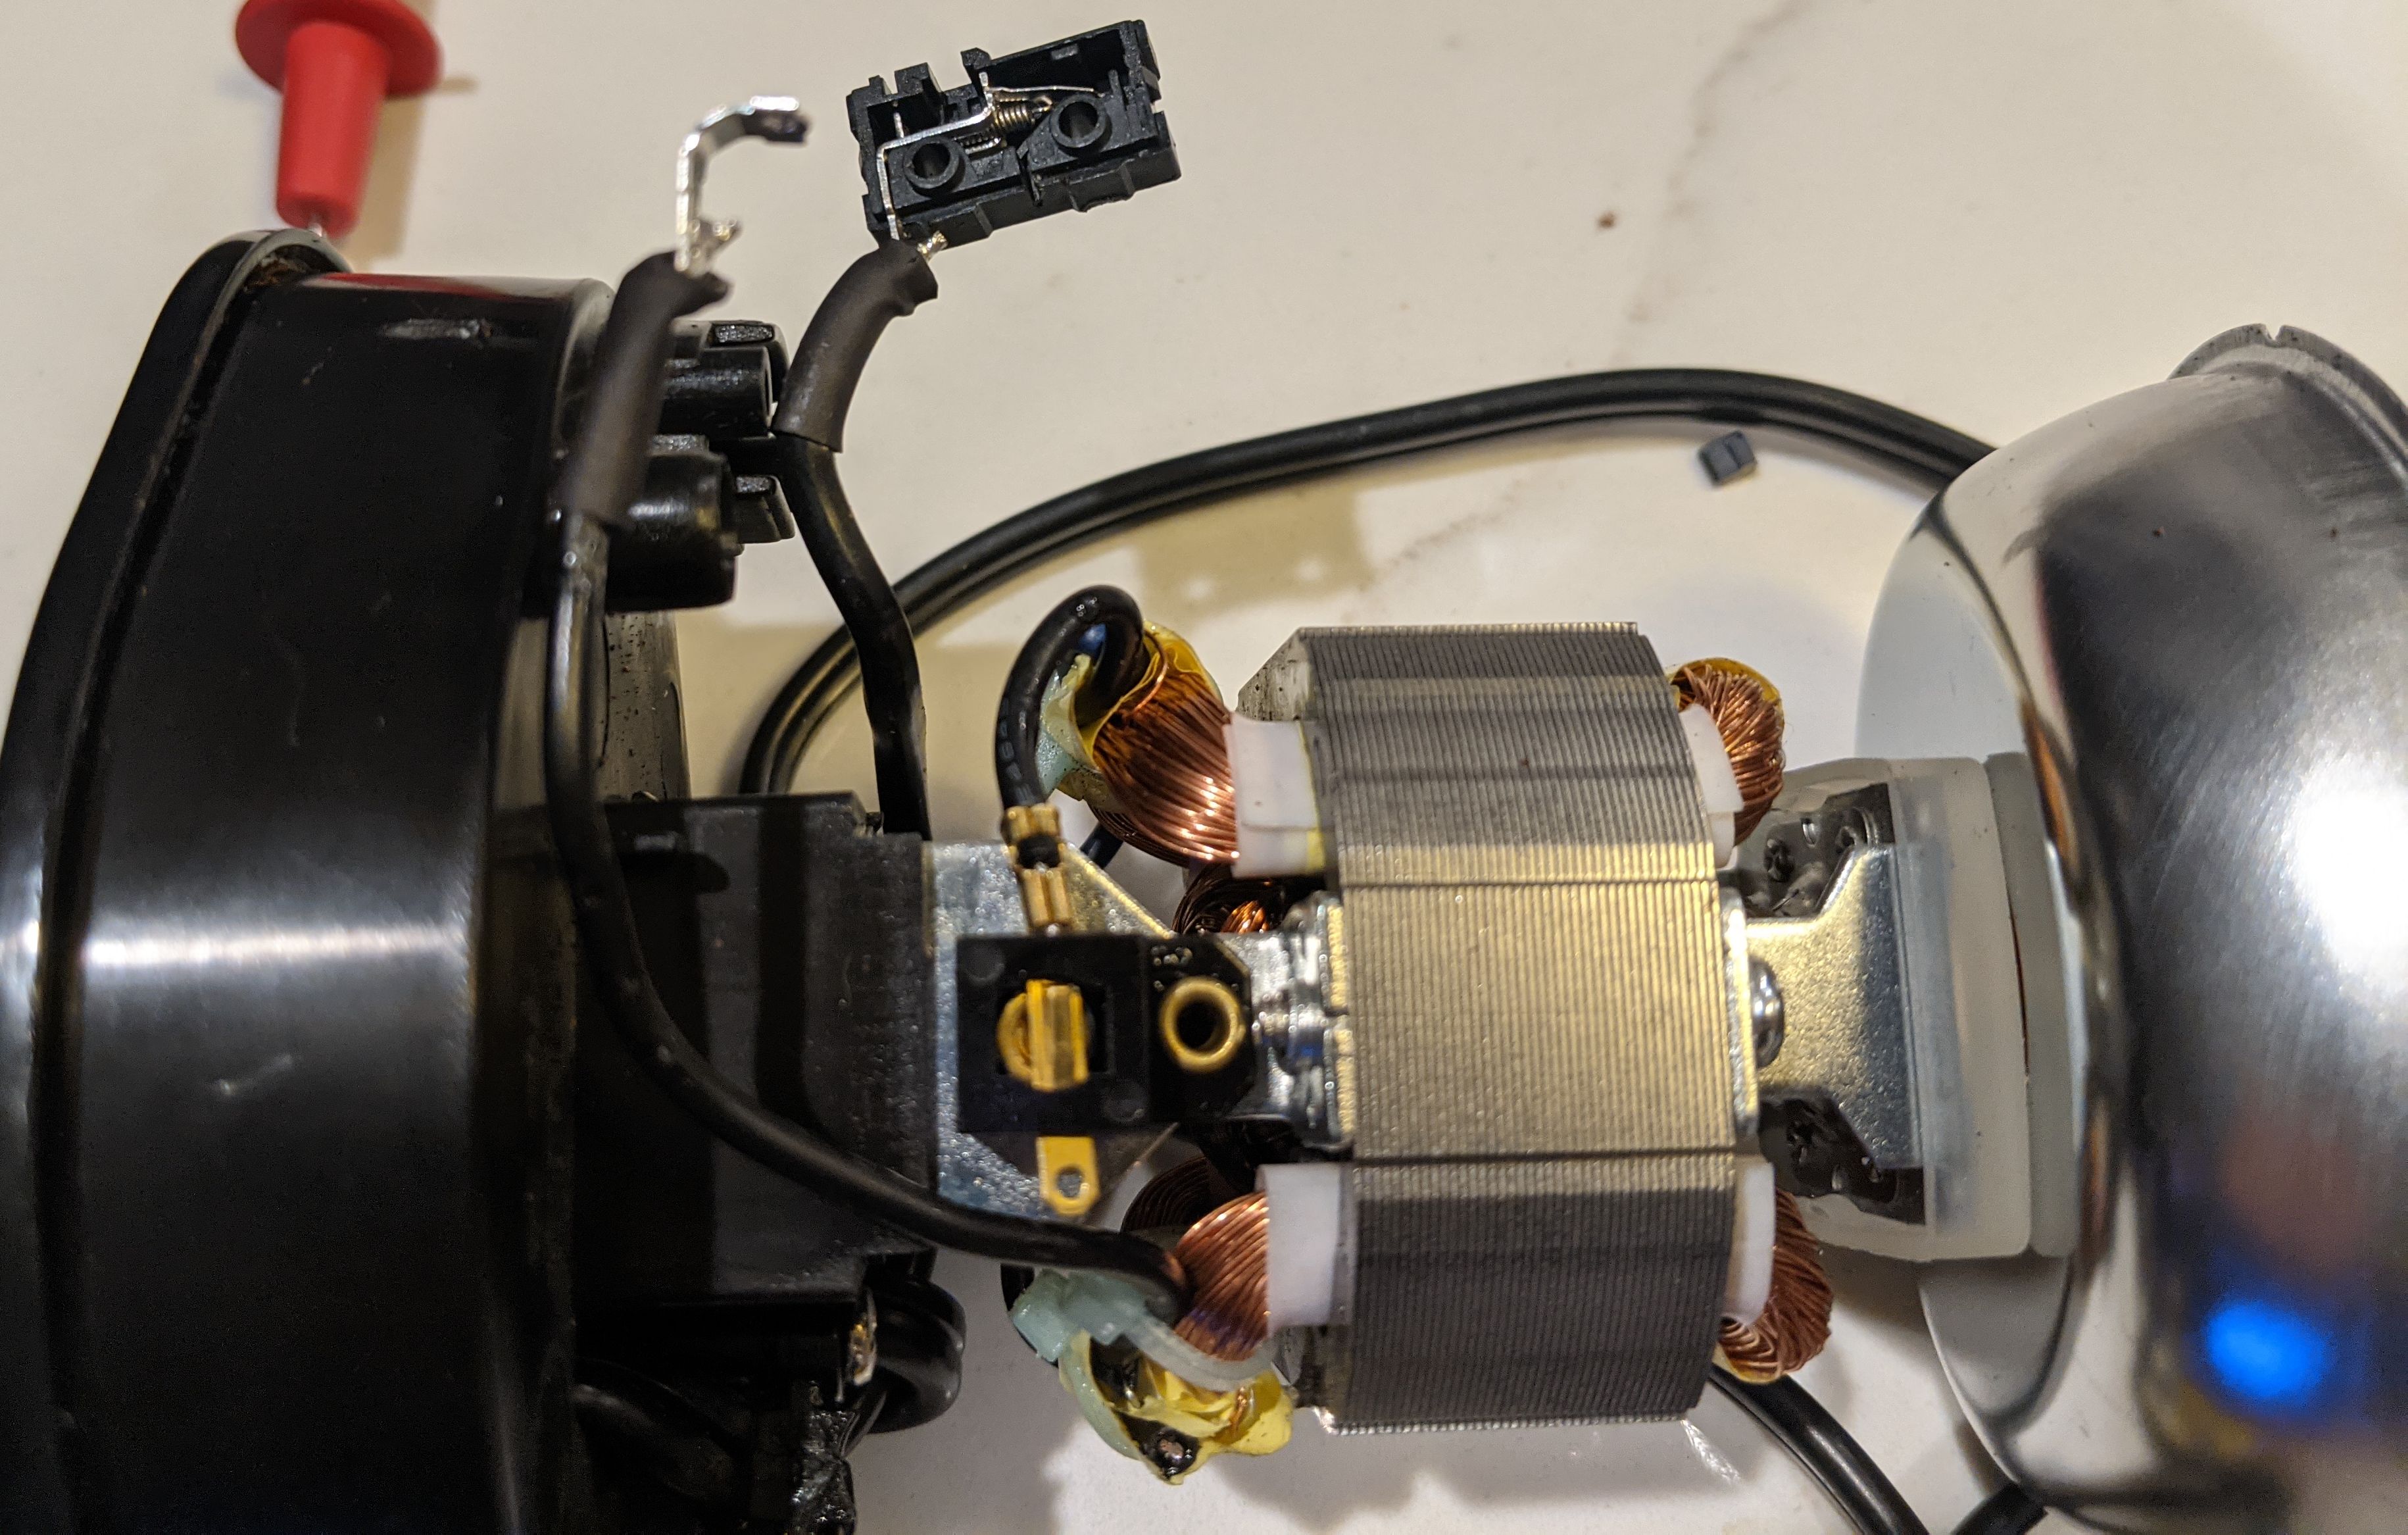
Unfortunately, the process of disassembling it was a bit destructive, so I was left with a functional motor, which led to deciding to do this project.
Initially, I went through a lot of ideas on how to motorize the chair. I could add motors to the wheels of the chair, or maybe make some sort of cable car system. I decided to make a motorized spool to drag the chair. I could have done something elaborate like use a counterweight to pull the chair back at the end of the day, or have another motor on the opposite end, but decided to keep things simple and manually push the chair back at the end of the day.
After spending some time relearning how universal motors work, I tried some prototypes.
With AC power, the motor would need to be geared way down.
I actually spent some time figuring out how to design and manufacture gears with the laser cutter. https://geargenerator.com/ is a pretty awesome web tool for gear design, but I was disappointed they removed the free download option. However, while looking around a noticed an old mirror had the design file stored in the javascript data. I made a simple clone with a working download link https://www.robopenguins.com/assets/wp-content/pages/geargenerator/ and made some prototypes.

Besides the material challenges for having gears under that much force, I also wanted to be able to have the motor switch direction, which would be pretty difficult with AC relays. I tried running the motor with DC, but it didn’t seem to have enough force to work at all.
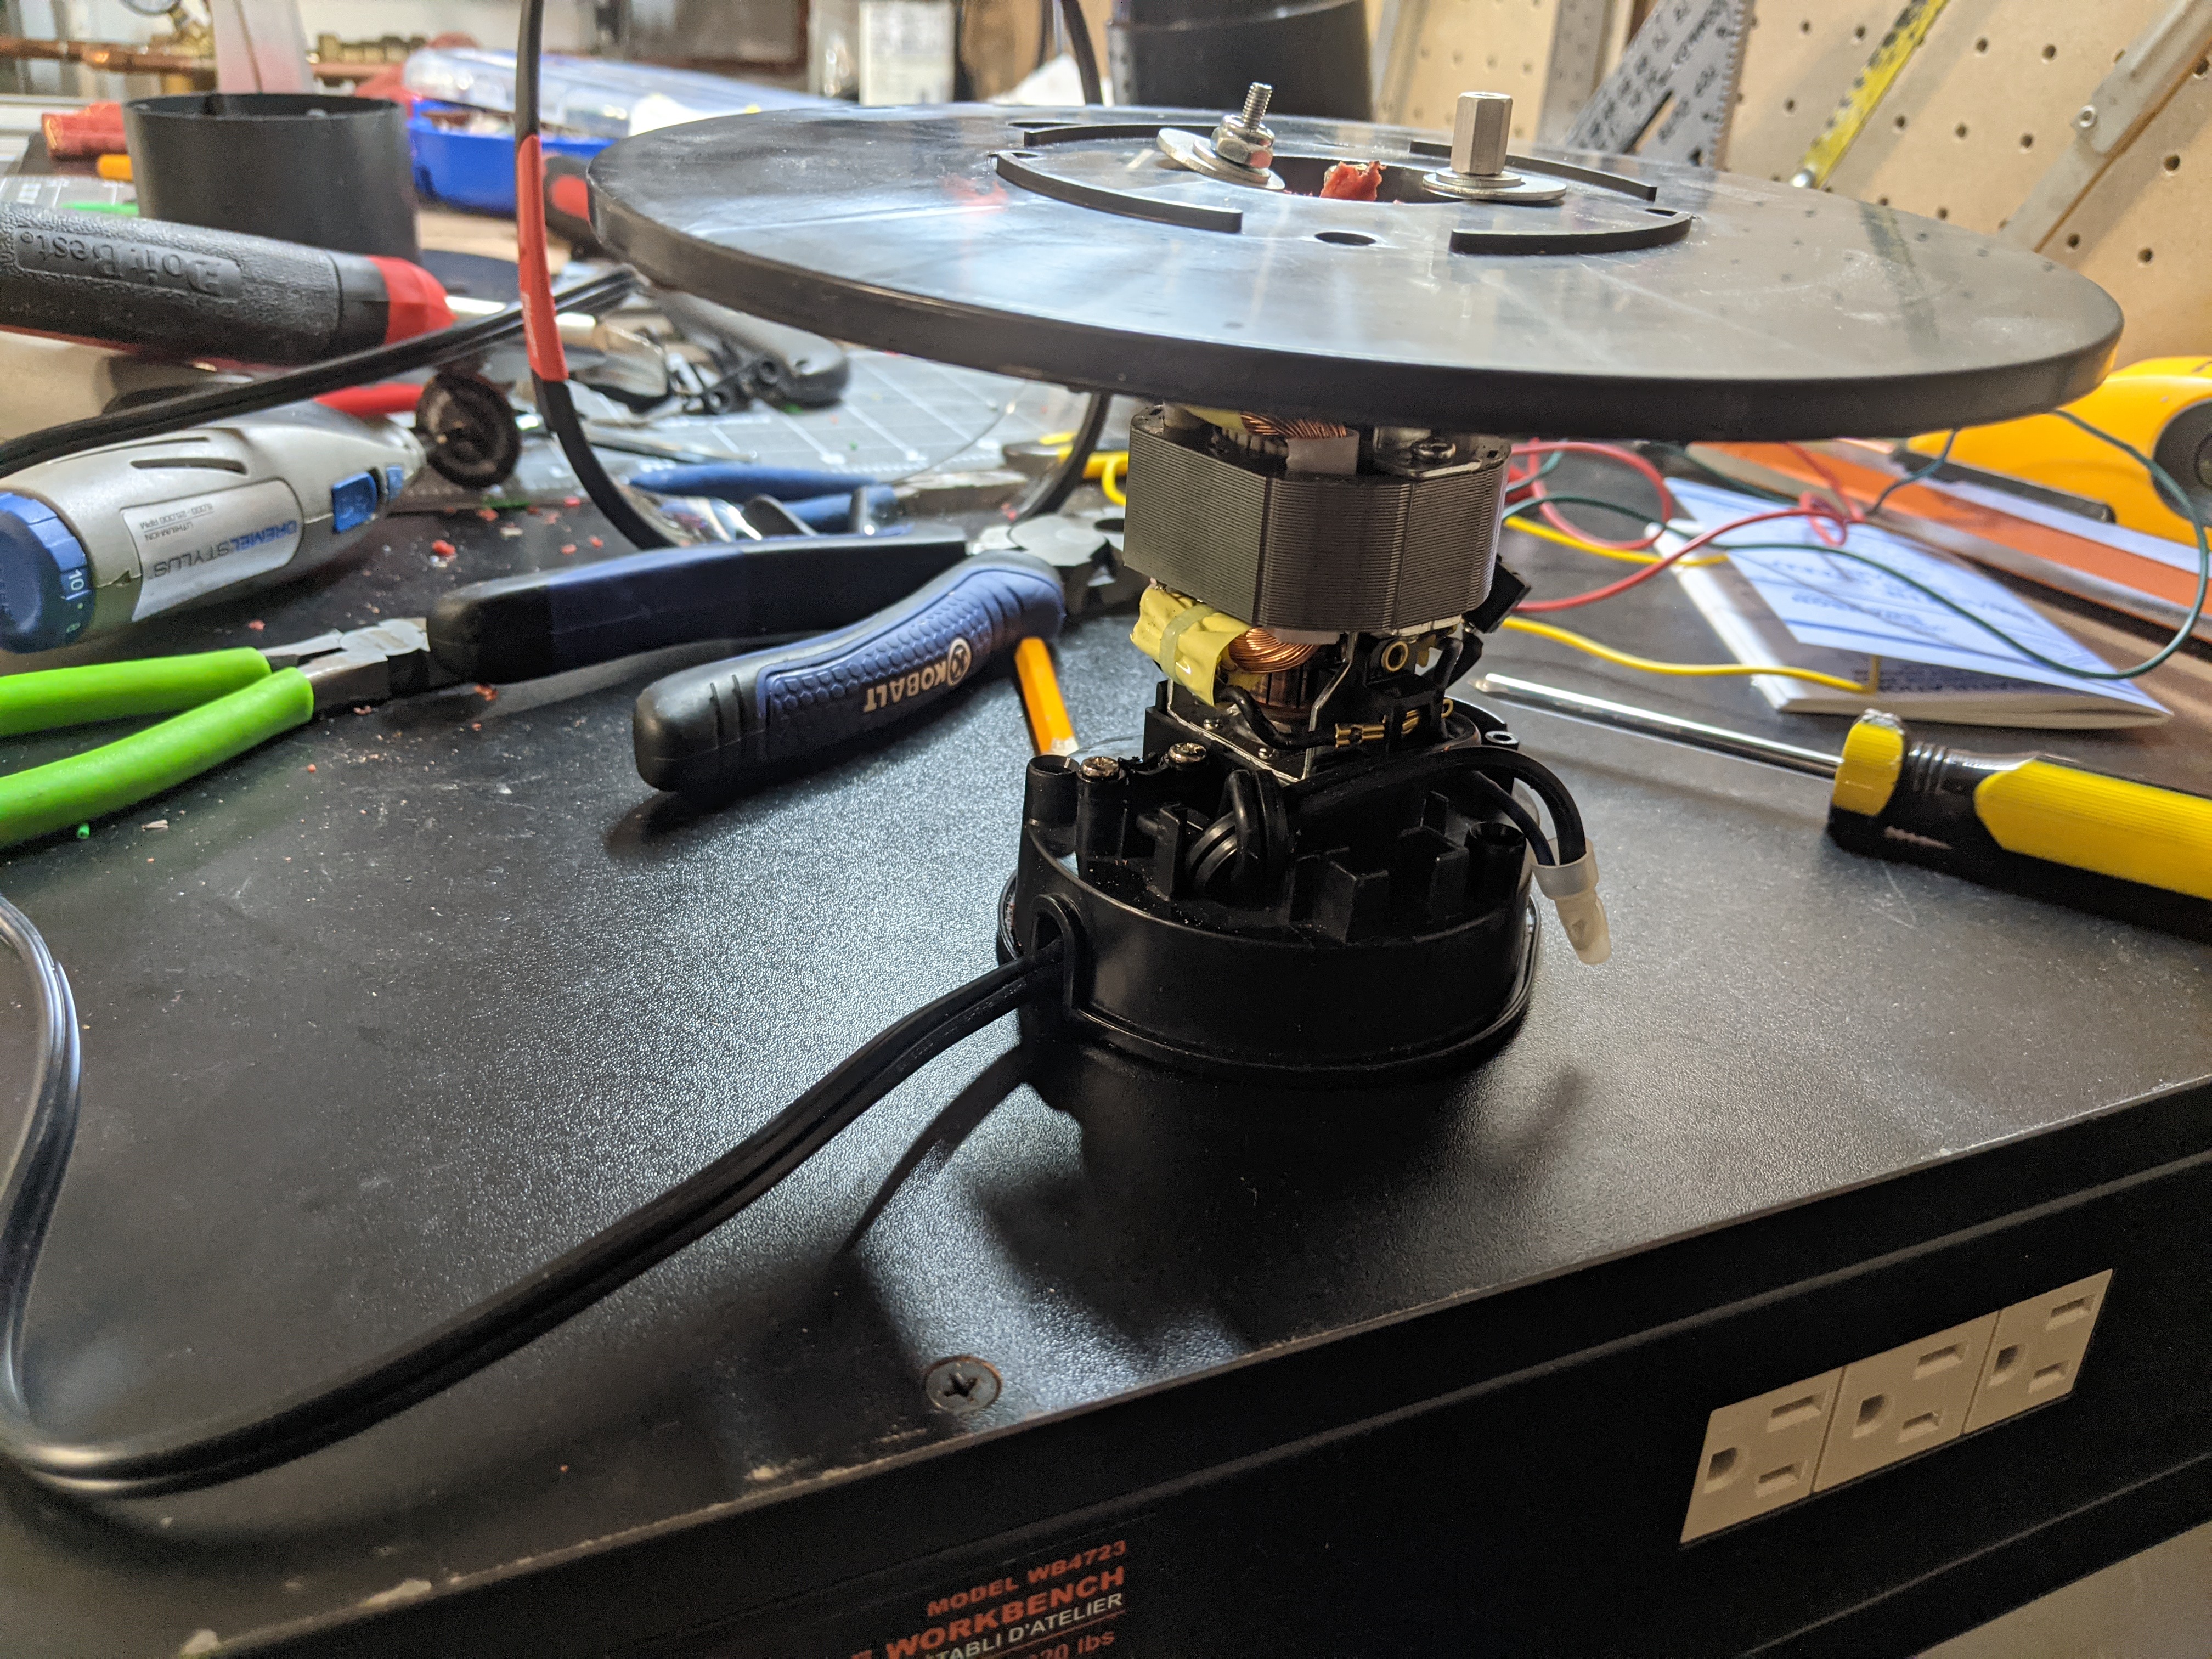
Looking through the parts I had on hand, I found a DC motor that was already geared for fairly high torque. I also found a break out board for a motor controller that would let me adjust the speed and direction. With that, I abandoned the coffee grinder for a much more sensible motor.
The controller was a L298 breakout board, which gave a very simple interface for direction and speed control.
After some basic tests I went with this and laser cut a piece to allow me to mount the motor to the spool.
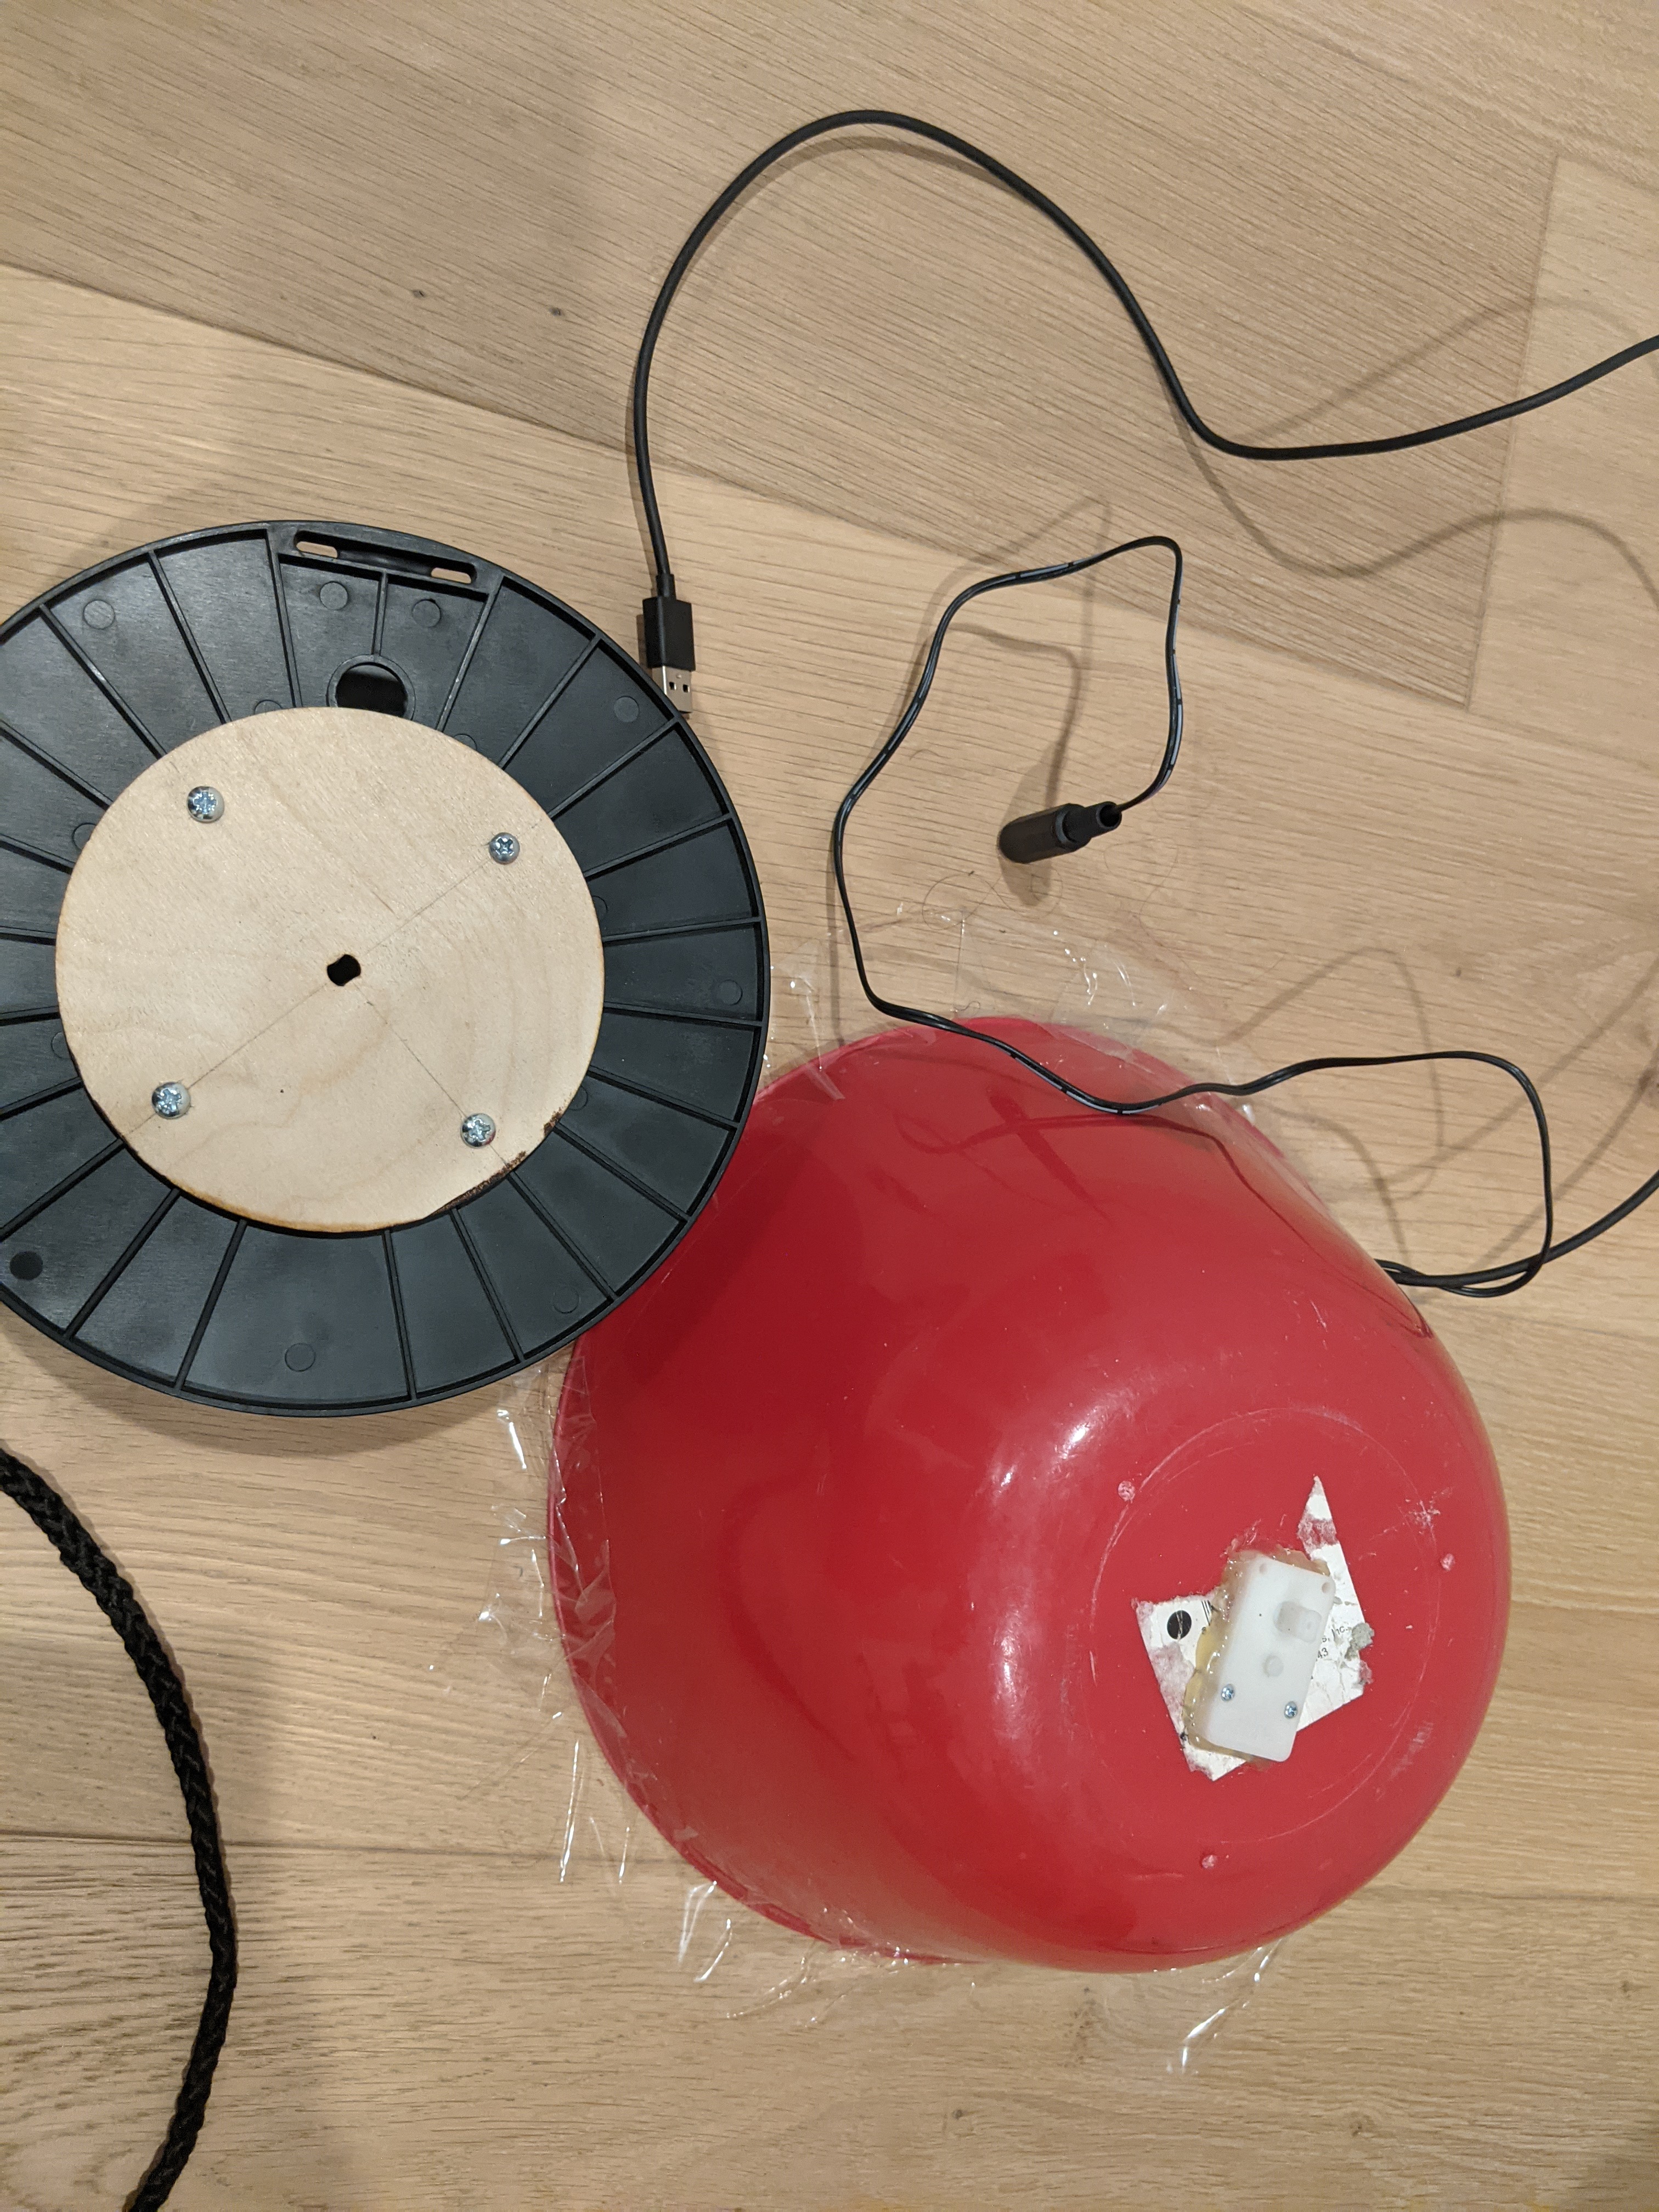
To control the controller, I went with my old trusty companion, a NodeMcu (See NodeMCU Development) . I cut up an old salad bowl to act as the base.
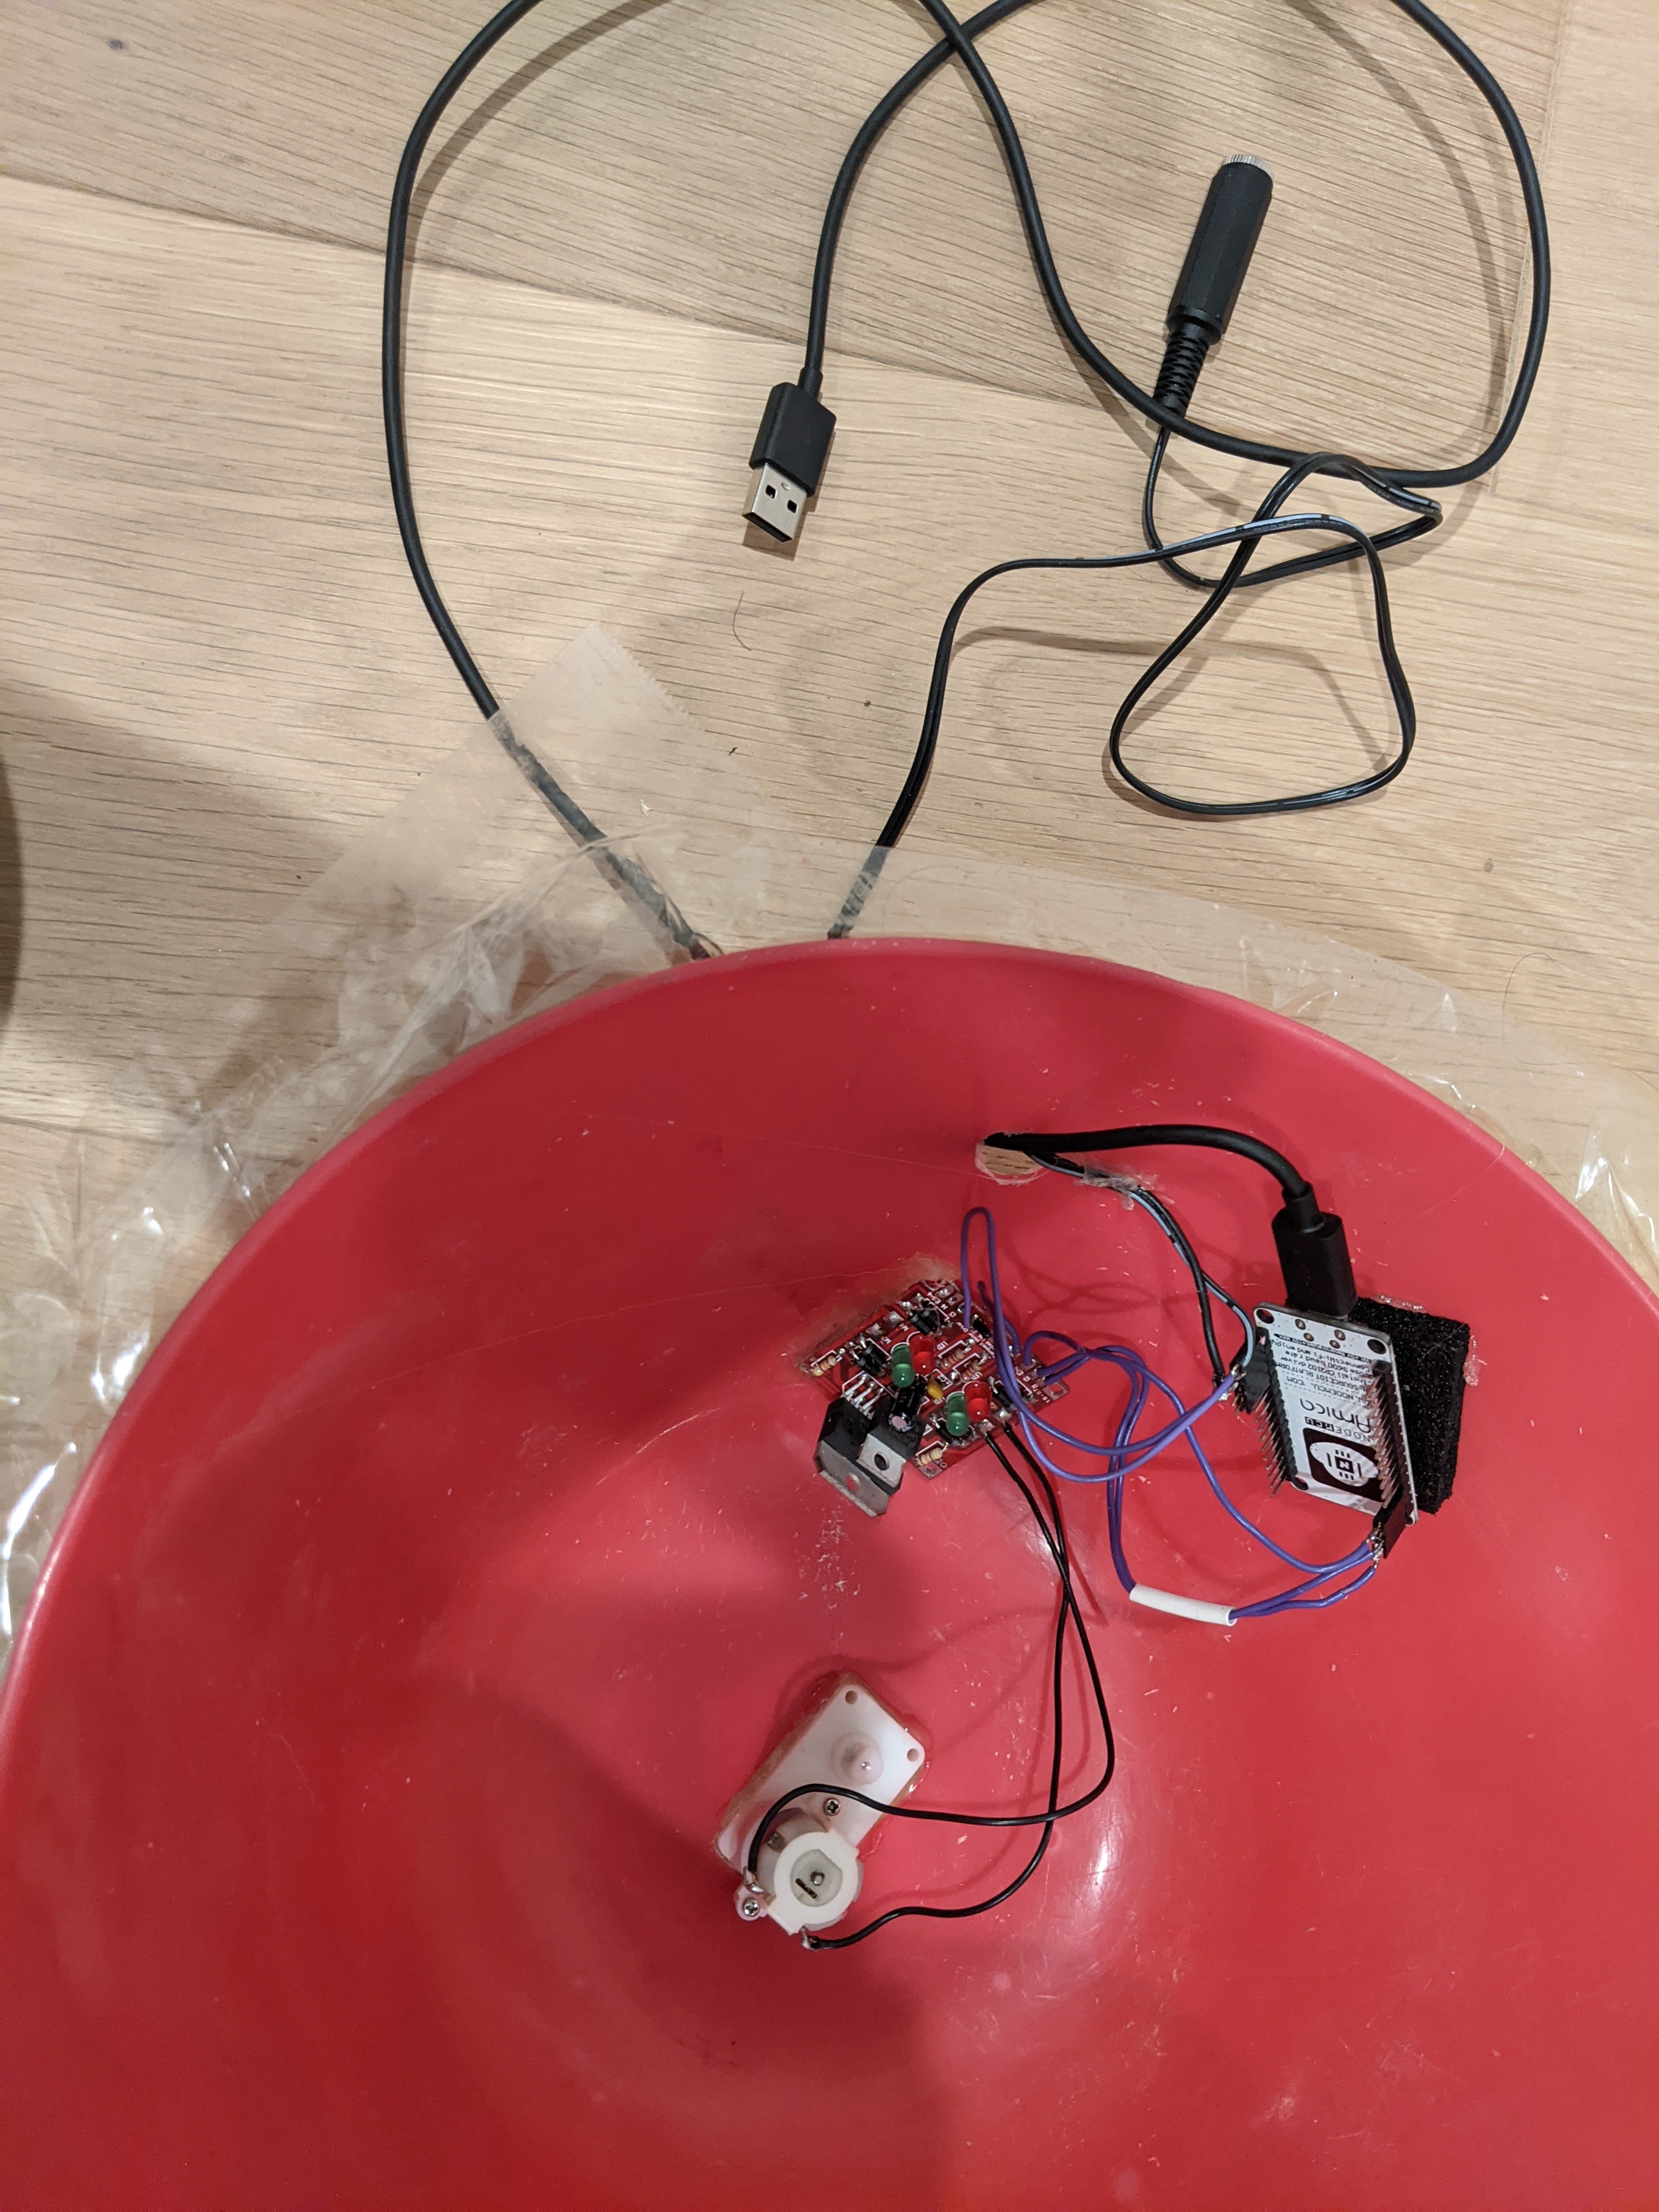
The USB connection was just for reprogramming, until I switched to wireless over the air (OTA) updating. I was giving the motor controller 12V since the motor controller let me reduce the power, but it turned out the motor would start stripping its gears if I went above 9V under load.
Rather then continue abusing the WLED code base (See Internet Cut Off Switch), I actually made a fresh PlatformIO project and used the ESPAsyncWebServer to set up a REST-ful control interface.
https://github.com/axlan/cat_chair/tree/master/chair_ctrl
1
2
3
4
5
6
7
8
9
10
Send a GET request to <IP>/set

Required Parameters
  * dir - 1 or 2 to set the direction
  * time - on time in milliseconds, or -1 for stay on
Additional optional args:
  * speed= 0.0-1.0 fraction of max speed defaults to 1.0
  * ramp= milliseconds to ramp up to speed defaults to 0

Any invalid request or setting the time to 0 immediately stops the motor
It was at this point I realized a key problem with the new motor.
Nala was too heavy.
To get the chair to move with her in it, I had to up the voltage and remove back of chair. Even then it was struggling pretty badly. However, since the motor only had to inch her forward a bit at a time, I pressed ahead.
I also knew at this point there was approximately 0% chance she would put up with the motor noise, but hey, this project is for me, not her.
Sun Beam Detection
The next step was coming up with how to figure out when to move the chair. A few ideas immediately jumped out:
- Look up table based on time of day - Measure where in the room the sun is once every ~15 minutes and translate that into control commands
- Calculate position of the sun - Based on our location and the time of day, I could figure out the angle of the sun. This would give the angle of the sun beam.
- Computer vision - Use a camera to track the position of the sunbeam and the chair
- Light sensors on the chair - Detect the edge of the sunbeam and move the chair when the sun is getting close to the edge
The issue with the first 2 options is that they don’t account for uncertainty in the chairs movement. The control commands don’t move the chair a fixed amount, and will move the chair a much shorter distance if Nala is actually sitting in it. Since computer vision seemed like overkill, I went with the light sensor idea.
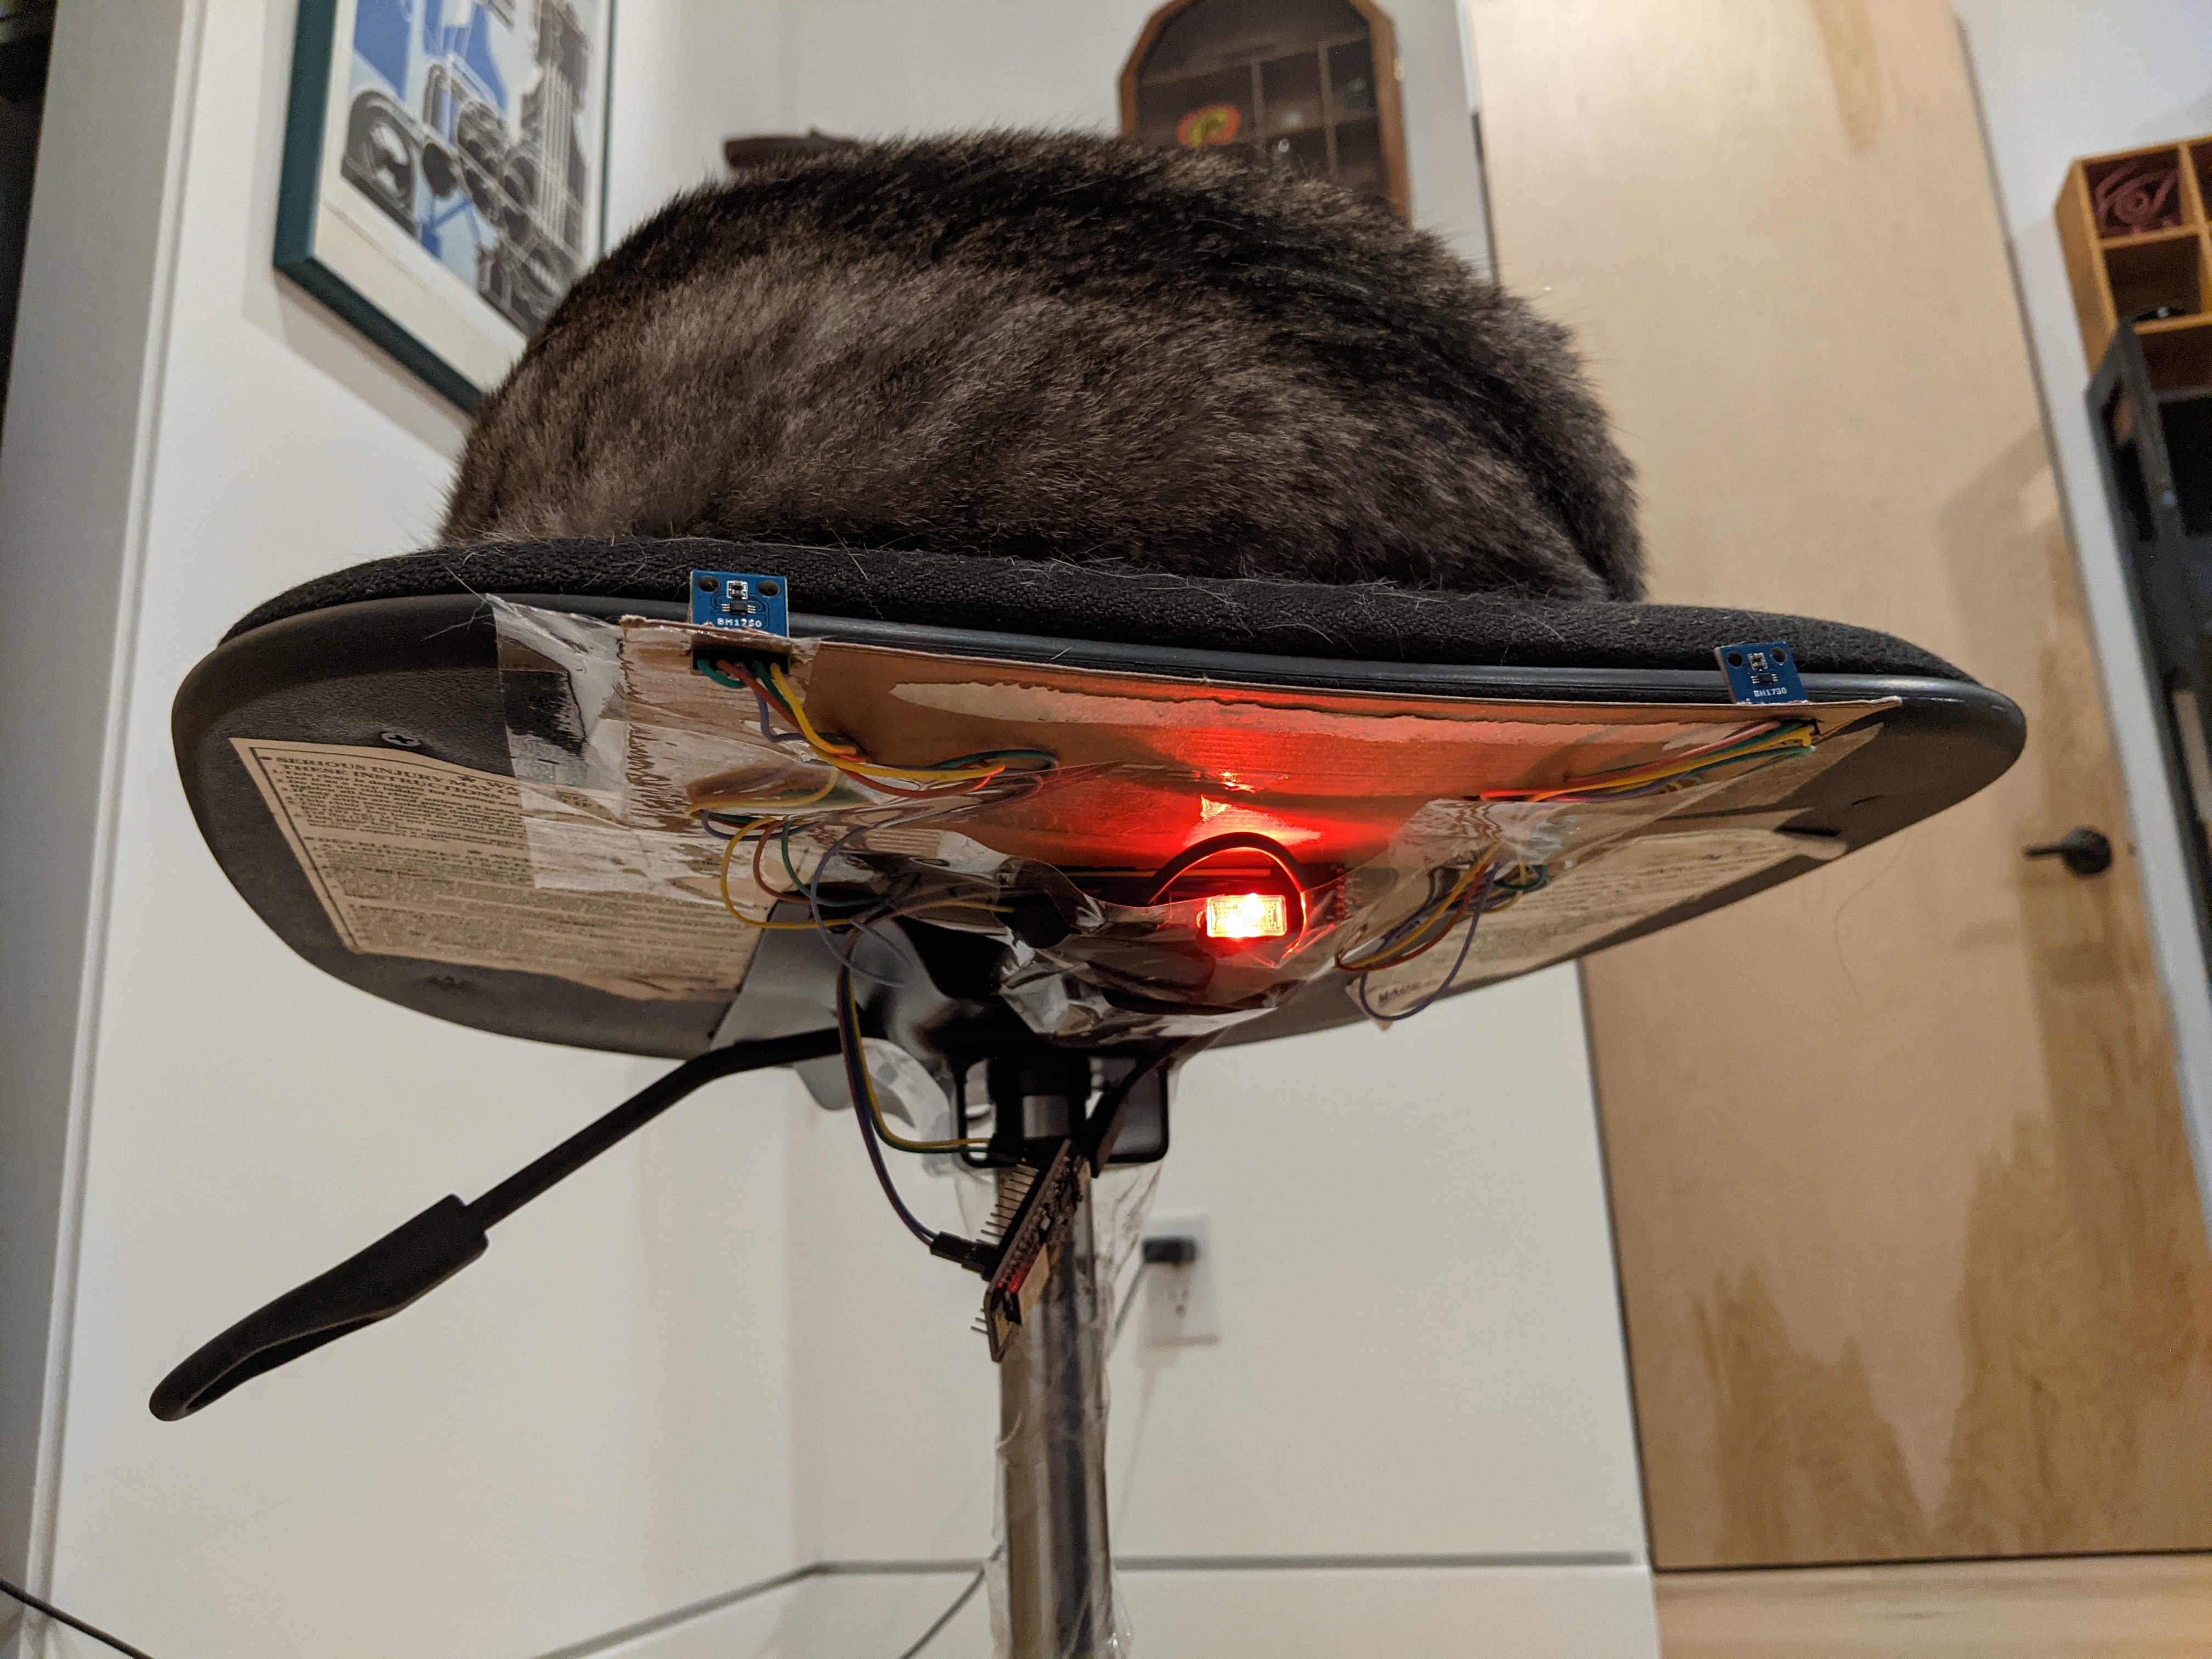
One challenge with a light sensor was figuring out how to detect a sun beam from raw brightness measurements. I came up with the idea of having one sensor on the window, and two on the chair. By comparing the chair sensors to the one in the window, I should be able to figure out where the edge of the sunbeam was, or if it was too dark/cloudy to even try.
After a quick search I picked the BH1750 digital ambient light sensor. I picked it since it was cheap and it supported I2C so I didn’t need to worry about analog to digital conversion. A bonus feature was that the chip supported an address input which allowed two of the sensors to share a single I2C bus to their controller.
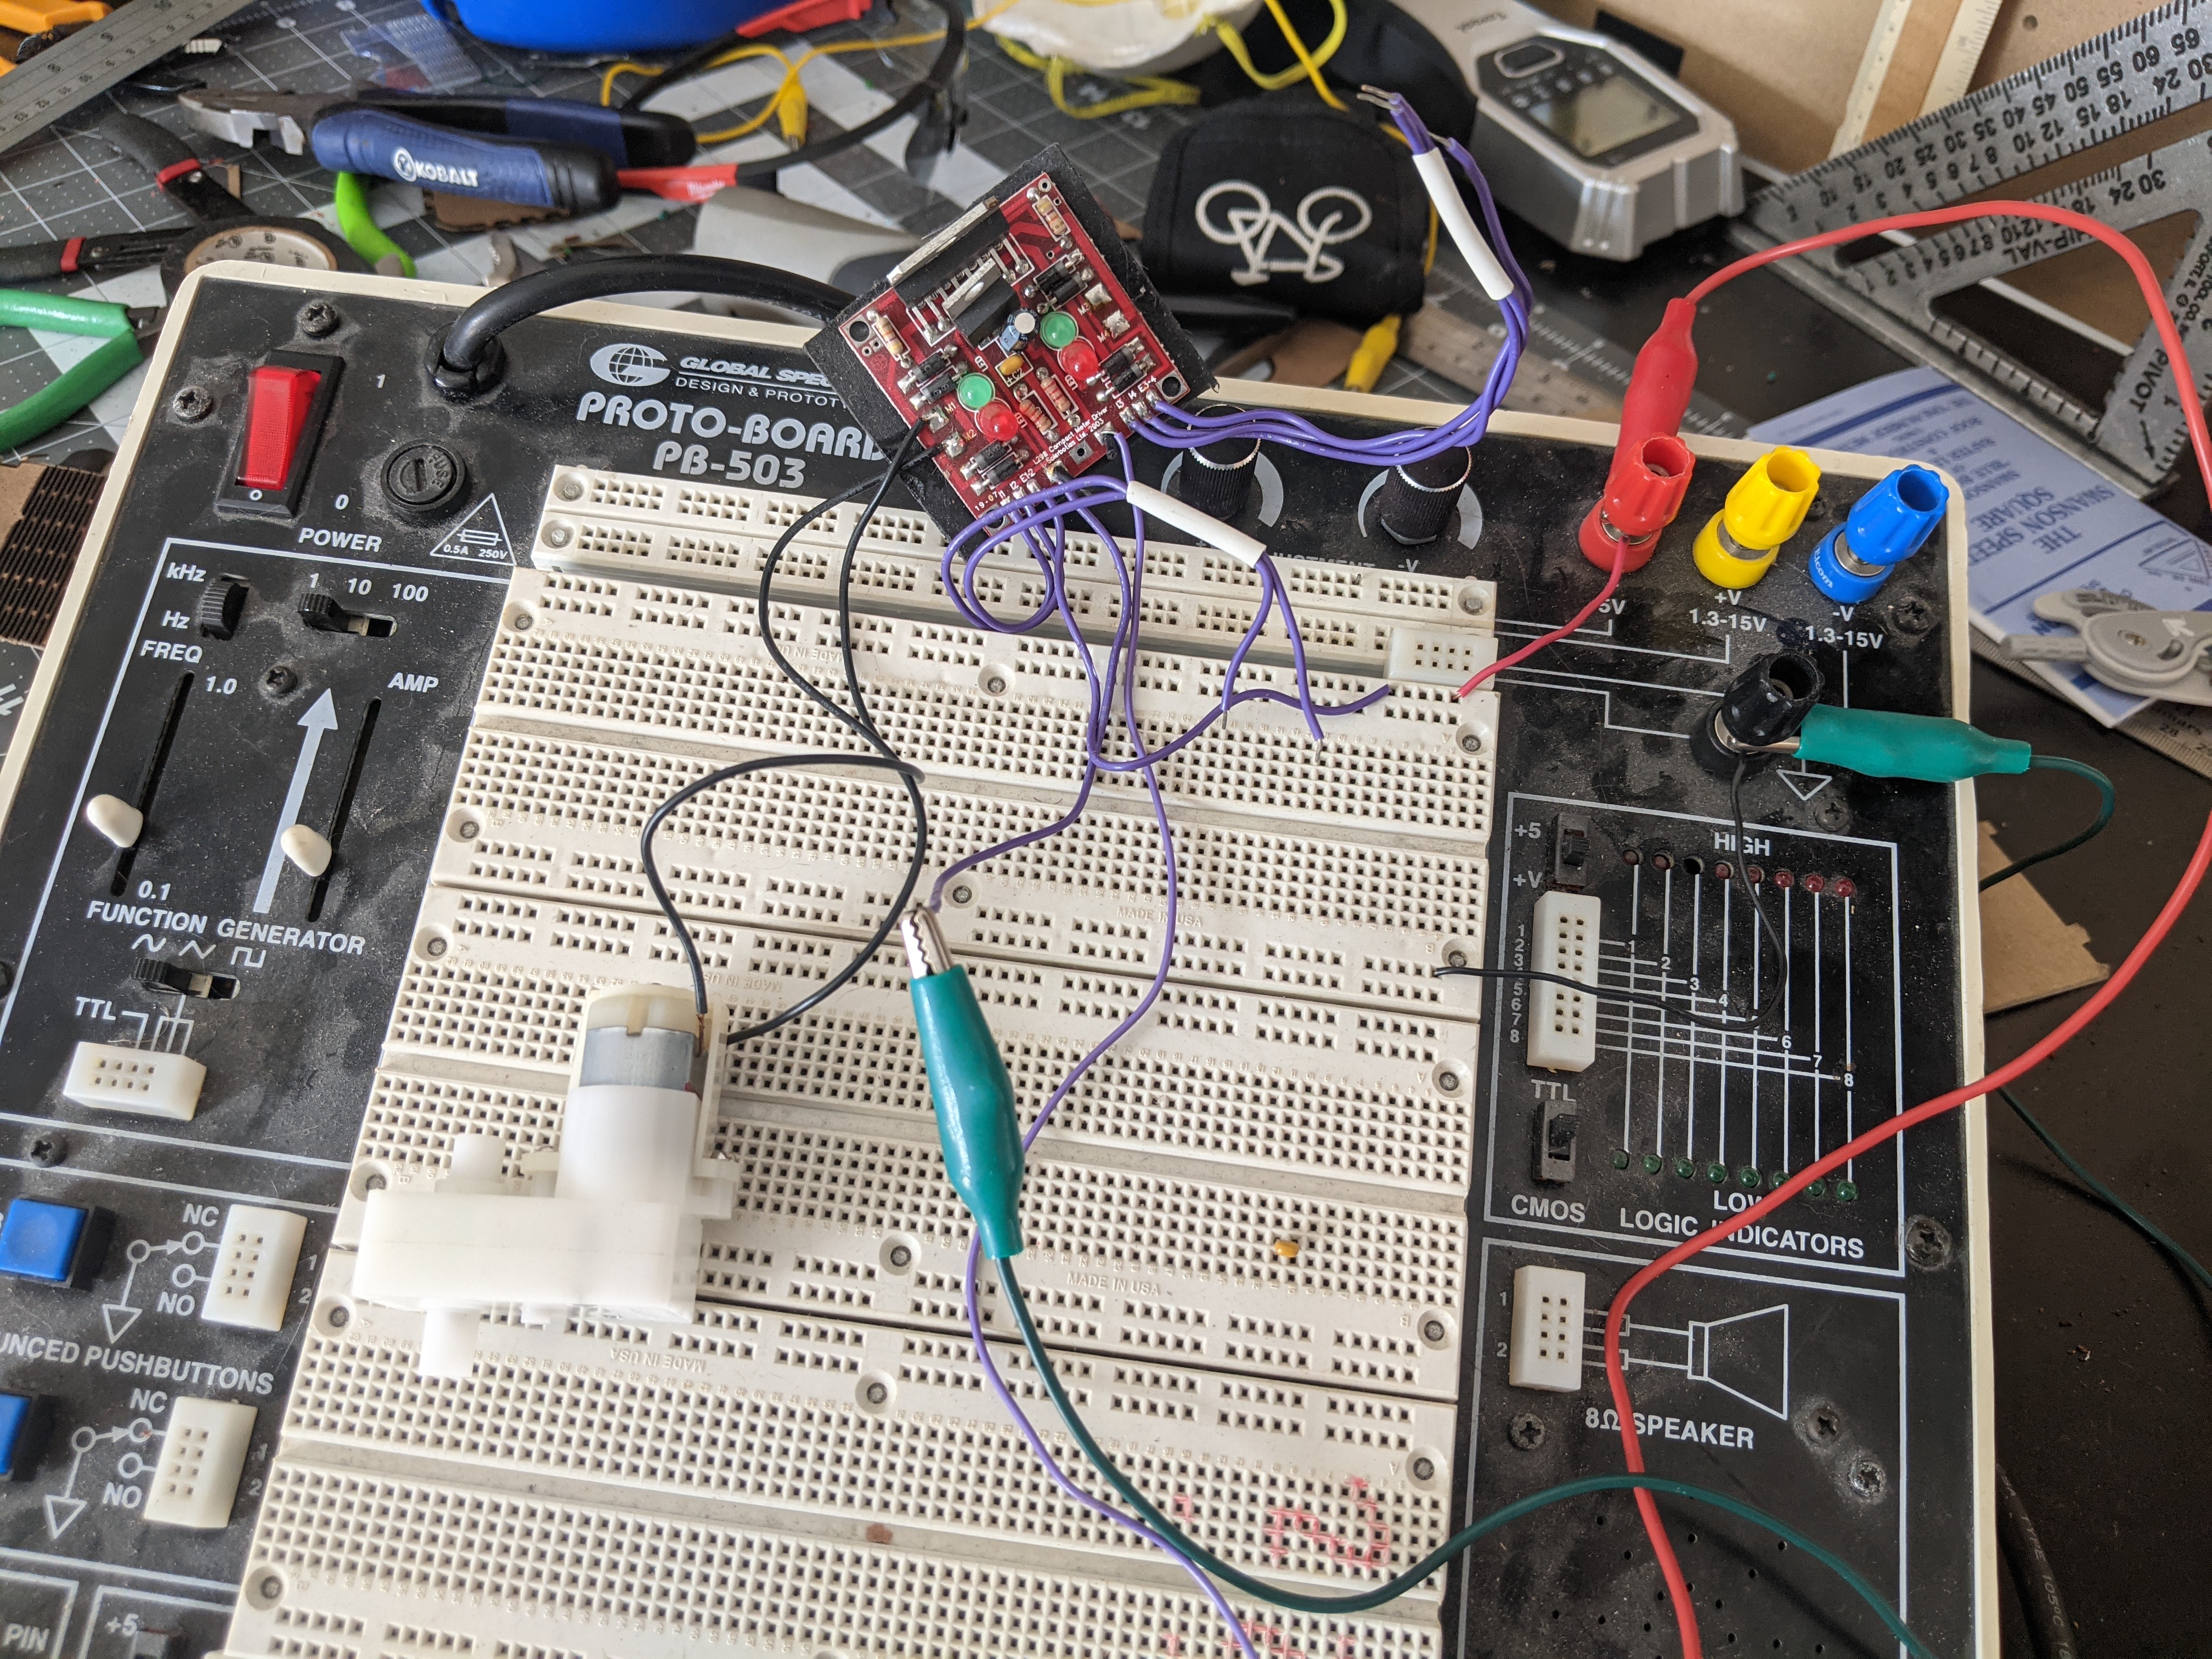
One quick bread board job later and I was ready to start gathering data

I basically took the same approach for the sensor as I did with the motor controller. I set up another NodeMcu and I was able to import an existing BH1750 library in PlatformIO.
https://github.com/axlan/cat_chair/tree/master/light_sensor
Since the chair was going to have two sensors, I set up their server to return the JSON string [<MEASUREMENT1>,<MEASUREMENT2>] and fill in a negative value if there was a problem communicating with the sensors.
Both the controller and the light sensor software was designed with flexibility and simplicity in mind. If I was trying to set this up as a long running project I would have at least made a token effort to lower the power by adding sleep and making the measurements on demand instead of continuous. I also might have gone with MQTT to reduce the bandwidth.
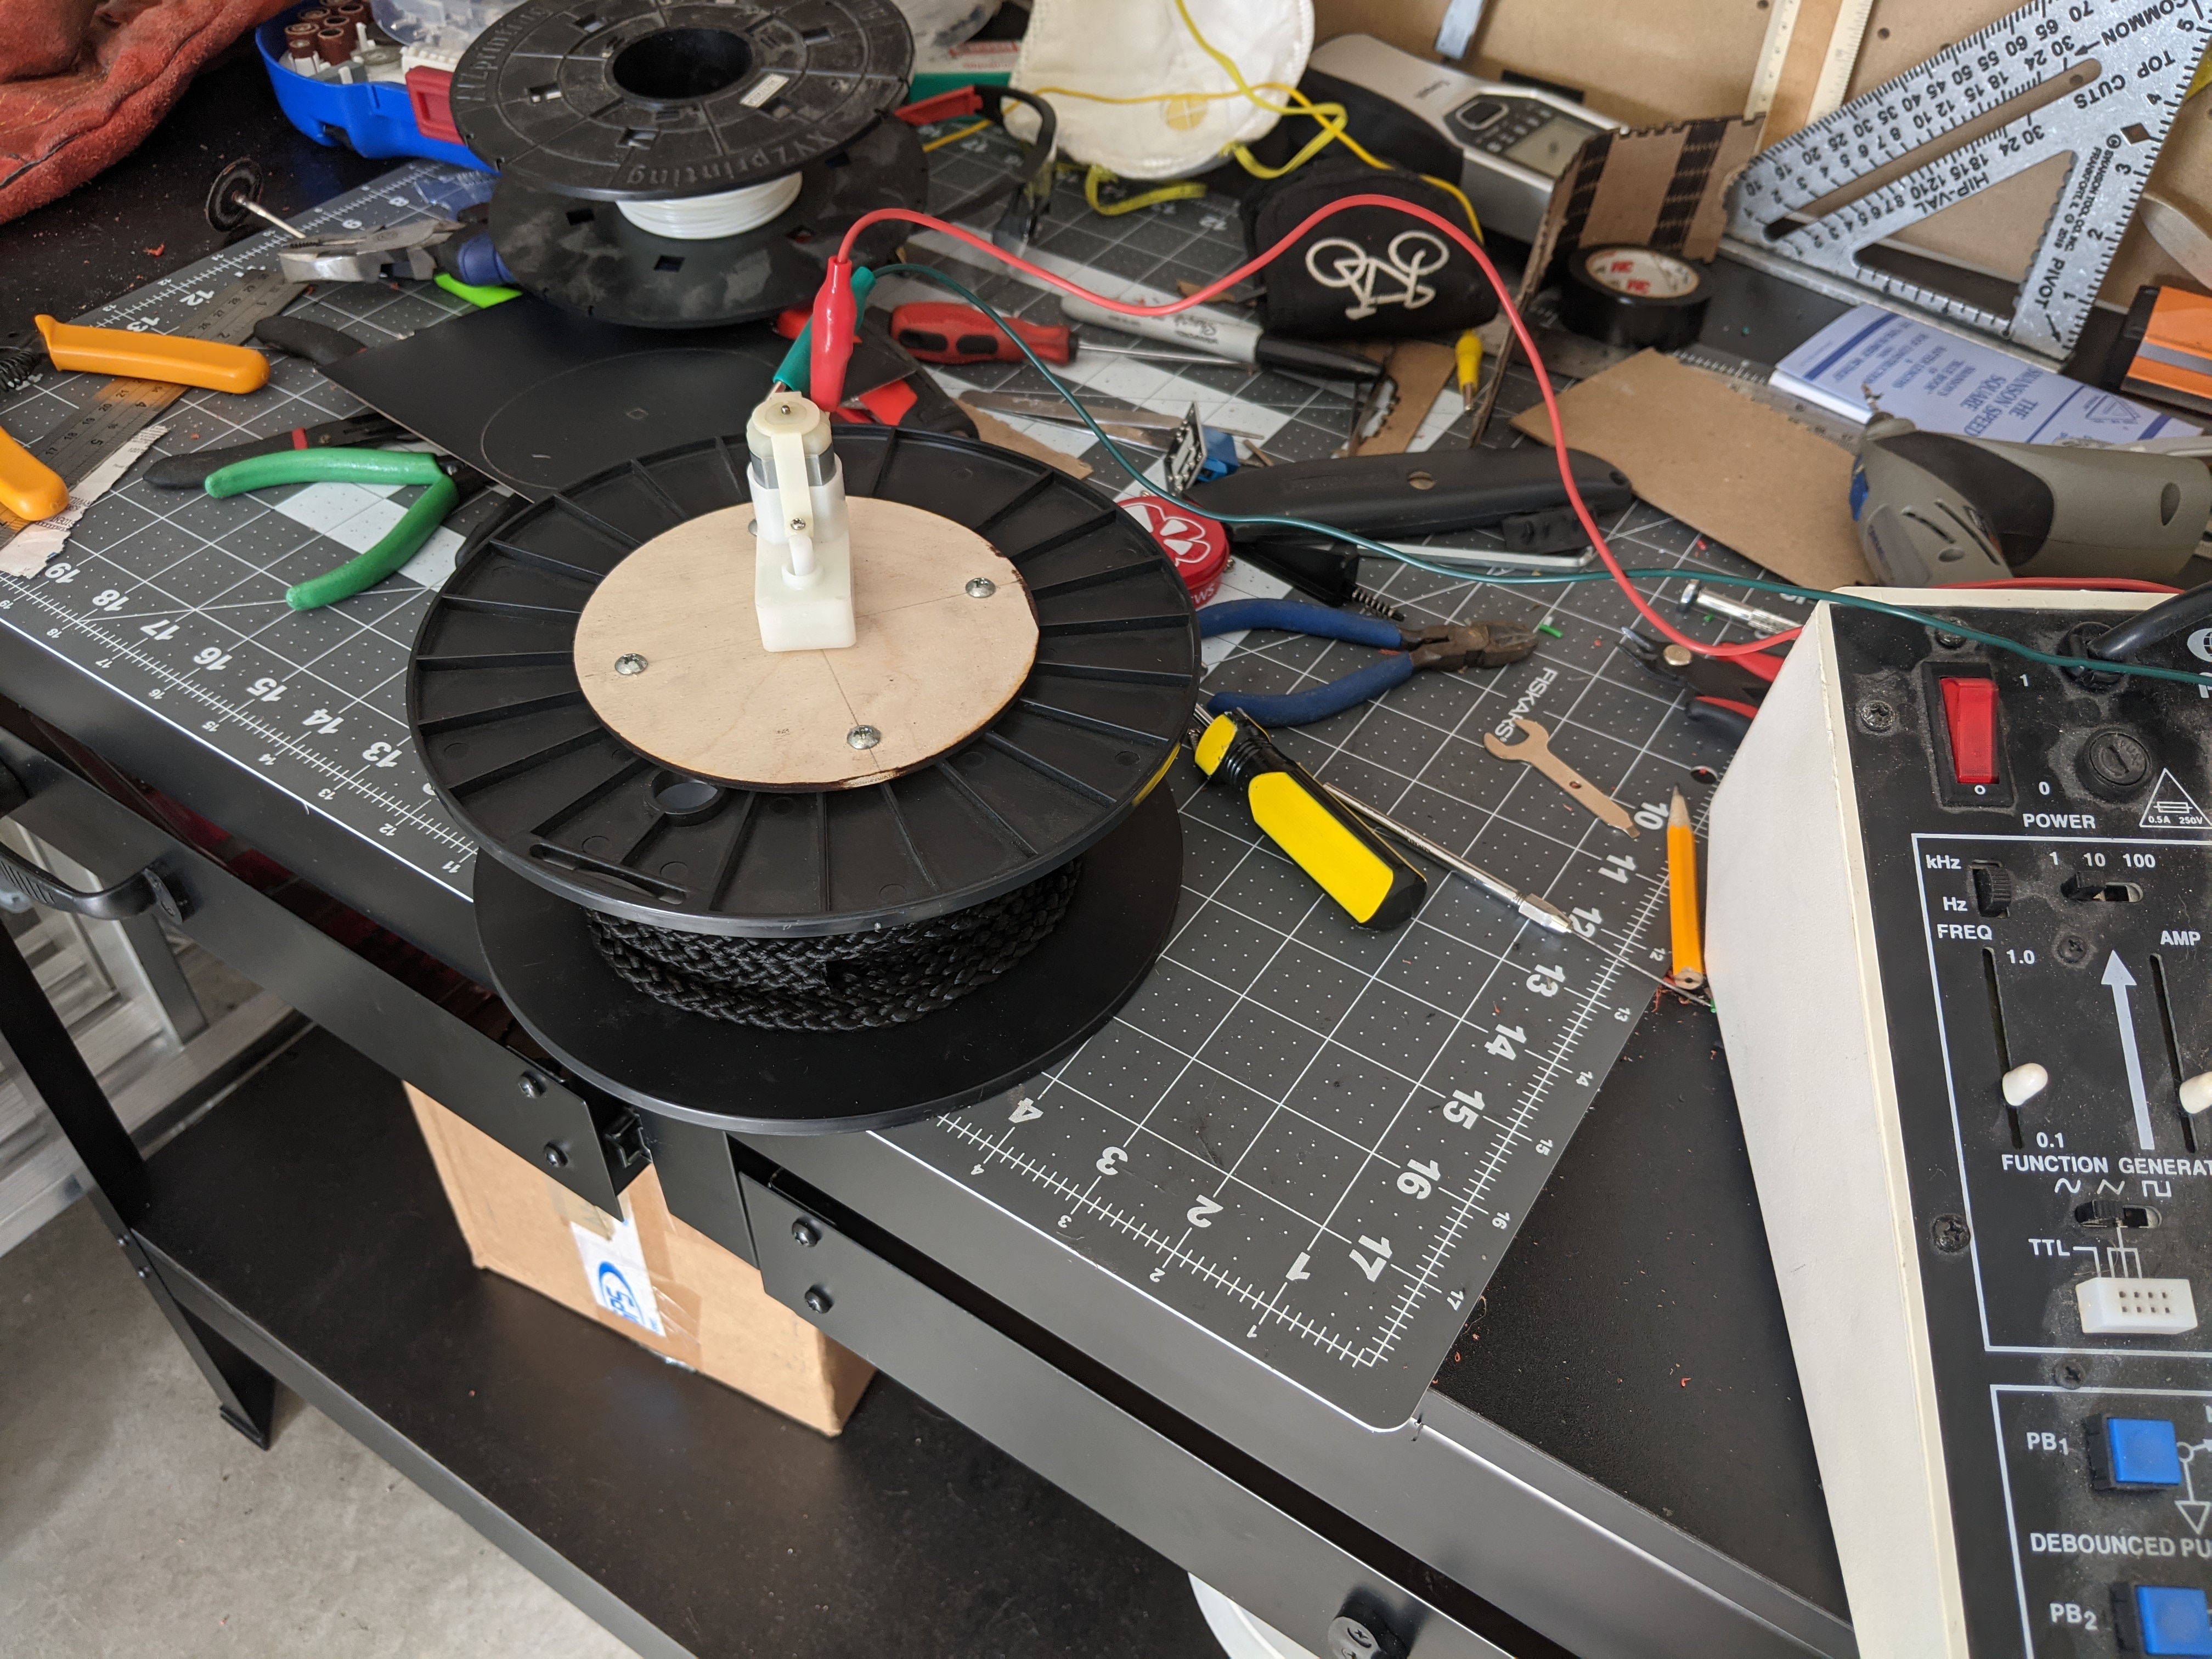
With the code up and running, I wired up the sensors for the chair

I immediately began to collect data. I made a monitoring service that would periodically connect to the sensors and collect the data in an SQLite database and a Jupyter notebook to do the analysis https://github.com/axlan/cat_chair/blob/master/controller. You can see the sensor measurements over a couple days here
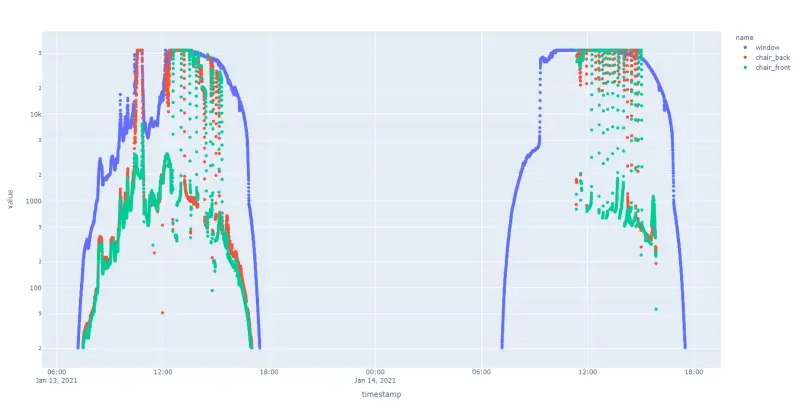
Click for an interactive graph app
In the above example, 1/13 was partly cloudy, and I moved the chair into the sun manually a couple times. 1/14 is the test you see in the video with the motor being automatically controlled. Chair data only starts at 11AM because I had to recharge the chair’s battery.
For this app and the Jupyter notebook, I used Plotly Express. While there’s a small learning curve figuring out all the parameters you need to pass into the plotting functions, it supports some really slick interactive plotting functionality without any set up. I was able to generate the static HTMl page above by just calling fig.write_html("<PATH TO PAGE TO GENERATE>").
My take away from looking at the data was that sunbeams only really form when the window sensor is getting readings above 20k or so. The ceiling in the data is an artifact of the sensor. The top of its range in the configuration I was using it was below full noon sunlight.
It seemed like the most reliable way to detect the sunbeam on the chair sensor, was to look for when it was within 50% of the window sensor. The measurements were clearer the brighter the sun was, so I decided to add a minimum to the amount of sun that was required for detection.
One interesting observation was that toward the end of the day, the sensors on the chair were actually getting more light then the senor on the window. I attribute this to the fact the chair was at an angle, so the sensors might have been closer to perpendicular to the sun.
Initially I put the sensors on wings
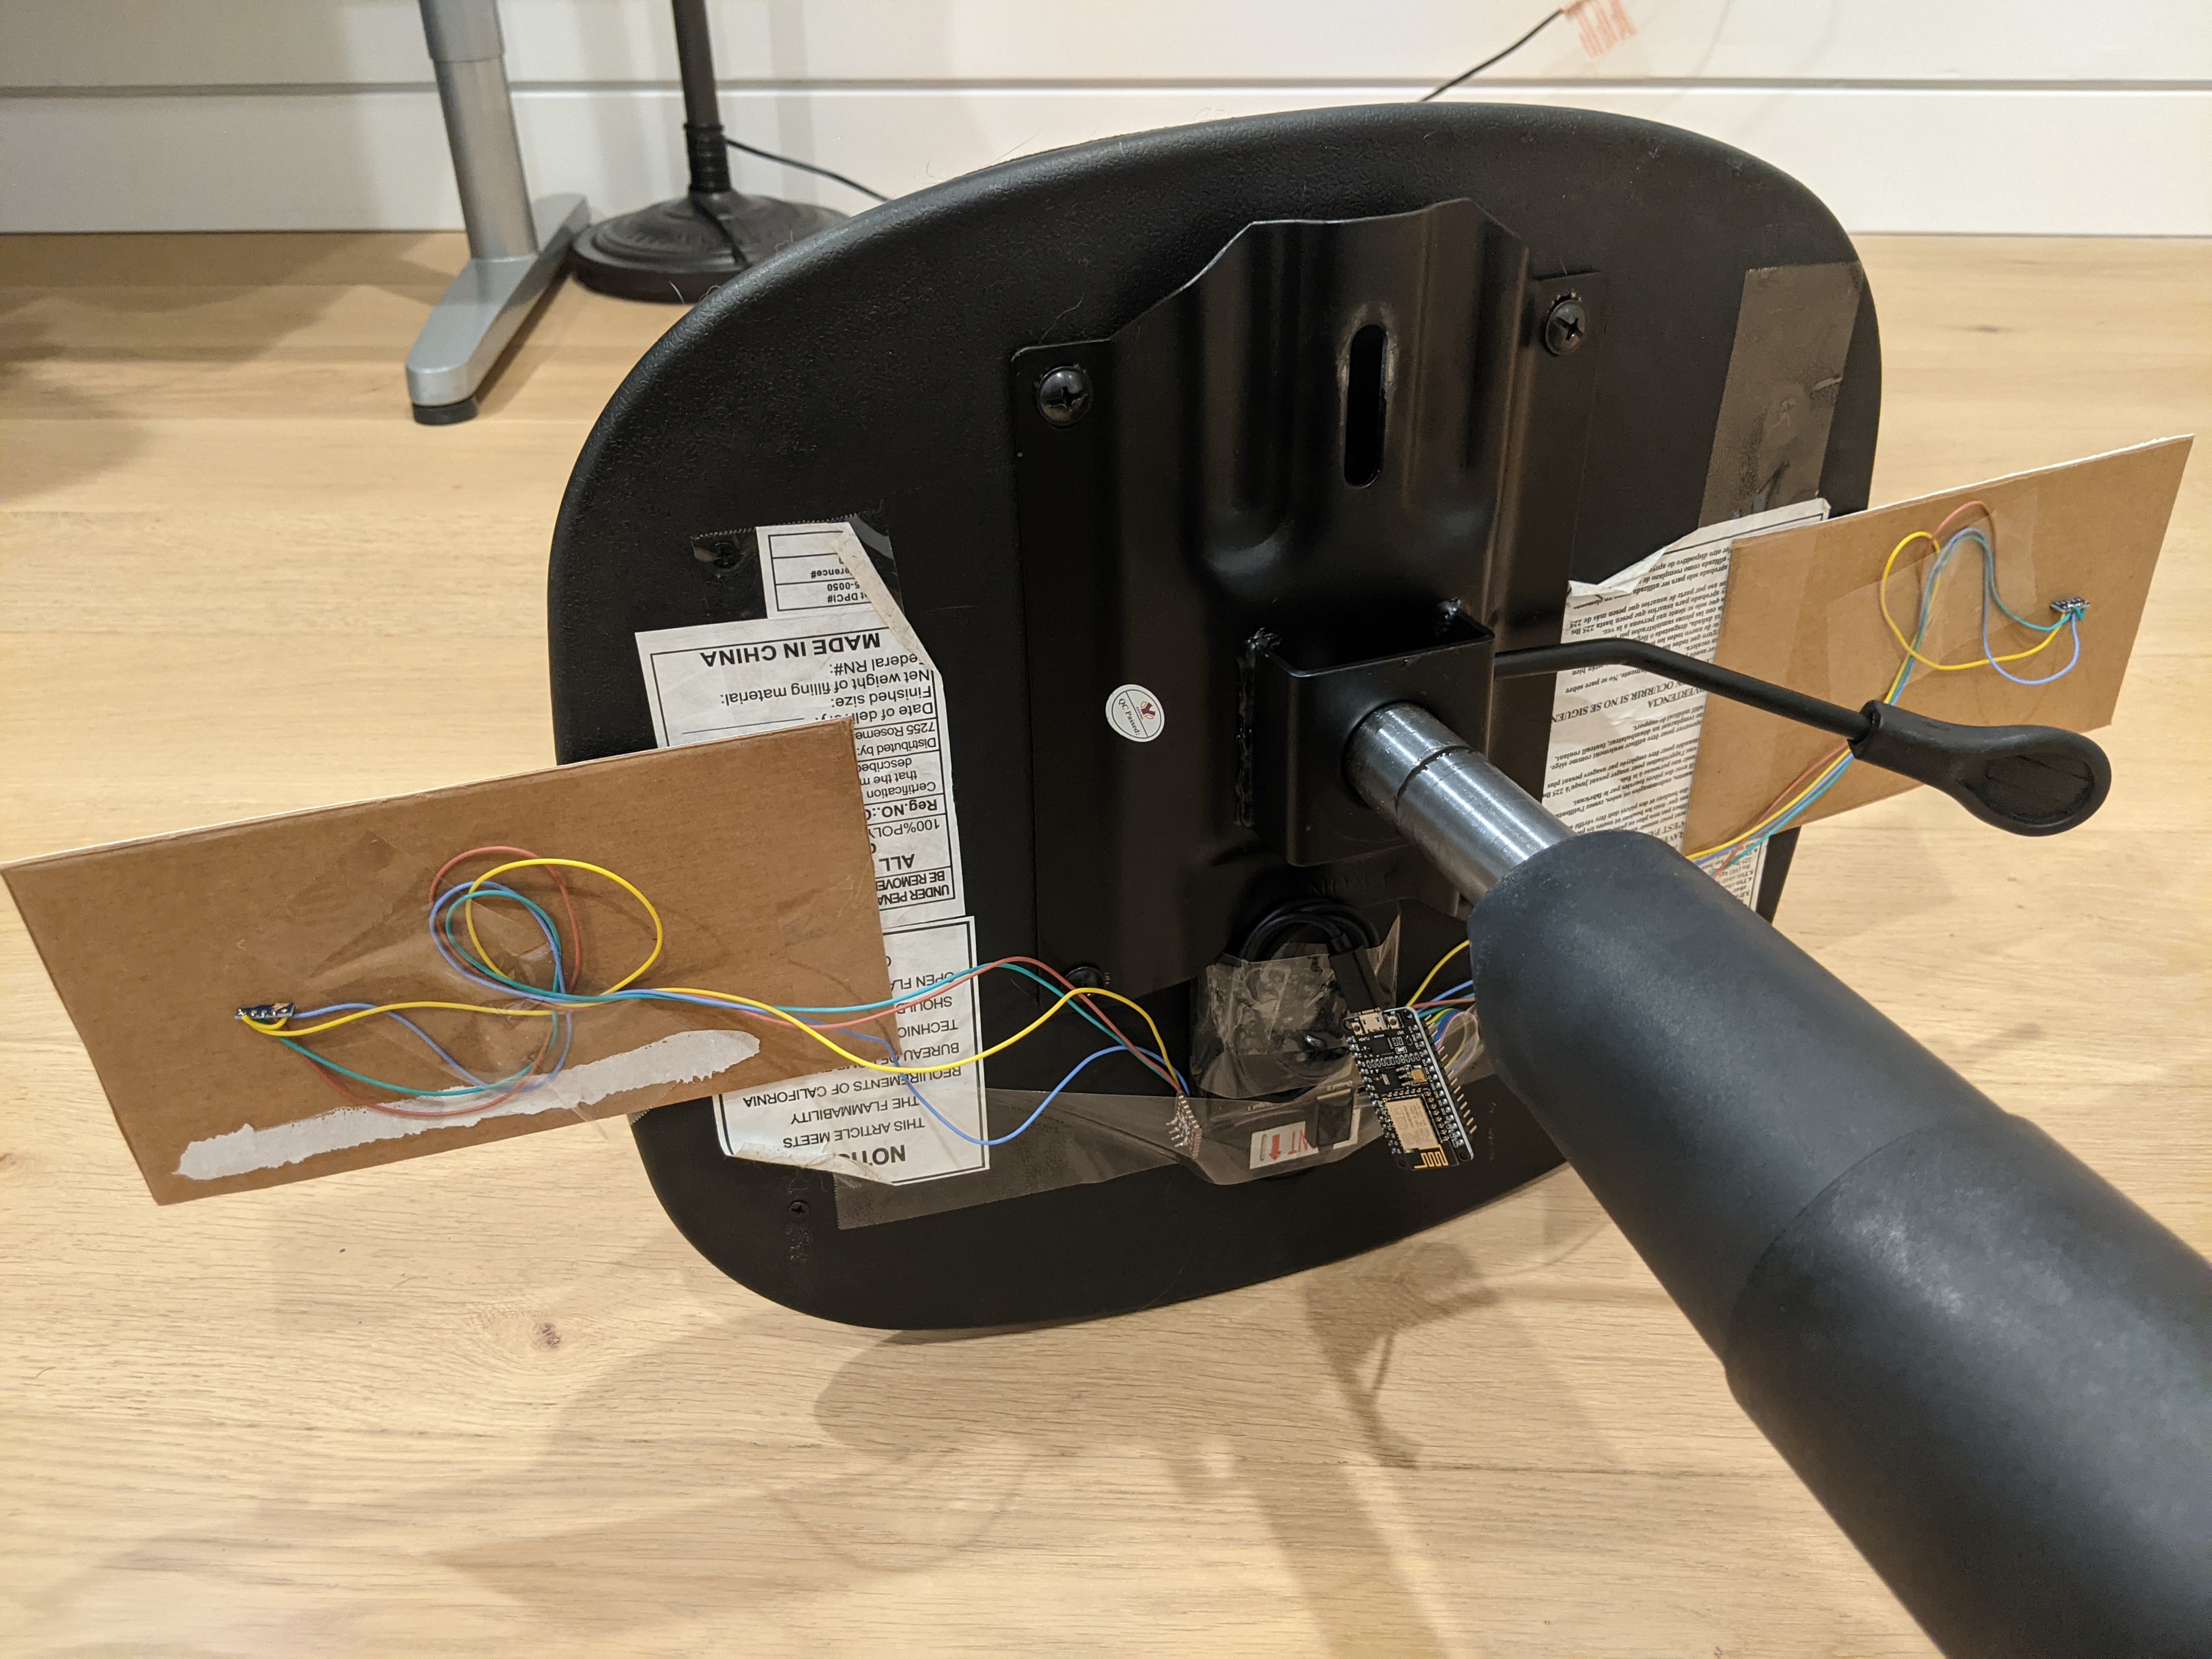
But found the measurements ambiguous when the beam fell between the two sensors. So I moved them closer together.
This proved problematic with certain user behavior which would block the beam from being detected:
But seemed generally robust enough to do a real run.
Controller Code
I wrote up a simple controller based on what I found https://github.com/axlan/cat_chair/blob/master/controller/controller.py. It’s a pretty simple state machine, and could be simplified even further. Basically all it does is wait for one of the sensors to stop detecting the sun beam, then trigger the motor until the sun is detected again. Most of the rest of the logic is to add robustness, and to stop running if it’s no longer able to figure out where the chair is in relation to the sunbeam.
Here’s some example logs from the test:
1
2
3
4
5
6
7
8
9
10
01/14/2021 13:25:20-DEBUG: W:54612.5-True,F:23984.17-False,B:5461.16-True
01/14/2021 13:25:28-DEBUG: W:54612.5-True,F:29495.0-True,B:54612.5-True
01/14/2021 13:25:28-INFO: Went from AHEAD to IN_SUN
01/14/2021 13:25:37-DEBUG: W:54612.5-True,F:35032.08-True,B:54612.5-True
...
01/14/2021 13:31:41-DEBUG: W:54612.5-True,F:54612.5-True,B:25209.32-False
01/14/2021 13:31:43-INFO: Went from IN_SUN to MOVING
01/14/2021 13:31:52-DEBUG: W:54612.5-True,F:741.67-False,B:54612.5-True
01/14/2021 13:31:52-INFO: Went from MOVING to AHEAD
01/14/2021 13:32:01-DEBUG: W:54612.5-True,F:741.67-False,B:54612.5-True
The DEBUG statements give the values for the window (W), chair front (F), and chair back (B) along with whether the value was high enough to be registered as a detection.
To make the chair “wireless” I added a USB battery. However, this presented a new stumbling block. The battery would stop outputting power after a few seconds because the power draw was below some cutoff threshold. Apparently, this is pretty universal with USB power packs. Rather then buying a more suitable battery, I found a USB LED I could stick in the pack to make the draw go above the threshold.
With this final challenge overcome, I set up a time lapse using an old phone and the Framelapse Android app, and shot the video show at the top.
Hopefully some day Nala will recover from the trauma of a haunted chair.