Making a Custom Hellboy Magic Deck
For an update on the custom card creator Card Conjurer mentioned in this article see this update: Running Card Conjurer Locally
Since my project to print magic card proxies came out so well, I decided to make another. This time I made an entire EDH deck using art from Hellboy comics.
As a new dad, I don’t really have time for involved projects. Frankly, I didn’t have time for this project, but I had a little down time while I was on leave to work on this on and off.
I’ve been reading Hellboy on and off for probably 15 years now, and recently caught up to the conclusion of the main narrative. Like most comic books, the story is spread across multiple different series. Most notably “Hellboy” and “B.P.R.D”.
Trying to figure out the read order is a bit a a labyrinth (producing these fun graphics http://www.multiversitycomics.com/annotations/hellboy-reading-order-2021/), and I ended up downloading most of the series digitally to even figure out what I’d already read.
The original creator, Mike Mignola, has a interesting art style that alternates between detail and minimalism. The comics also cover such a huge variety of situations, I thought it would be well suited to mine to card art.
I spend most of this article going into the details of how I hacked the tooling a bit to make the process a bit easier for me, but here are the result:
I also made a custom engraved deck box to hold the results: Card Boxes
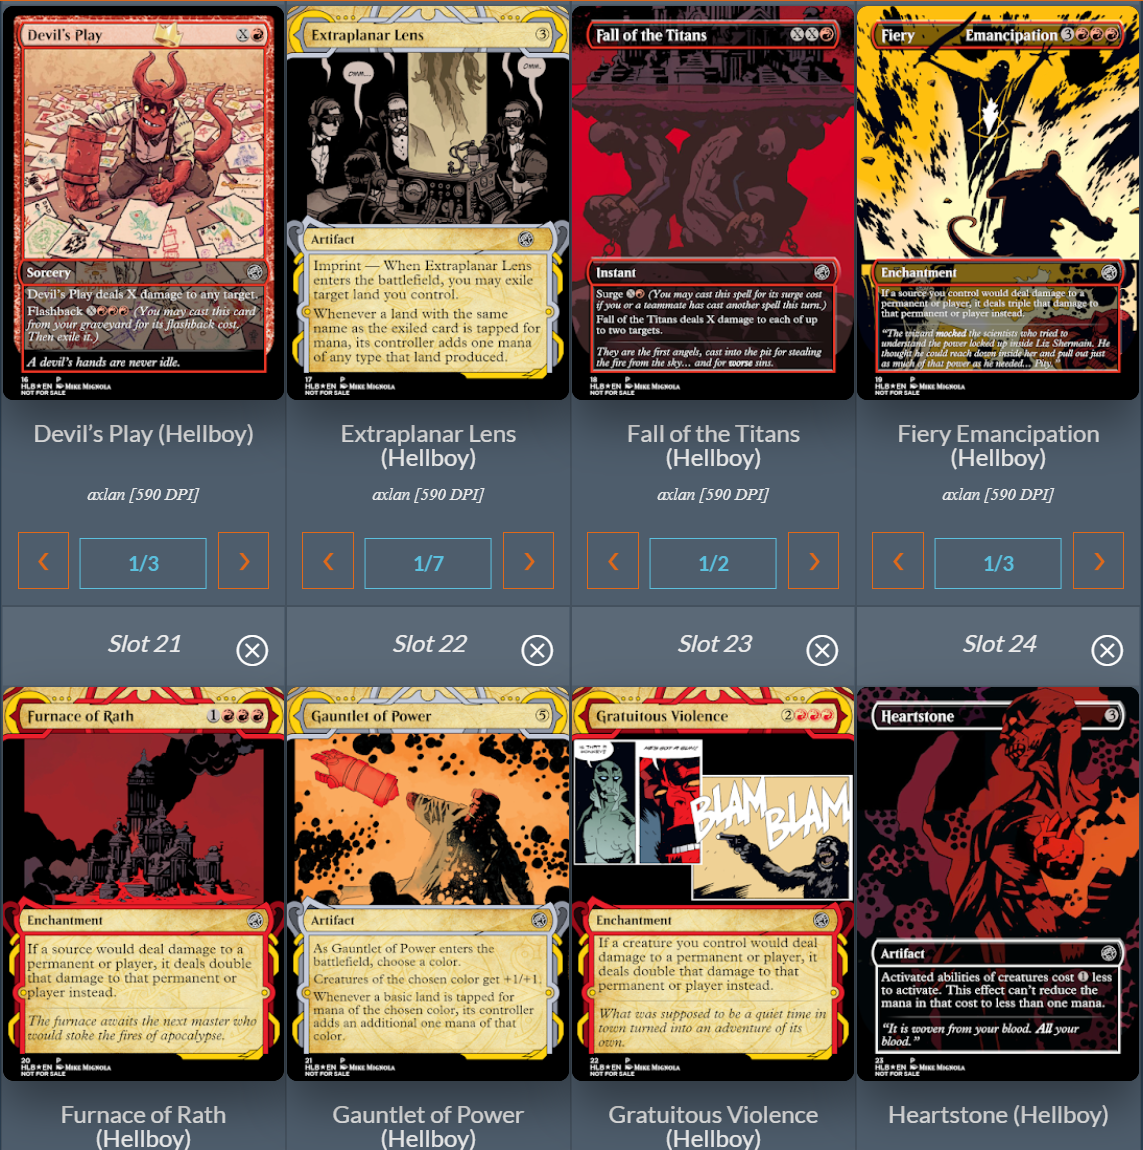
The Card Images
The Printed Results
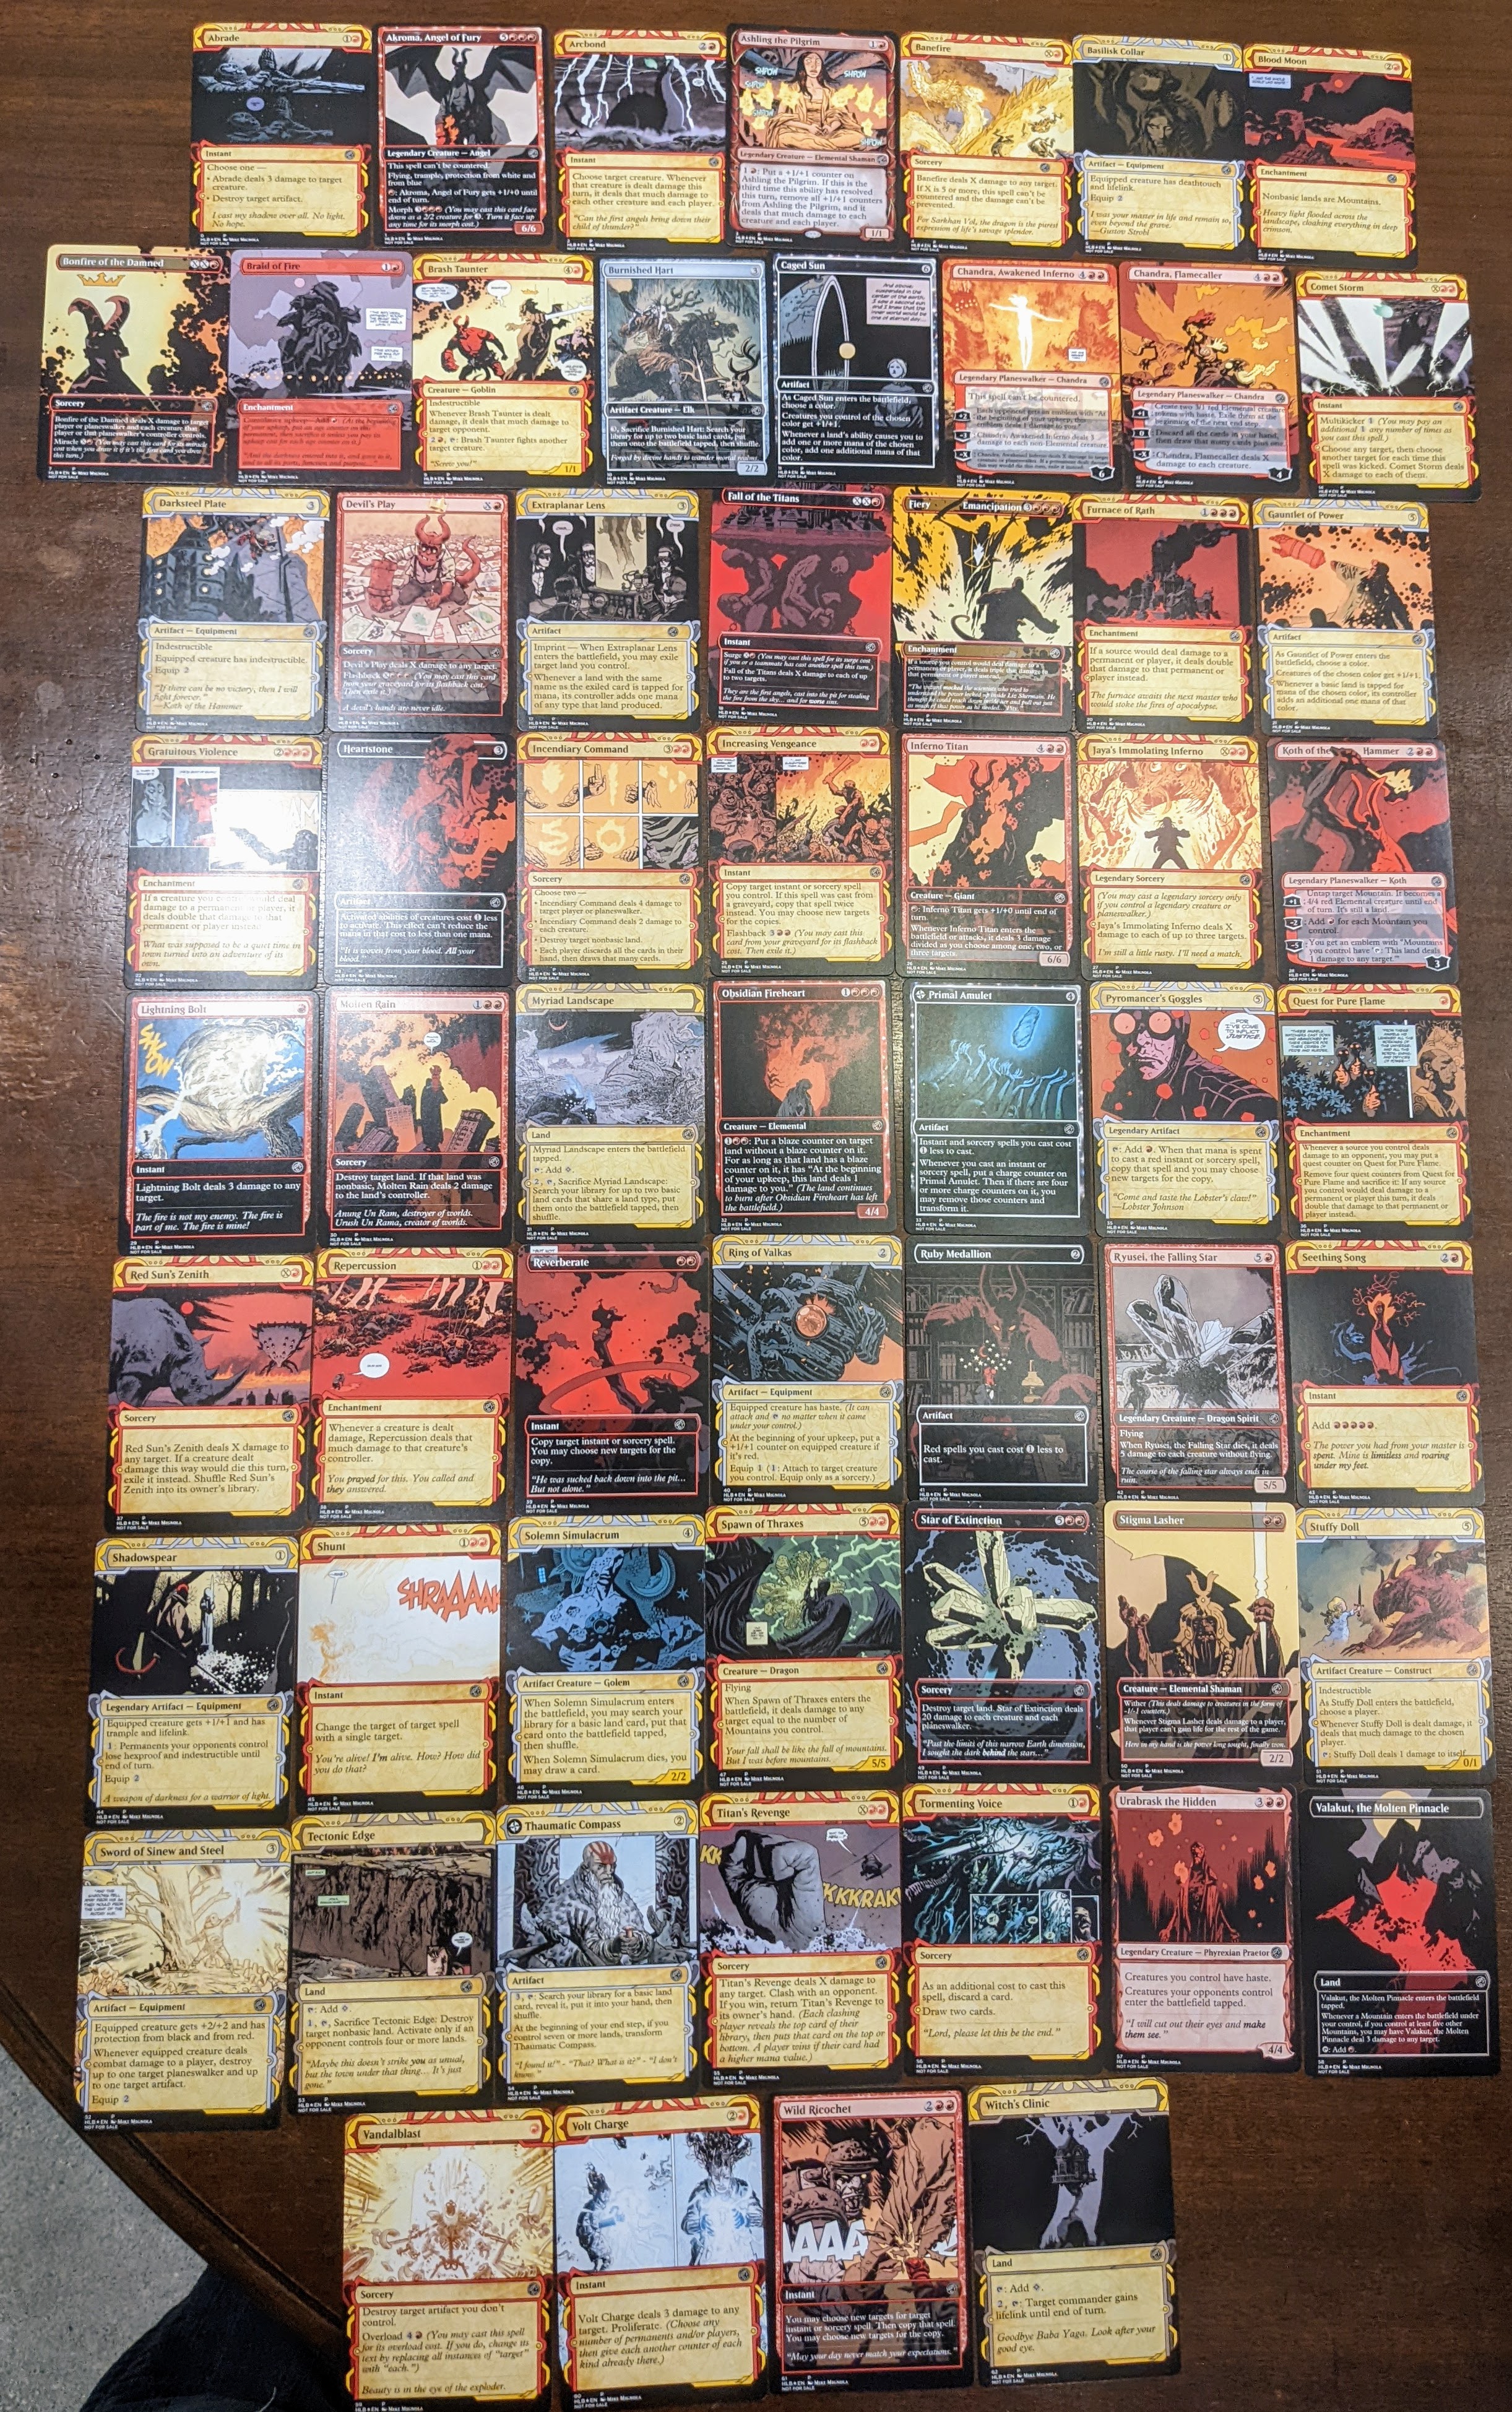
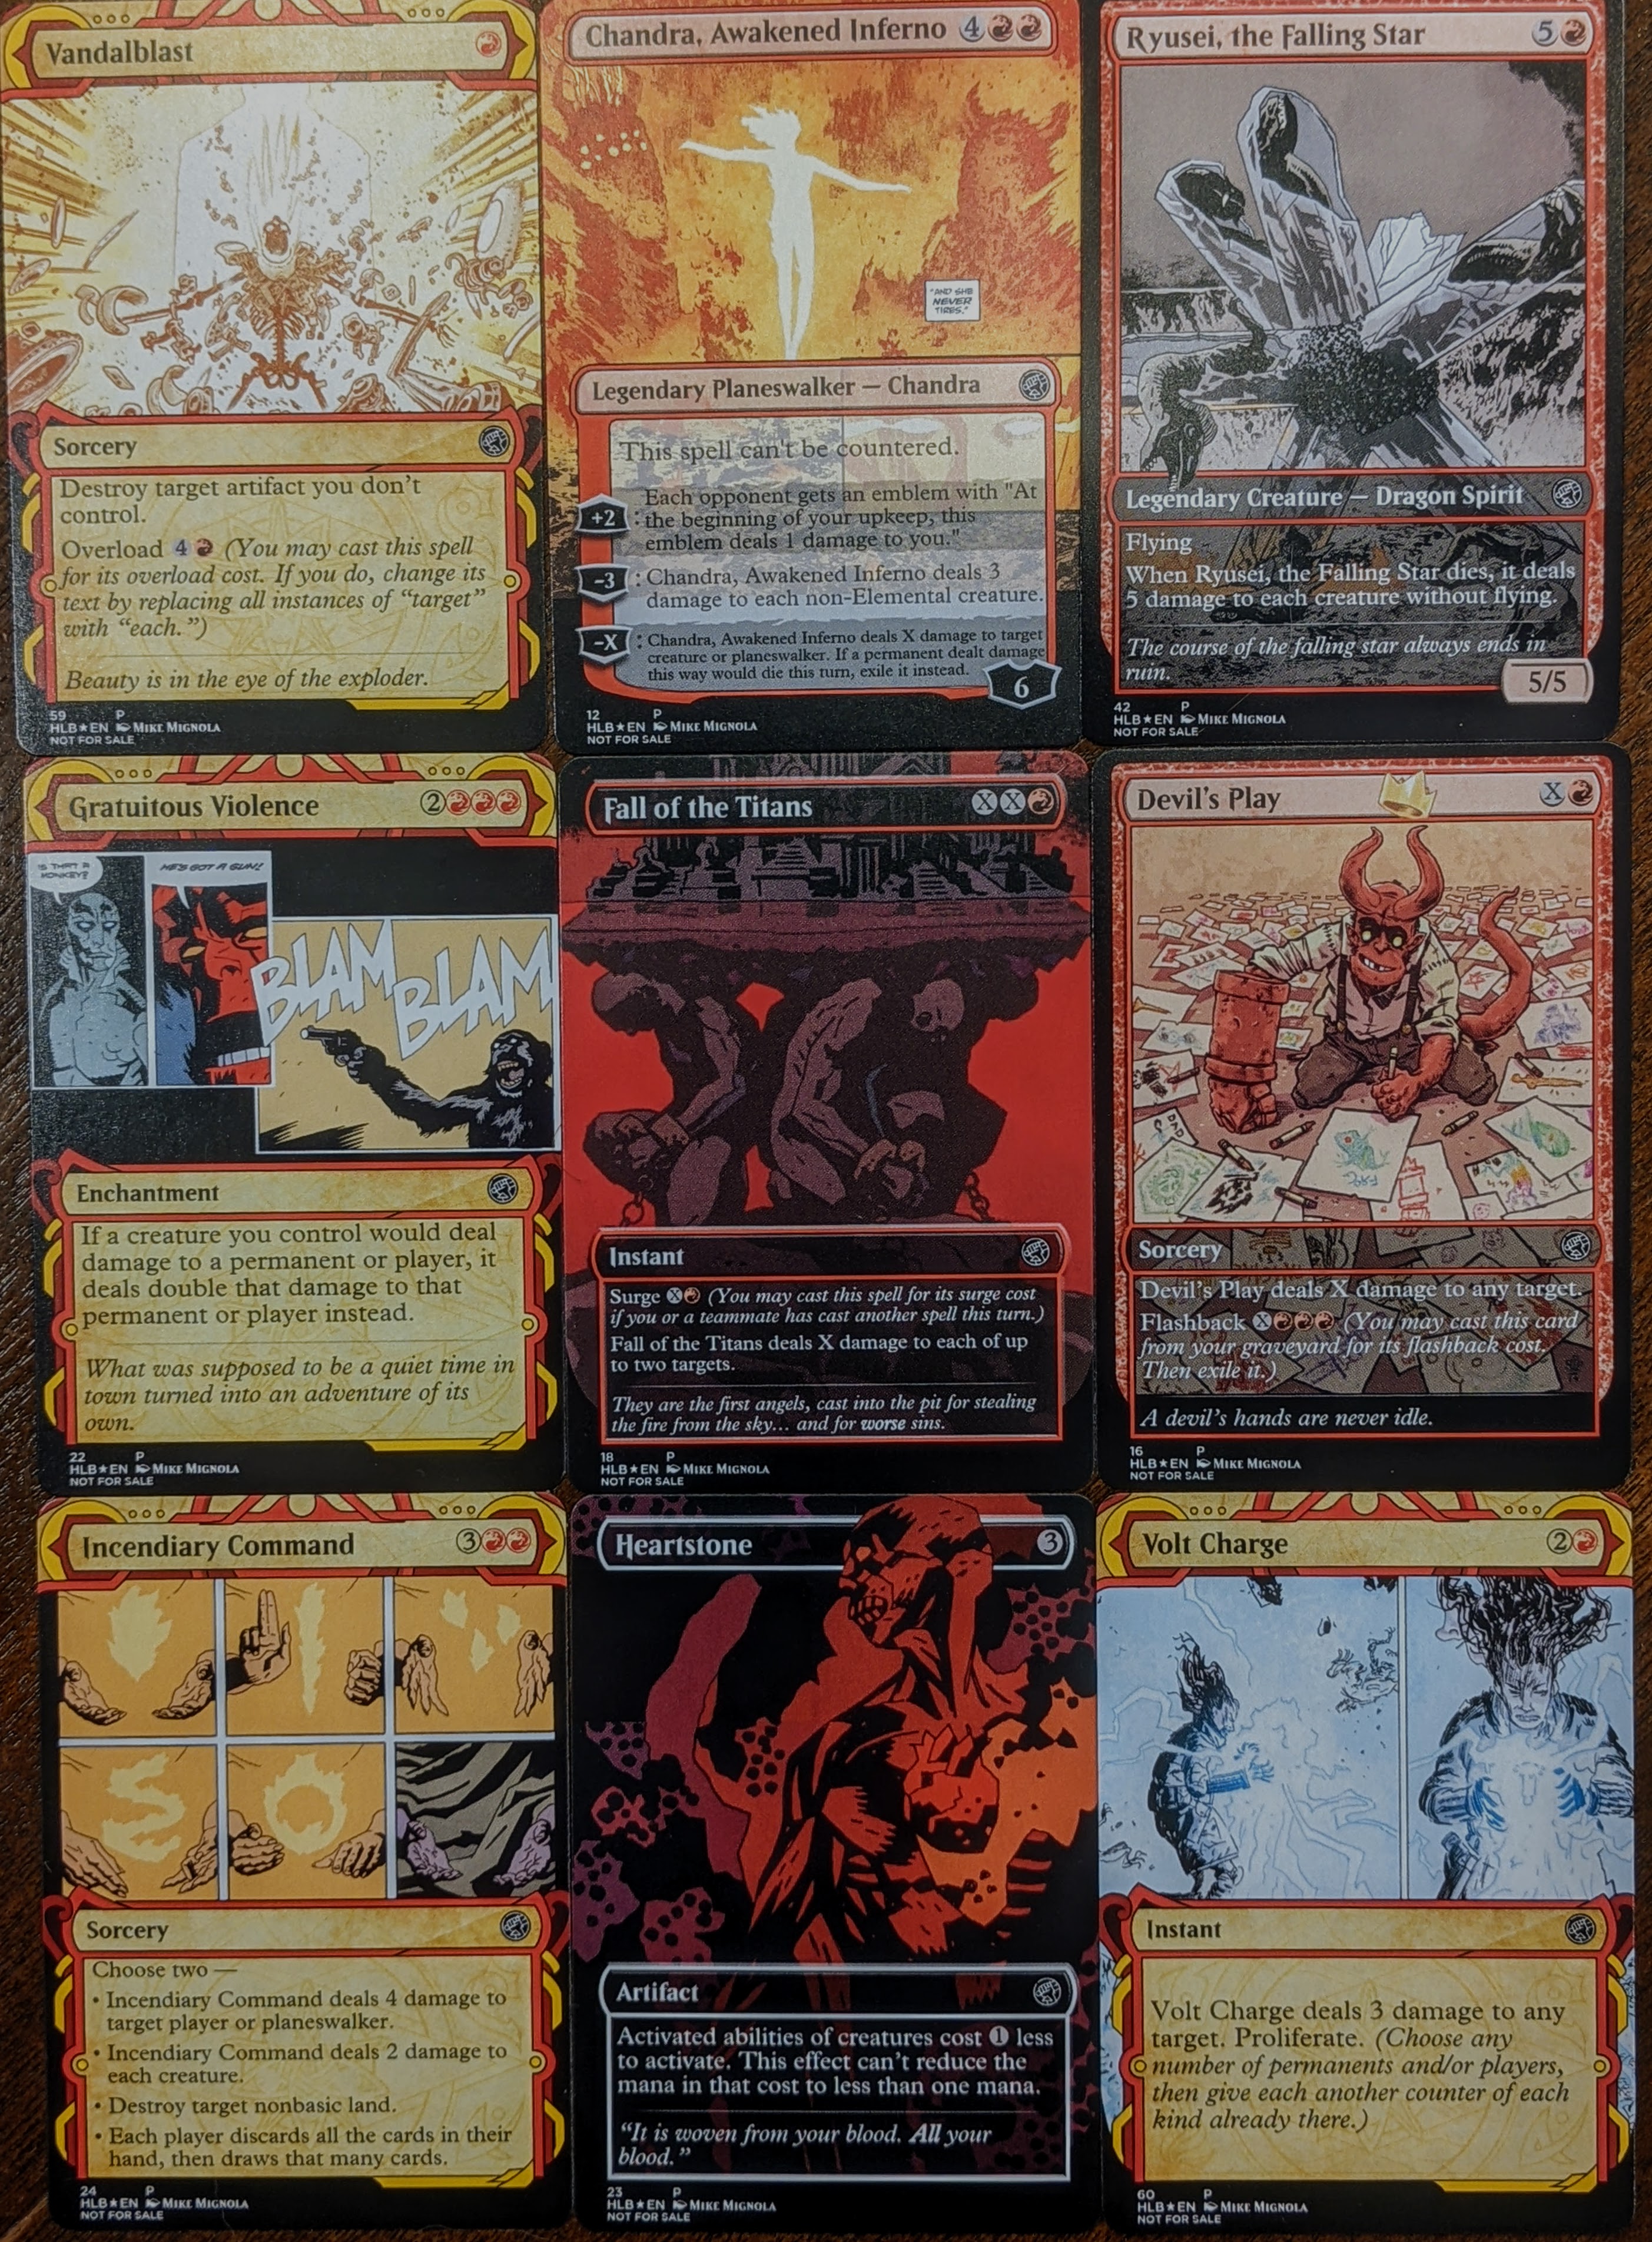
I don’t go into much details of the process of printing the cards, but I cover that more extensively in my previous post on the subject print magic card proxies.
You can find instructions to see the cards I made on MPC Fill at the end of this article.
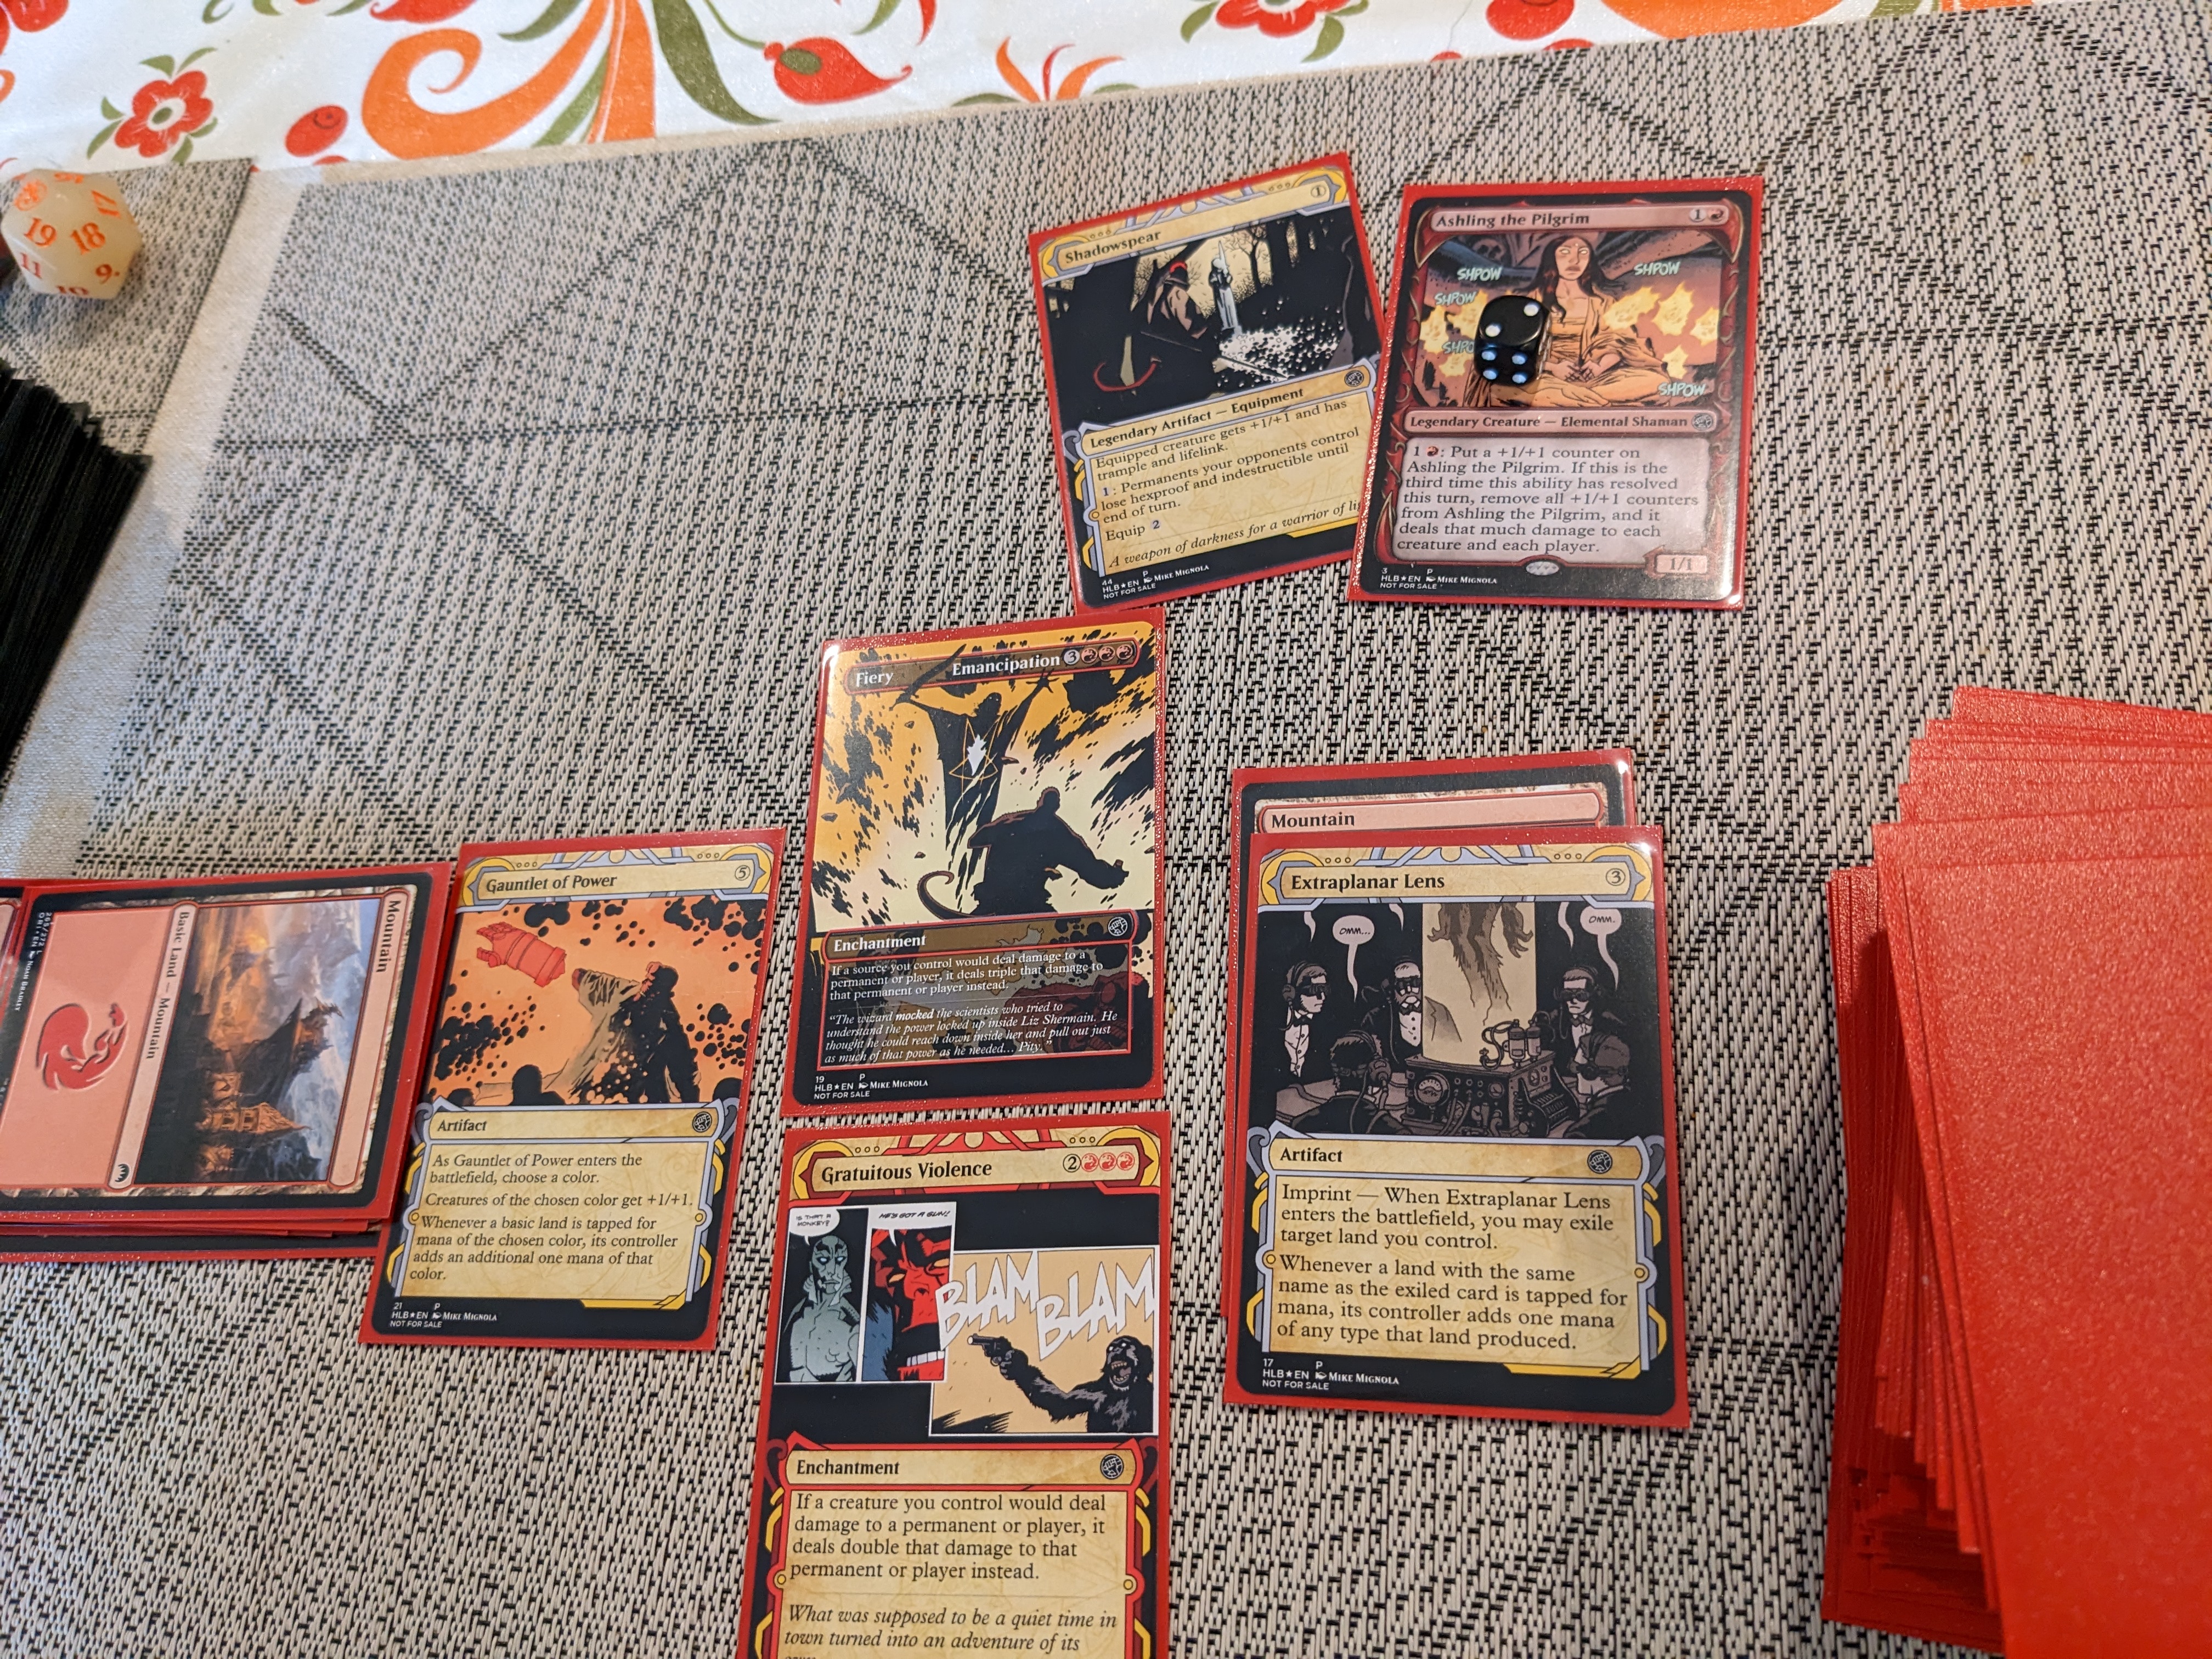
It took me almost the full year, but I finally got a chance to play with the deck. It was in a very casual 5 player game, but I had a pretty great draw and won pretty handily. Here’s the board state I achieved:
Looking for a Card Creation Tool
Last time I tried a few different custom card creators. None of them offered the flexibility and output quality I was looking for. The only way I found to make high quality cards was to use Photoshop templates. I still wanted to find a more automated way to design custom cards.
First, I revisited https://magicseteditor.boards.net/ since it was a very customizable open source desktop application. It’s source can be found at https://github.com/twanvl/MagicSetEditor2. The main limitation of this tool is that the output is fairly low resolution. This is because the templates themselves are mostly low resolution, but also that it will purposely lower the resolution of any image added. Apparently, it does this to avoid potential liability for creating fake cards. I started looking into what it would take to remove this for a custom build, but it wasn’t exactly trivial, and I quickly found a better option.
Since I last looked into this seen a new contender has risen up. https://cardconjurer.com/ is everything that I was looking for in a card creation tool. It’s both extremely customizable while staying relatively easy to use. Every feature I could think to want was pretty much already present. As I’ll discuss, I ended up making a few modification for my convenience, but these weren’t really necessary since its almost perfect out of the box.
Customizing Card Conjurer
If you haven’t looked at it, I highly recommend trying https://cardconjurer.com/creator/ out. Nearly every time I thought there was a missing feature, I realized I had just missed it, and it worked exactly how I wanted. It has tutorials and guides, which I probably should have looked at more carefully before I started…
The first nice thing about Card Conjurer is that it’s entirely client side. Once your browser downloads the scripts and images from the server, you could unplug your internet and it will continue working with full functionality. This also means that you can download the files and rehost it yourself. This lets you make your own copy with whatever modifications you’d like. The second nice thing is that Card Conjurer lets you save a JSON file describing the cards you’ve made. This include all the images, text, and positioning for the cards. You can then write a script to modify the JSON and re-upload it to programmatically modify the cards you’ve created.
While the application is nearly perfect, there were a couple things that were a little annoying for making a large set of cards:
- Card Conjurer gives you an interface to import official cards from https://scryfall.com/ . However, there isn’t an interface for importing a list of cards all at once, and they need to be added manually one at a time.
- The saved JSON can either have URLs that point to the images you’re using, or a base64 representation of the image itself. There’s a limitation that the JSON being stored in localstorage is less than 5MB, so if you are uploading high quality images you’ll only be able to save a couple cards. You can get around this by downloading and managing JSON files for each card, but that would be very tedious for a large set. The other alternative is hosting all the art you want somewhere publicly accessible (AWS S3, a webserver, Google drive, etc.). This is a much better option, but still adds some friction.
In the end I didn’t think it was worth modifying the code to enable bulk imports from scryfall, but I was able to use local files as URLs by rehosting the page on my local machine.
Making a Local Copy
To preface this section, I think Card Conjurer works well enough that making modifications is unnecessary. The process described here was more for learning how the site worked then for utility.
While most major browsers support the feature set I’ll be discussing here, I’m going to reference how I did this using Chrome for clarity.
For basic websites, you can make a local copy by saving the page with Ctrl+S. However, this just downloads the resources that are directly referenced and doesn’t grab everything that’s programmatically fetched in Javascript. You can see the full set of resources that are fetched by opening the developer tools and going to the network tab. If you disable the cache and reload the page you’ll see all the requests that are made.
Since this application doesn’t have any dynamic server component if we download all the resources that were sent to the browser we’ll have everything we need to run the app. The trick here is that not everything is sent up front. Selecting different frames causes them to be loaded as needed. Some of the frame groups (like Planeswalkers) also have special scripts associated with them. For my initial dump of the page, I exercised a bunch of the functionality by selecting different frames and going through the features with the network tab open. Once I’d used the features I wanted I right clicked on the traffic and selected Save all as HAR with content. This saves a HAR file with most of the content you had downloaded from the site.
I wrote a Python script that generates the site from the HAR and fetches all the frames. It’s not perfect, and I had to manually capture a few missing files as I went.
With the files captured you can host the page with any HTTP server. You can use python with python3 -m http.server or use anything from Apache to NGINX.
With my local copy up and running I made a small change to /js/creator-23.js. I changed the imageURL function to:
1
2
3
4
5
6
7
8
9
10
function imageURL(url, destination, otherParams) {
	var imageurl = url;
	if (!url.includes('http')) {
		imageurl = 'http://localhost:8000/' + url;
	} else if (params.get('noproxy') != '') {
		//CORS PROXY LINKS
		//Previously: https://cors.bridged.cc/
		imageurl = 'https://api.codetabs.com/v1/proxy?quest=' + url;
	}
	destination(imageurl, otherParams);
Note, I was running my local instance on port 8000.
This made it so that if I included a path without “http” it would assume it was a local path. That way I could just add my images to the HTTP server contents and add images in my local Card Conjurer with paths like pics/my_cool_pic.png. This let me avoid needing to include the images directly in the JSON saves, but still be able to store them on my local machine.
My Process for Creating a Deck
Next, I found an EDH deck to use as reference: The Original Ashling the Pilgrim.
In the end I substituted a few cards and had a couple extra’s that I could swap around.
I made a spreadsheet to track the cards I was interested in and started going through a digital archive of the Hellboy comics looking for appropriate artwork. I was using CDisplay which had some nice features like viewing the pages as thumbnails to make skimming through issues a bit faster. I’d save panels that were good fits for cards I was looking for, or just visually interesting to try to backwards engineer for cards later. About 60% of cards were easy enough to find art for, but the last 40% took a long time. Often, I’d find a fitting panel, but I didn’t think it looked good enough as a card. Text boxes and images that required panel-to-panel context also made things harder.
Once I had art for most of the cards, I started trying to lay them out in Card Conjurer. It took me a bit to get into a good rhythm, but I ended up with this process:
- First I’d use the import function to import the text from the original version of the card.
- I picked a few frames I liked to use with different ratios of width vs height. For each image I’d try to find the frame that best fit the image.
- Since I was planning on printing the frames I needed to add 1/8th inch margins. Once the main frame is added, you need to go to the
1/8th Inch Margingroup and add the appropriate frame extension. - I’d scale and position the image to fit the frame.
- I’d modify any text sizing that was out of place, and sometimes add flavor text from the comic.
- Once the image was totally done I would download it. Sometimes I’d add additional modifications in an image editor, like making parts of the image go on top of the frame.
I made a vector design of the BPRD logo to use as the set symbol.

As I got through my list I ended up with a few images that I ended up switching around or replacing. This was a bit annoying since I had to manually position everything.
There were a few values like artist and the set symbol I wanted to set for all the cards, so I wrote a script that could modify the saved JSON with these values. You can see the script I used here.
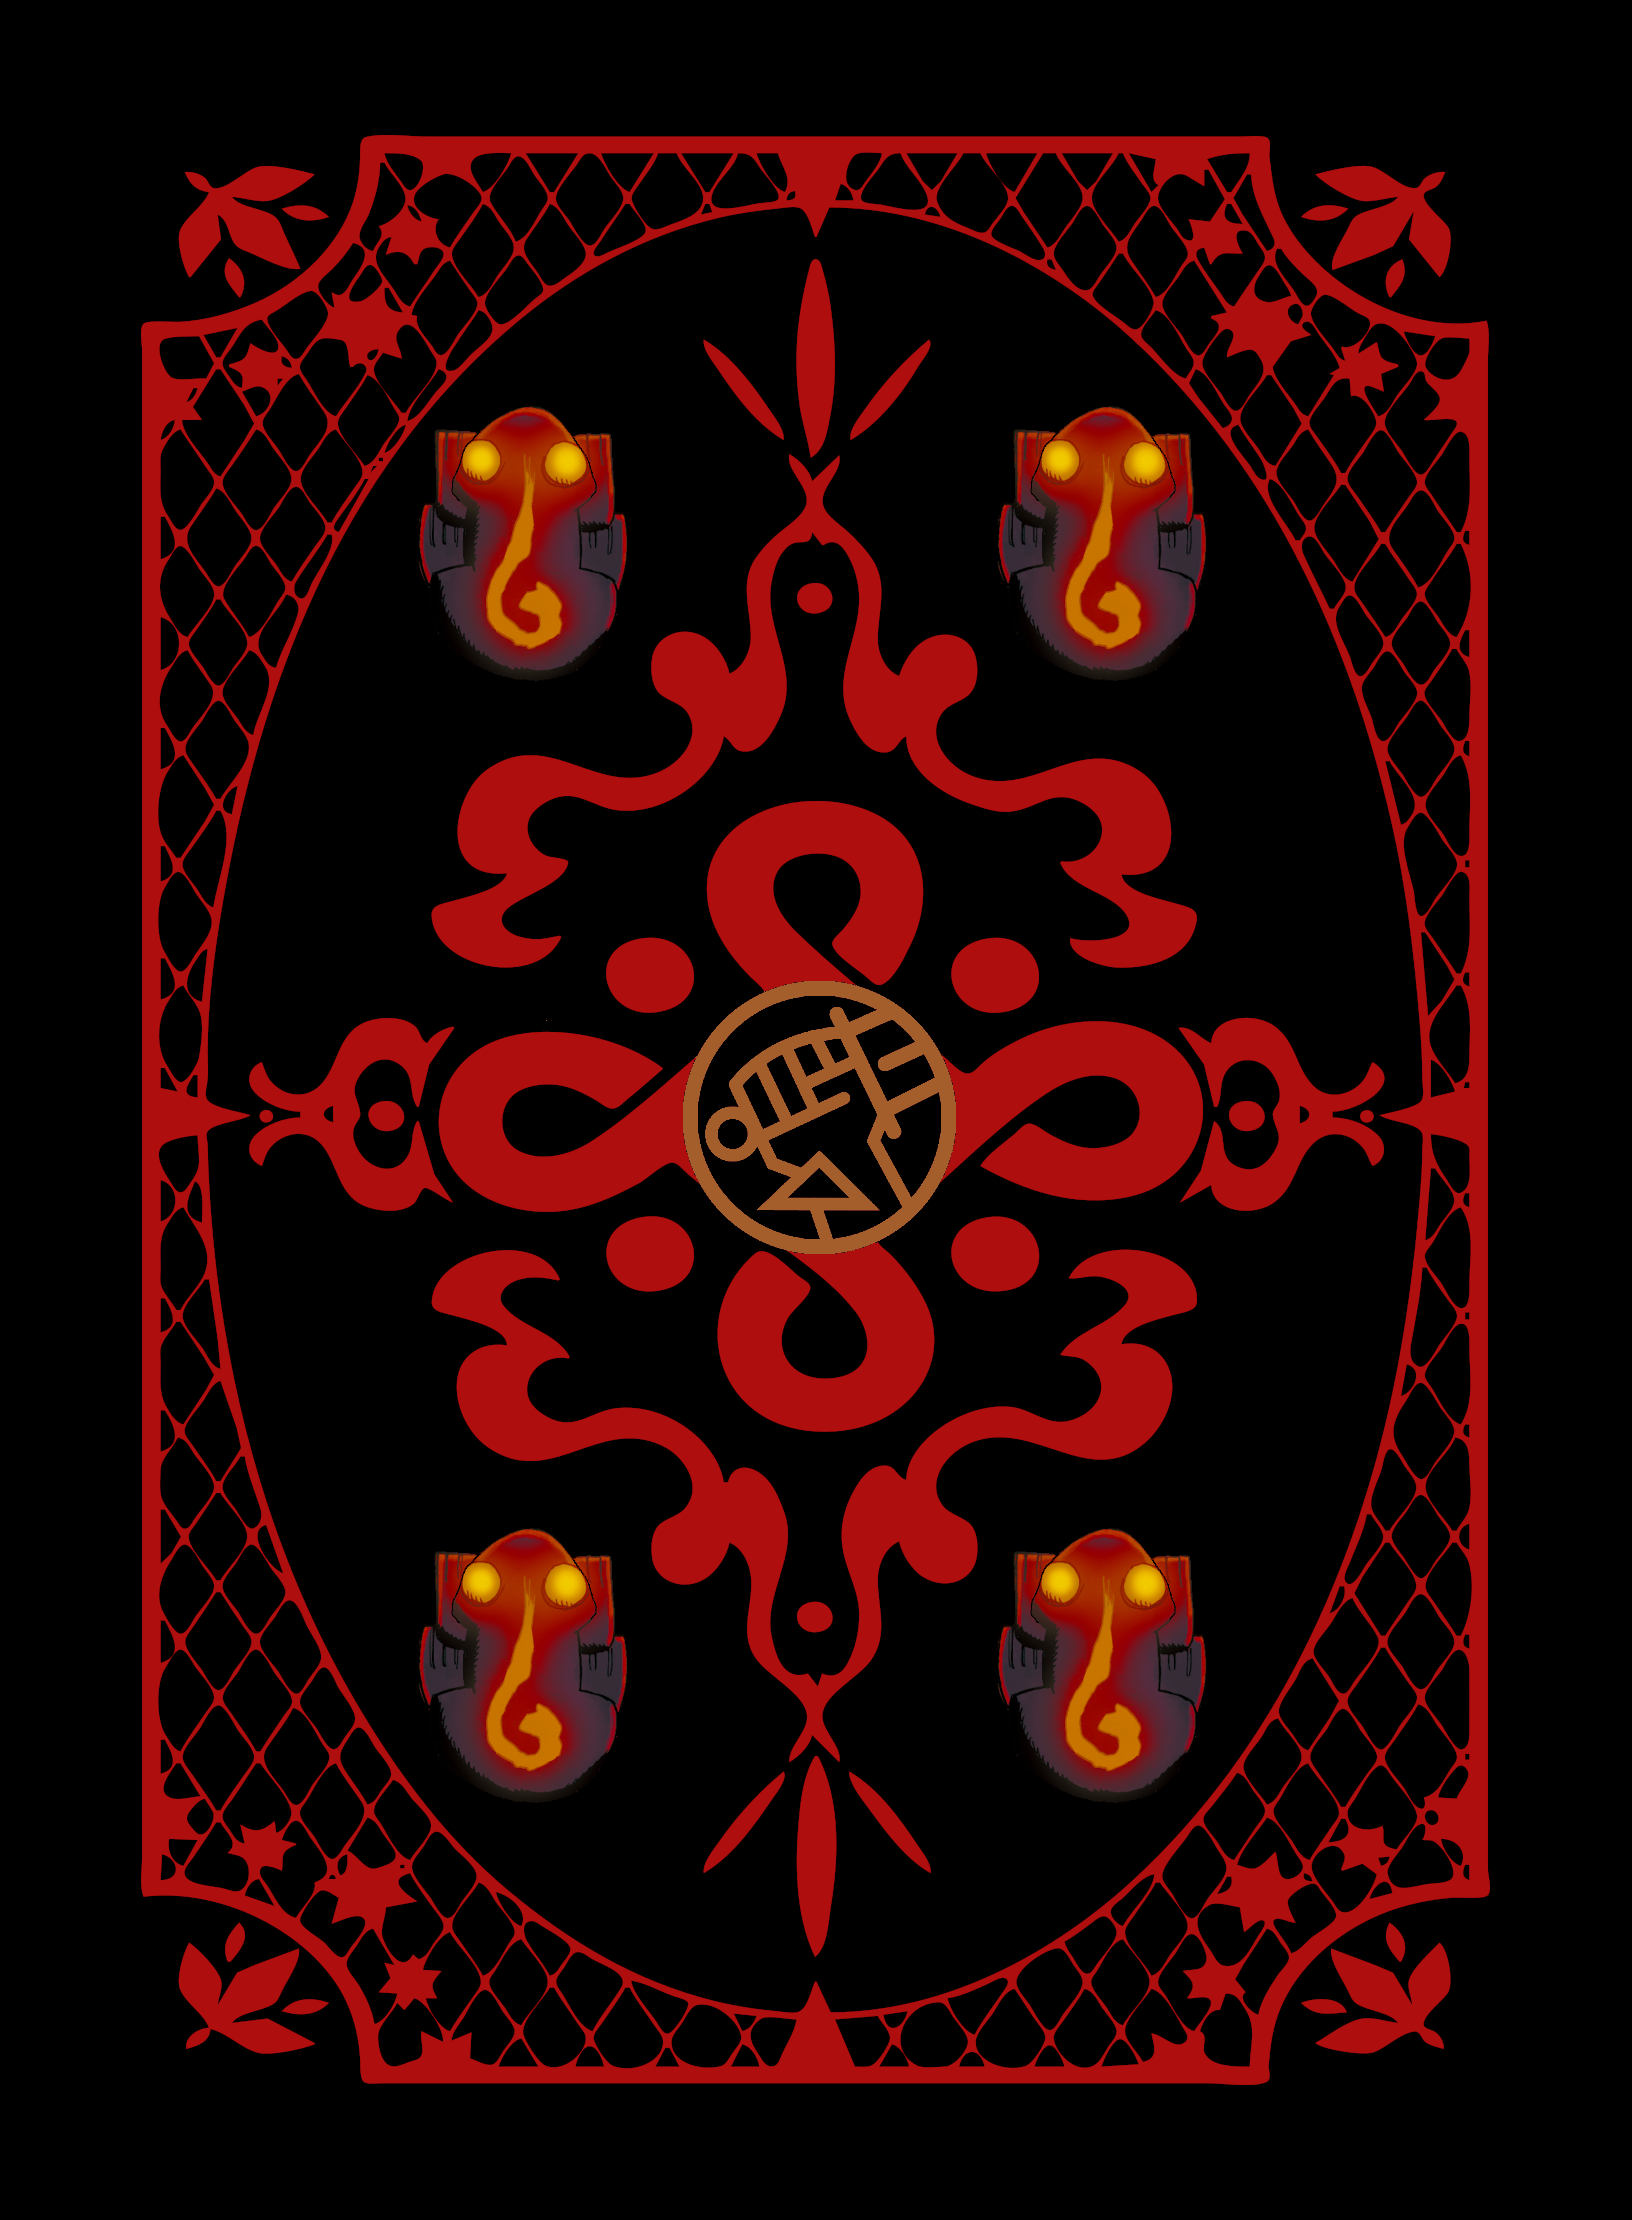
I also made a card back for the set:
What I’d do Differently
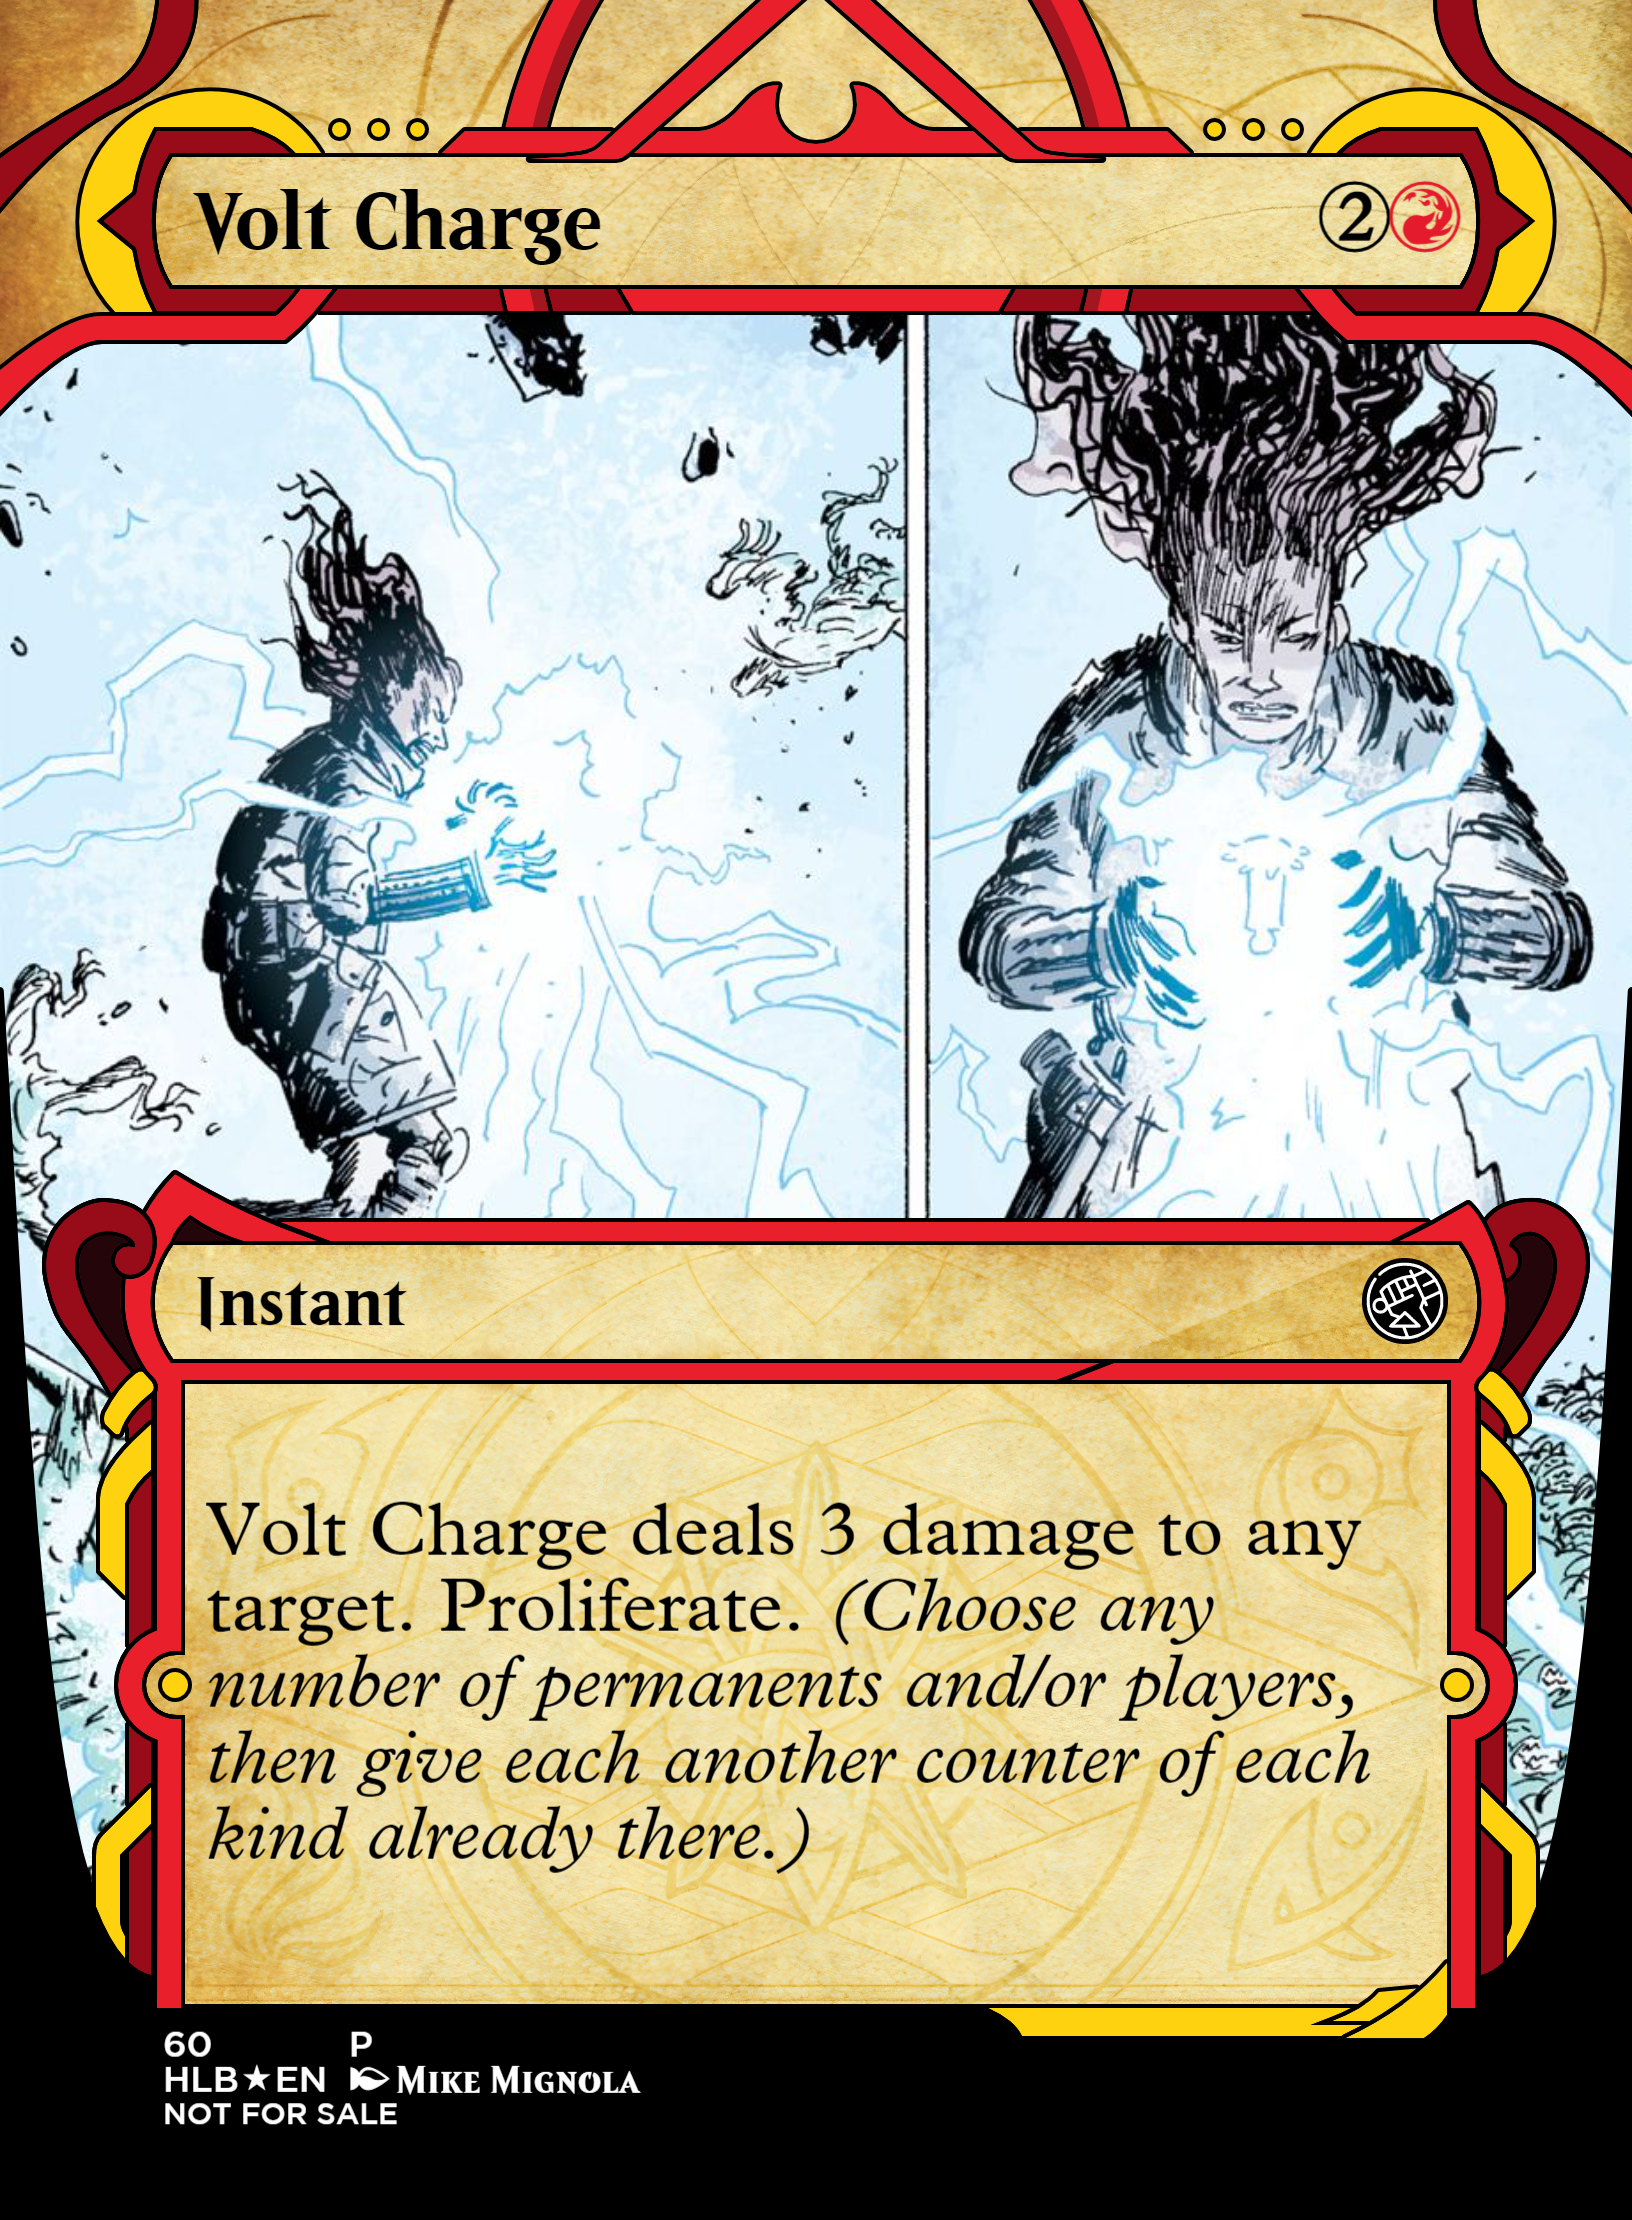
I liked the Mystic Archive frame and used it for most of my cards. The problem with it, is that it ends up covering a big chunk of the image by default. It shows small portions of art on the sides that I usually wan’t able to take advantage of. Here’s one of the few cards that did:
For other cards, I would have to manually resize and move the image and cover the areas on the sides. I actually made an additional frame component that just covered the sides with black. A different frame would have made the auto-fit more useful and saved me a bunch of time.
On a similar note, I had a lot of trouble fitting the panels with arbitrary width vs height ratios into the frames. I probably should have just picked a small set of frames and made the images the right scale in an image editor before I uploaded them. This was especially a problem, since I had to re-layout the images after I realized I needed to add the 1/8th inch margins. This also would have made it easier to adjust the cards with my script if they had predictable placements and would have made it much easier to swap images.
It would have been nice to automate in Selenium the process of reuploading the JSON and Downloading all the images. There were a few times when I wanted to make some small tweaks and had to manually do this to dozens of cards.
If I were to do all these changes, I could have automated the whole process. Then it would have come down to just doing manual cleanup and flourishes.
Using Local Cards with MPC Fill
So now that I had the images for the cards, I needed to actually add them to an order. I still wanted to use https://github.com/chilli-axe/mpc-autofill to make it a little less tedious and error prone, but the documented usage is more focussed on putting together the card set on the web interface and downloading the images from the cloud. There is an issue to add an option for local cards https://github.com/chilli-axe/mpc-autofill/issues/39, but that’s still a work in progress.
A developer responded that the project appears to be inactive and the fork https://github.com/MrTeferi/mpc-fill is the current active source of development.
To get around this I wrote a script that took my list of cards and card backs and generated the order XML used to run an order. Here’s the script I used: https://gist.github.com/axlan/21faf9c28b40904662124d20ff365f2b . It also copies the cards into the cache directory used by MPC Autofill. This script directly encodes the cards and the makes the assumption that the card names match the file names.
The exported XML can be loaded into MPC Autofill like normal and it skips downloading images and just uploads the generated order.
Combining Orders with MPC Fill
To amortise the shipping cost, I wanted to combine this order with the cards for a draft cube. This would not include any custom art and be a normal order.
There’s sort of a feature in MPC Fill that supports uploading additional cards to an order, but it’s a bit finicky. You can run python autofill.py -skipsetup or autofill.exe -skipsetup to make it skip the initial order configuration step. This lets you log in, open a saved order, and have the script start from there.
I added an offset value to my order generation script that let me generate an order XML that starts at the end of a previous one. The only problem is that it doesn’t know to not set the card back across the entire order, so I needed to set that up manually.
This ended up not working right for the cardbacks, so I had to fix them manually. I wrote up the issue here https://github.com/chilli-axe/mpc-autofill/issues/59.
Submitting Cards to MPC Fill
There’s a lot of cool custom art on MPC Fill, and I wanted to try to contribute my cards to their database.
This turned out to be as easy as contacting the maintainer on Discord and sending a link to a Drive with the uploaded cards. (As a side note, I should have really looked at the Discord earlier. There’s a lot of useful info in the FAQ there…)
If you’re interested in seeing / printing this deck you can see it on http://mpcfill.com/.
First you need to download the XML file with the order: hellboy_ashling_pilgrim_edh_deck.xml . Then, go to http://mpcfill.com/ and upload it with the “Upload List” option show below:
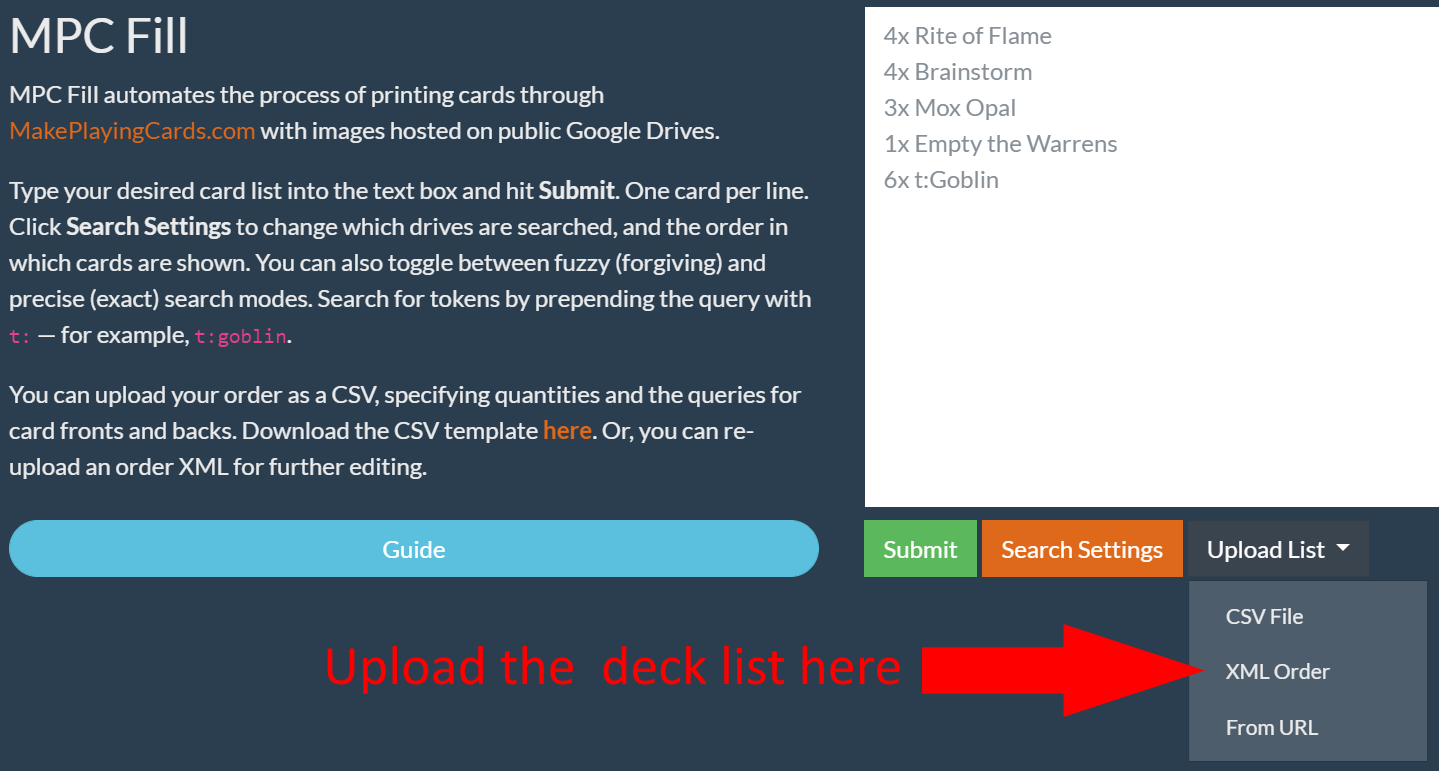
This will give you an order with the 61 cards and the custom card backs.