
Using NixOS to Manage Hardware Testing Environments
This was a blog post I did for Swift Navigaiton. I appears it’s been lost to the sands of time, so I’m reproducing it here.
Summery
Building and running hardware in the loop (HITL) testing infrastructure is a large scale effort for Swift Navigation. The nature of GPS processing, and the interaction of RTOS, embedded Linux, and FPGA components makes HITL testing especially important. Having to manage local custom hardware adds unique challenges that don’t easily fit into typical software development workflows.
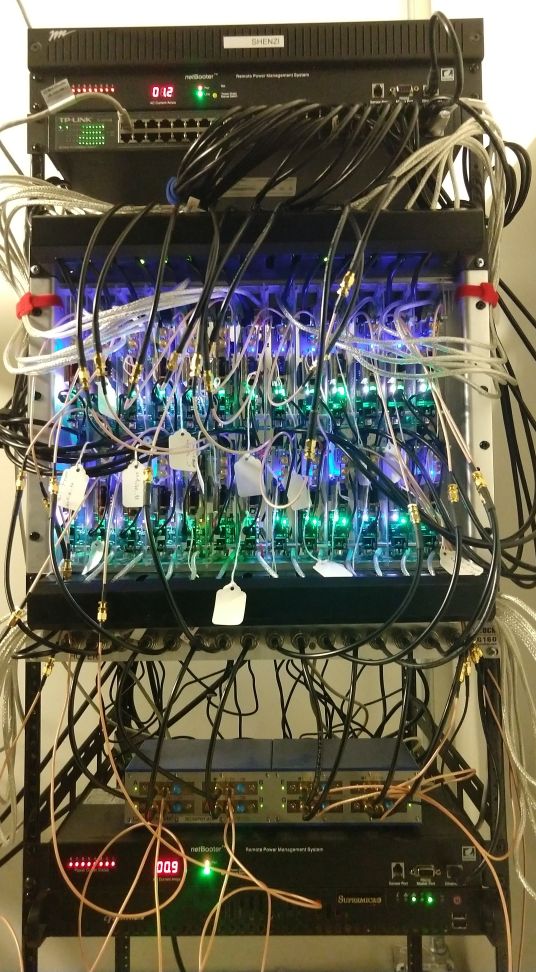
Our approach to HITL testing is to set up racks of test devices each managed by a single server. The server gets AWS simple workflow (SWF) tasks to run combinations of software builds and test scenarios on the attached devices. The results of the test are then uploaded to S3 and go through analysis in the cloud. These results are made available through a web front end to give performance summaries for potential code changes and the current mainline builds.
The software used to manage each rack is identical, the only difference are the details of how the test devices are configured and some extra capabilities that might be available for certain test scenarios.
A key part of our approach for managing these systems and ensuring that they are reproducible has been to use NixOS https://nixos.org/ across our test servers. The big idea behind NixOS is that the system you write a set of configuration files that fully specify the system. Any modifications are deployed by modifying these config files and running an update command. This is similar to configuration management tools like Ansible, Puppet, or Chef. However, it is directly baked into the OS. For a more extensive summary see the official about section https://nixos.org/nixos/about.html.
Implementation
Our NixOS configuration is tracked in a git repo. Since the *.nix files are simple text this is easy to manage. Here’s the structure of the repo:
- Nixos-Machines
- confs/
- server1/
- base/ → ../../modules/base/
- module1/ → ../../modules/module1/
- module2/ → ../../modules/module2/
- configuration.nix
- server2/
- base/ → ../../modules/base/
- module1/ → ../../modules/module1/
- module3/ → ../../modules/module3/
- configuration.nix
- server3/
- base/ → ../../modules/base/
- module1/ → ../../modules/module1/
- module2/ → ../../modules/module2/
- configuration.nix
- server1/
- pkgs/
- pkg1/
- default.nix
- pkg2/
- default.nix
- pkg3/
- default.nix
- pkg4/
- genscript.sh
- default.nix
- pkg1/
- modules/
- base/
- default.nix
- module1/
- pkg1/ → ../../pkgs/pkg1/
- pkg2/ → ../../pkgs/pkg2/
- default.nix
- module2/
- pkg2/ → ../../pkgs/pkg2/
- pkg3/ → ../../pkgs/pkg3/
- default.nix
- module4/
- pkg4/ → ../../pkgs/pkg4/
- default.nix
- base/
- Makefile
- confs/
The “ → “ denotes a symlink. This is how we manage configuration reuse and modularity. The reason we use symlinks here is mostly to simplify deployment, which will be described later.
The main thing to understand here is that each server’s configuration is a hierarchy. At the top are the servers in the conf directory. These are the top level configurations for each machine. The configuration.nix here describes the services the machine will run along with the specification of the hardware resources it will have available. To support this functionality each server has several modules. A module here is a self contained service or tool. For example the HITL testing service or a GUI application. These modules are made up of packages. Packages are the libraries or tools you’d normally install with a package manager like Aptitude or Pip.
Here’s how this setup is used to implement HITL testing. Let’s say we wanted to set up 10 testing racks. We’d create 10 folders in the confs directory each with identical symlinks to the modules needed to run HITL. The configuration.nix would capture the unique hardware addresses or configurations for each machine. For example:
{ config, pkgs, ... }:

{
 imports = [
   ./hardware-configuration.nix
   ./base
   ./hitl
   ./tftpd-hpa
   ./enable-usbhub
 ];

 # Defined hostname.
 networking.hostName = "pumbaa";

 # Use the gummiboot efi boot loader.
 boot.loader.systemd-boot.enable = true;
 boot.loader.efi.canTouchEfiVariables = true;

 # The NixOS release to be compatible with for stateful data such as databases.
 system.stateVersion = "17.09";

 # Second interface on private network
 networking.interfaces.eno2.ip4 = [ { address = "172.16.0.1"; prefixLength = 24; } ];

 # Disable firewall.
 networking.firewall.enable = false;

 # Setup nat
 networking.nat.enable = true;
 networking.nat.internalInterfaces = [ "eno2" ];
 networking.nat.externalInterface = "eno1";
 networking.nat.forwardPorts = [
   # pumbaa-1
   { sourcePort = 1022; destination = "172.16.0.52:22"; }
   { sourcePort = 1055; destination = "172.16.0.52:55555"; }
   { sourcePort = 1056; destination = "172.16.0.52:55556"; }
   { sourcePort = 1522; destination = "172.16.0.53:22"; }
   { sourcePort = 1555; destination = "172.16.0.53:55555"; }
   { sourcePort = 1556; destination = "172.16.0.53:55556"; }
     # pumbaa-13
   { sourcePort = 13022; destination = "172.16.0.74:22"; }
   { sourcePort = 13055; destination = "172.16.0.74:55555"; }
   { sourcePort = 13056; destination = "172.16.0.74:55556"; }
   { sourcePort = 13522; destination = "172.16.0.75:22"; }
   { sourcePort = 13555; destination = "172.16.0.75:55555"; }
   { sourcePort = 13556; destination = "172.16.0.75:55556"; }
 ];

 # Setup dhcpd on second interface
 services.dhcpd4.enable = true;
 services.dhcpd4.interfaces = ["eno2"];
 services.dhcpd4.extraConfig = ''
   default-lease-time 25920000;
   max-lease-time 25920000;
   next-server 172.16.0.1;
   subnet 172.16.0.0 netmask 255.255.255.0 { range 172.16.0.100 172.16.0.200; }
   option routers 172.16.0.1;
   option broadcast-address 172.16.0.255;
   option domain-name-servers 8.8.8.8, 8.8.4.4;
   # pumbaa-1
   host pumbaa-1-base { fixed-address 172.16.0.52; hardware ethernet 8c:c8:f4:90:02:6b; }
   host pumbaa-1-rover { fixed-address 172.16.0.53; hardware ethernet 8c:c8:f4:90:06:0c; }
   # pumbaa-13
   host pumbaa-13-base { fixed-address 172.16.0.74; hardware ethernet 8c:c8:f4:90:01:44; }
   host pumbaa-13-rover { fixed-address 172.16.0.75; hardware ethernet 8c:c8:f4:90:01:90; }
 '';

 # Setup tftpd-hpa service
 services.tftpd-hpa.enable = true;

 # Setup capture jobs.
 services.capture.jobs = [
  { name = "capture-1"; queue = "capture-workerv3"; timeout = "20m"; config = ./config.yaml; devices = ./devices/devices-1.yaml; ip = "172.16.0.1"; }
  { name = "capture-13"; queue = "capture-workerv3"; timeout = "20m"; config = ./config.yaml; devices = ./devices/devices-13.yaml; ip = "172.16.0.1"; }
 ];
}
This configuration first imports the modules that it will use. It then configures all the services and features that make up the system. A lot of the configuration here defines the networking for the attached test devices. These configurations could also be generated as a for loop using the nix language along with a list of MAC addresses. The last section actually defines the workers that this system hosts. These services manage an attached test device and fulfill tasks from AWS queues.
Modifying a system or adding an additional server is as simple as modifying these config files as needed.
Deployment
Generally developers work on their own machines to modify the configurations and test the software that makes up the packages. To deploy they run ‘make