
Fire Emblem Lights
As gift for my wife’s birthday I wanted to make something to celebrate our shared time with the game Fire Emblem Three Houses. I was originally inspired by a light up banner project https://www.etsy.com/listing/727321721/fire-emblem-three-houses-banners-light.
Coming Up with the Design
It took me a long time to decide on the final design. Initially I wanted to do some sort of edge lighting like this https://www.instructables.com/id/Edge-Lit-Wedding-Gift/. I thought I might even be able to do something multilayered like https://makezine.com/2012/02/18/edge-lit-led-nixie-tube-display/. After doing some tests, I wasn’t super happy with the effect with my laser cutter and plastics. After going through the materials I had on hand I decided to go with back lit wooden cutouts.
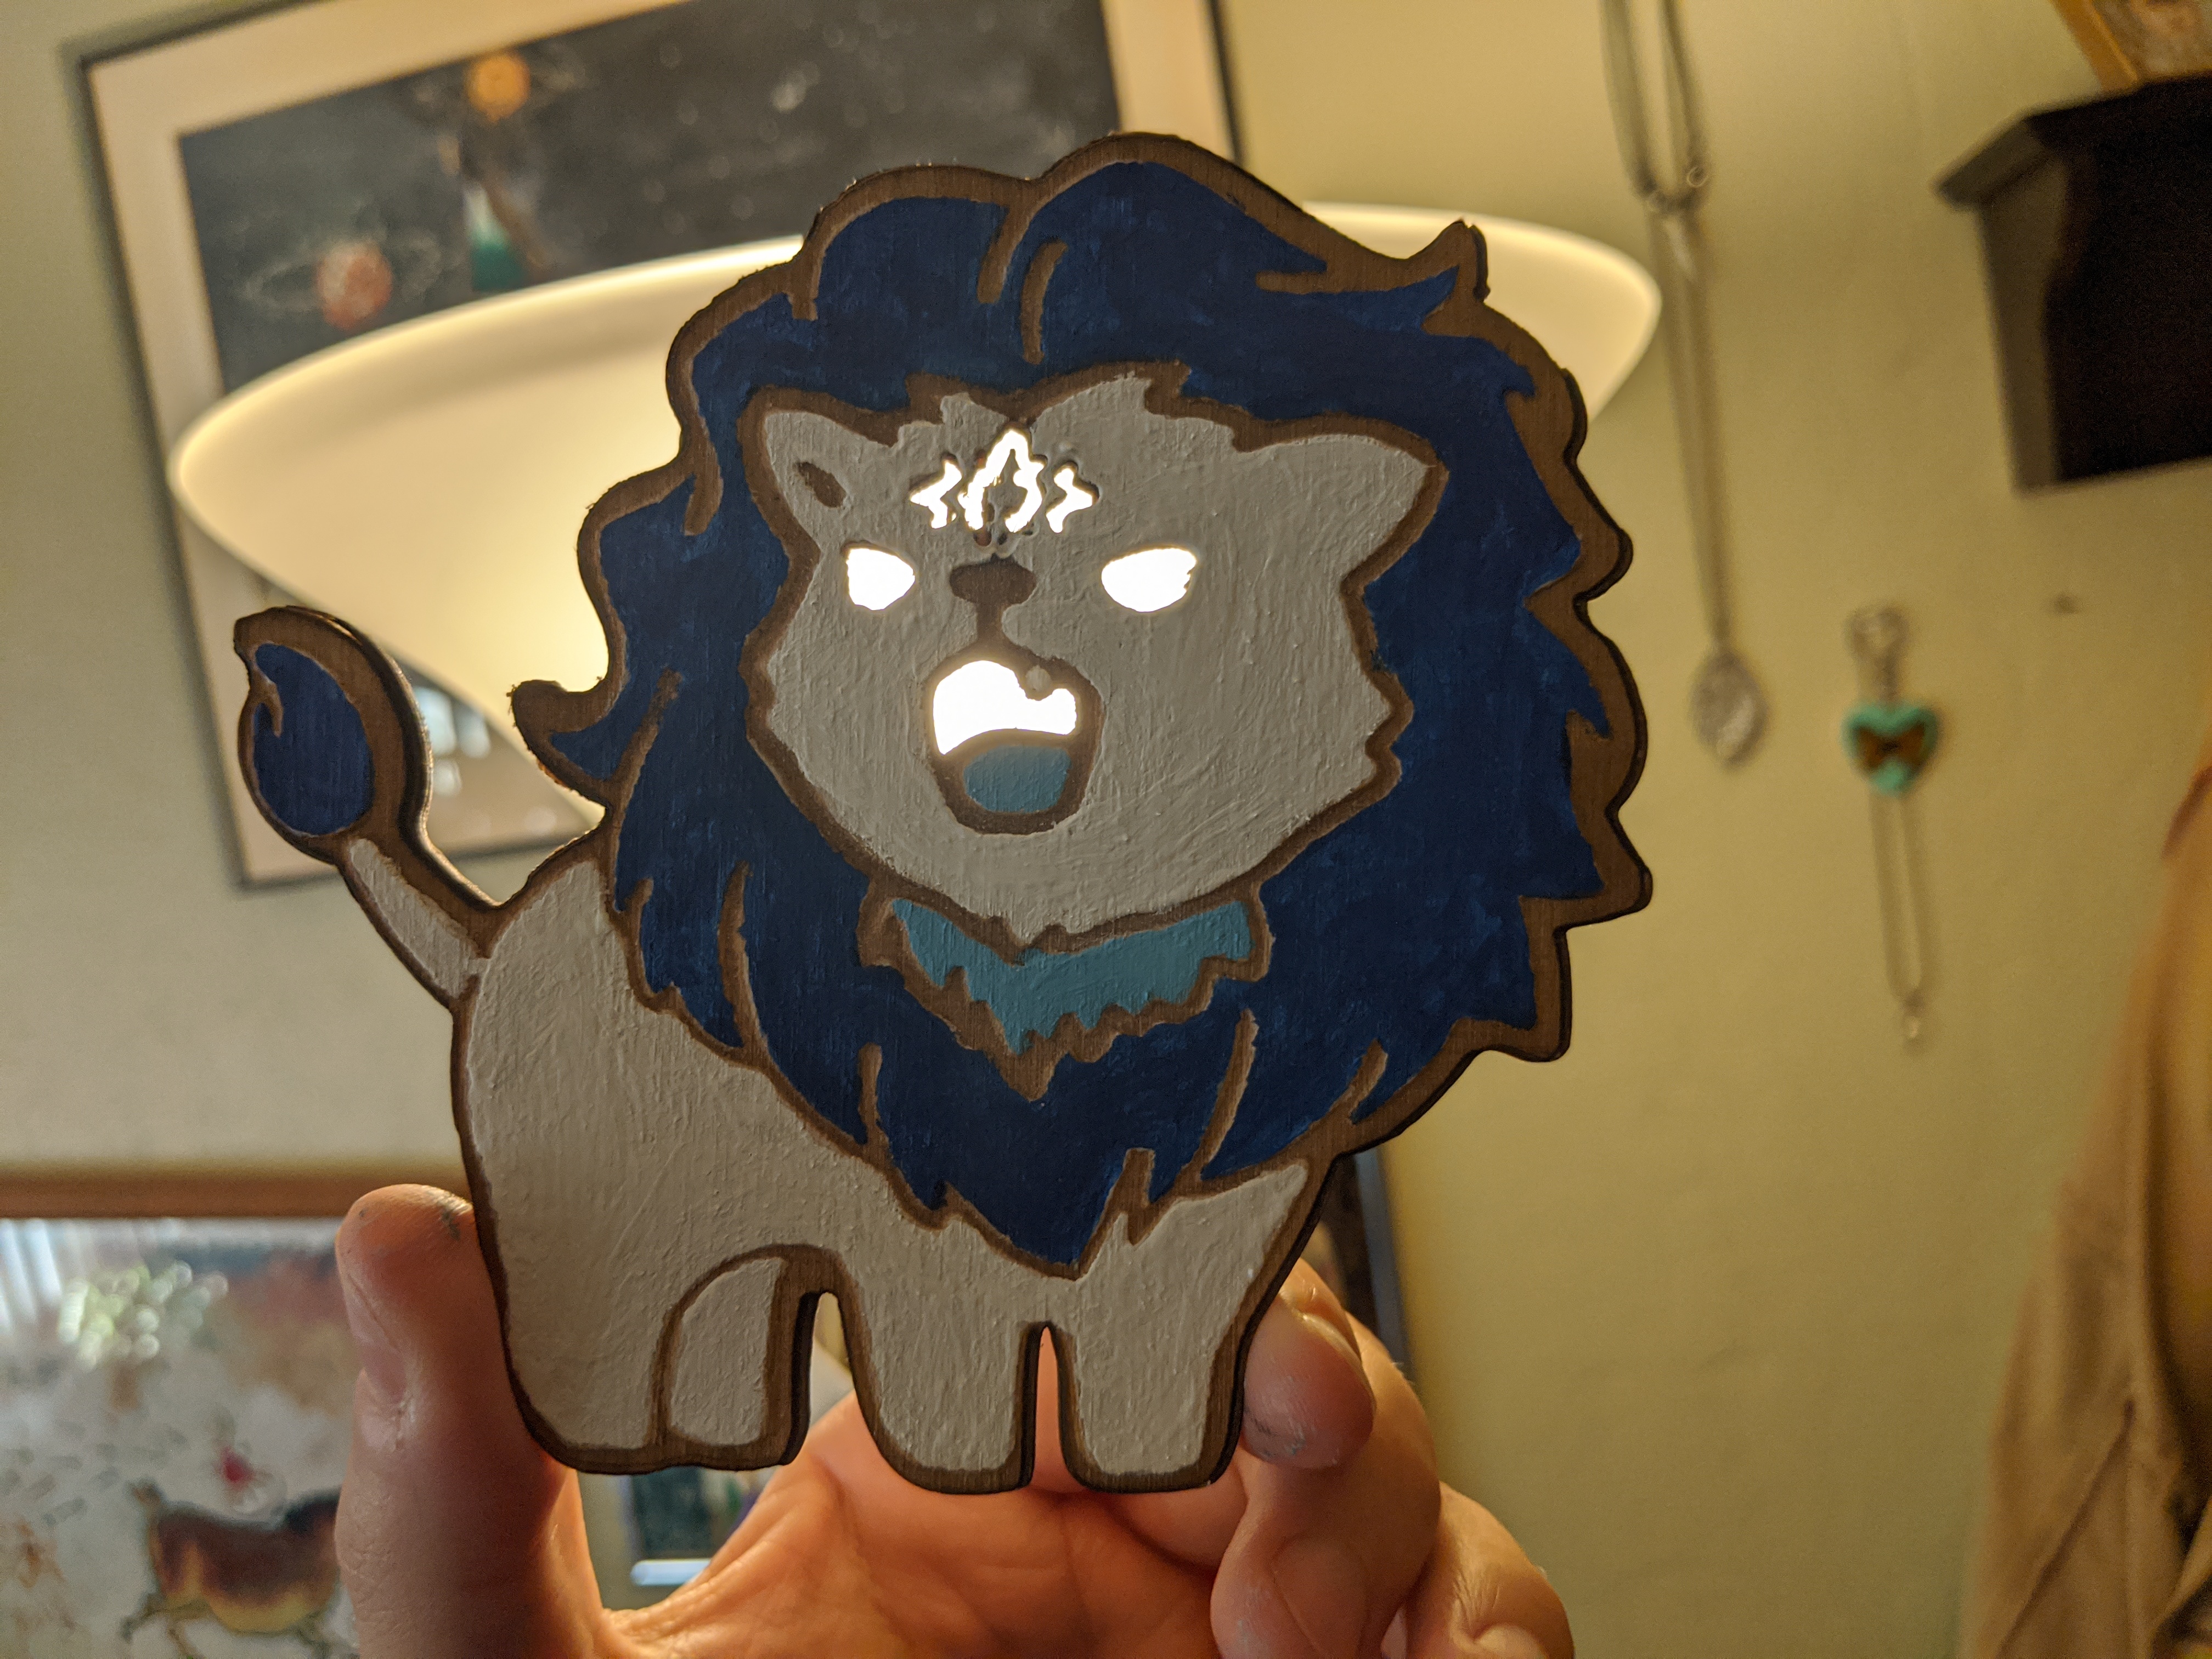
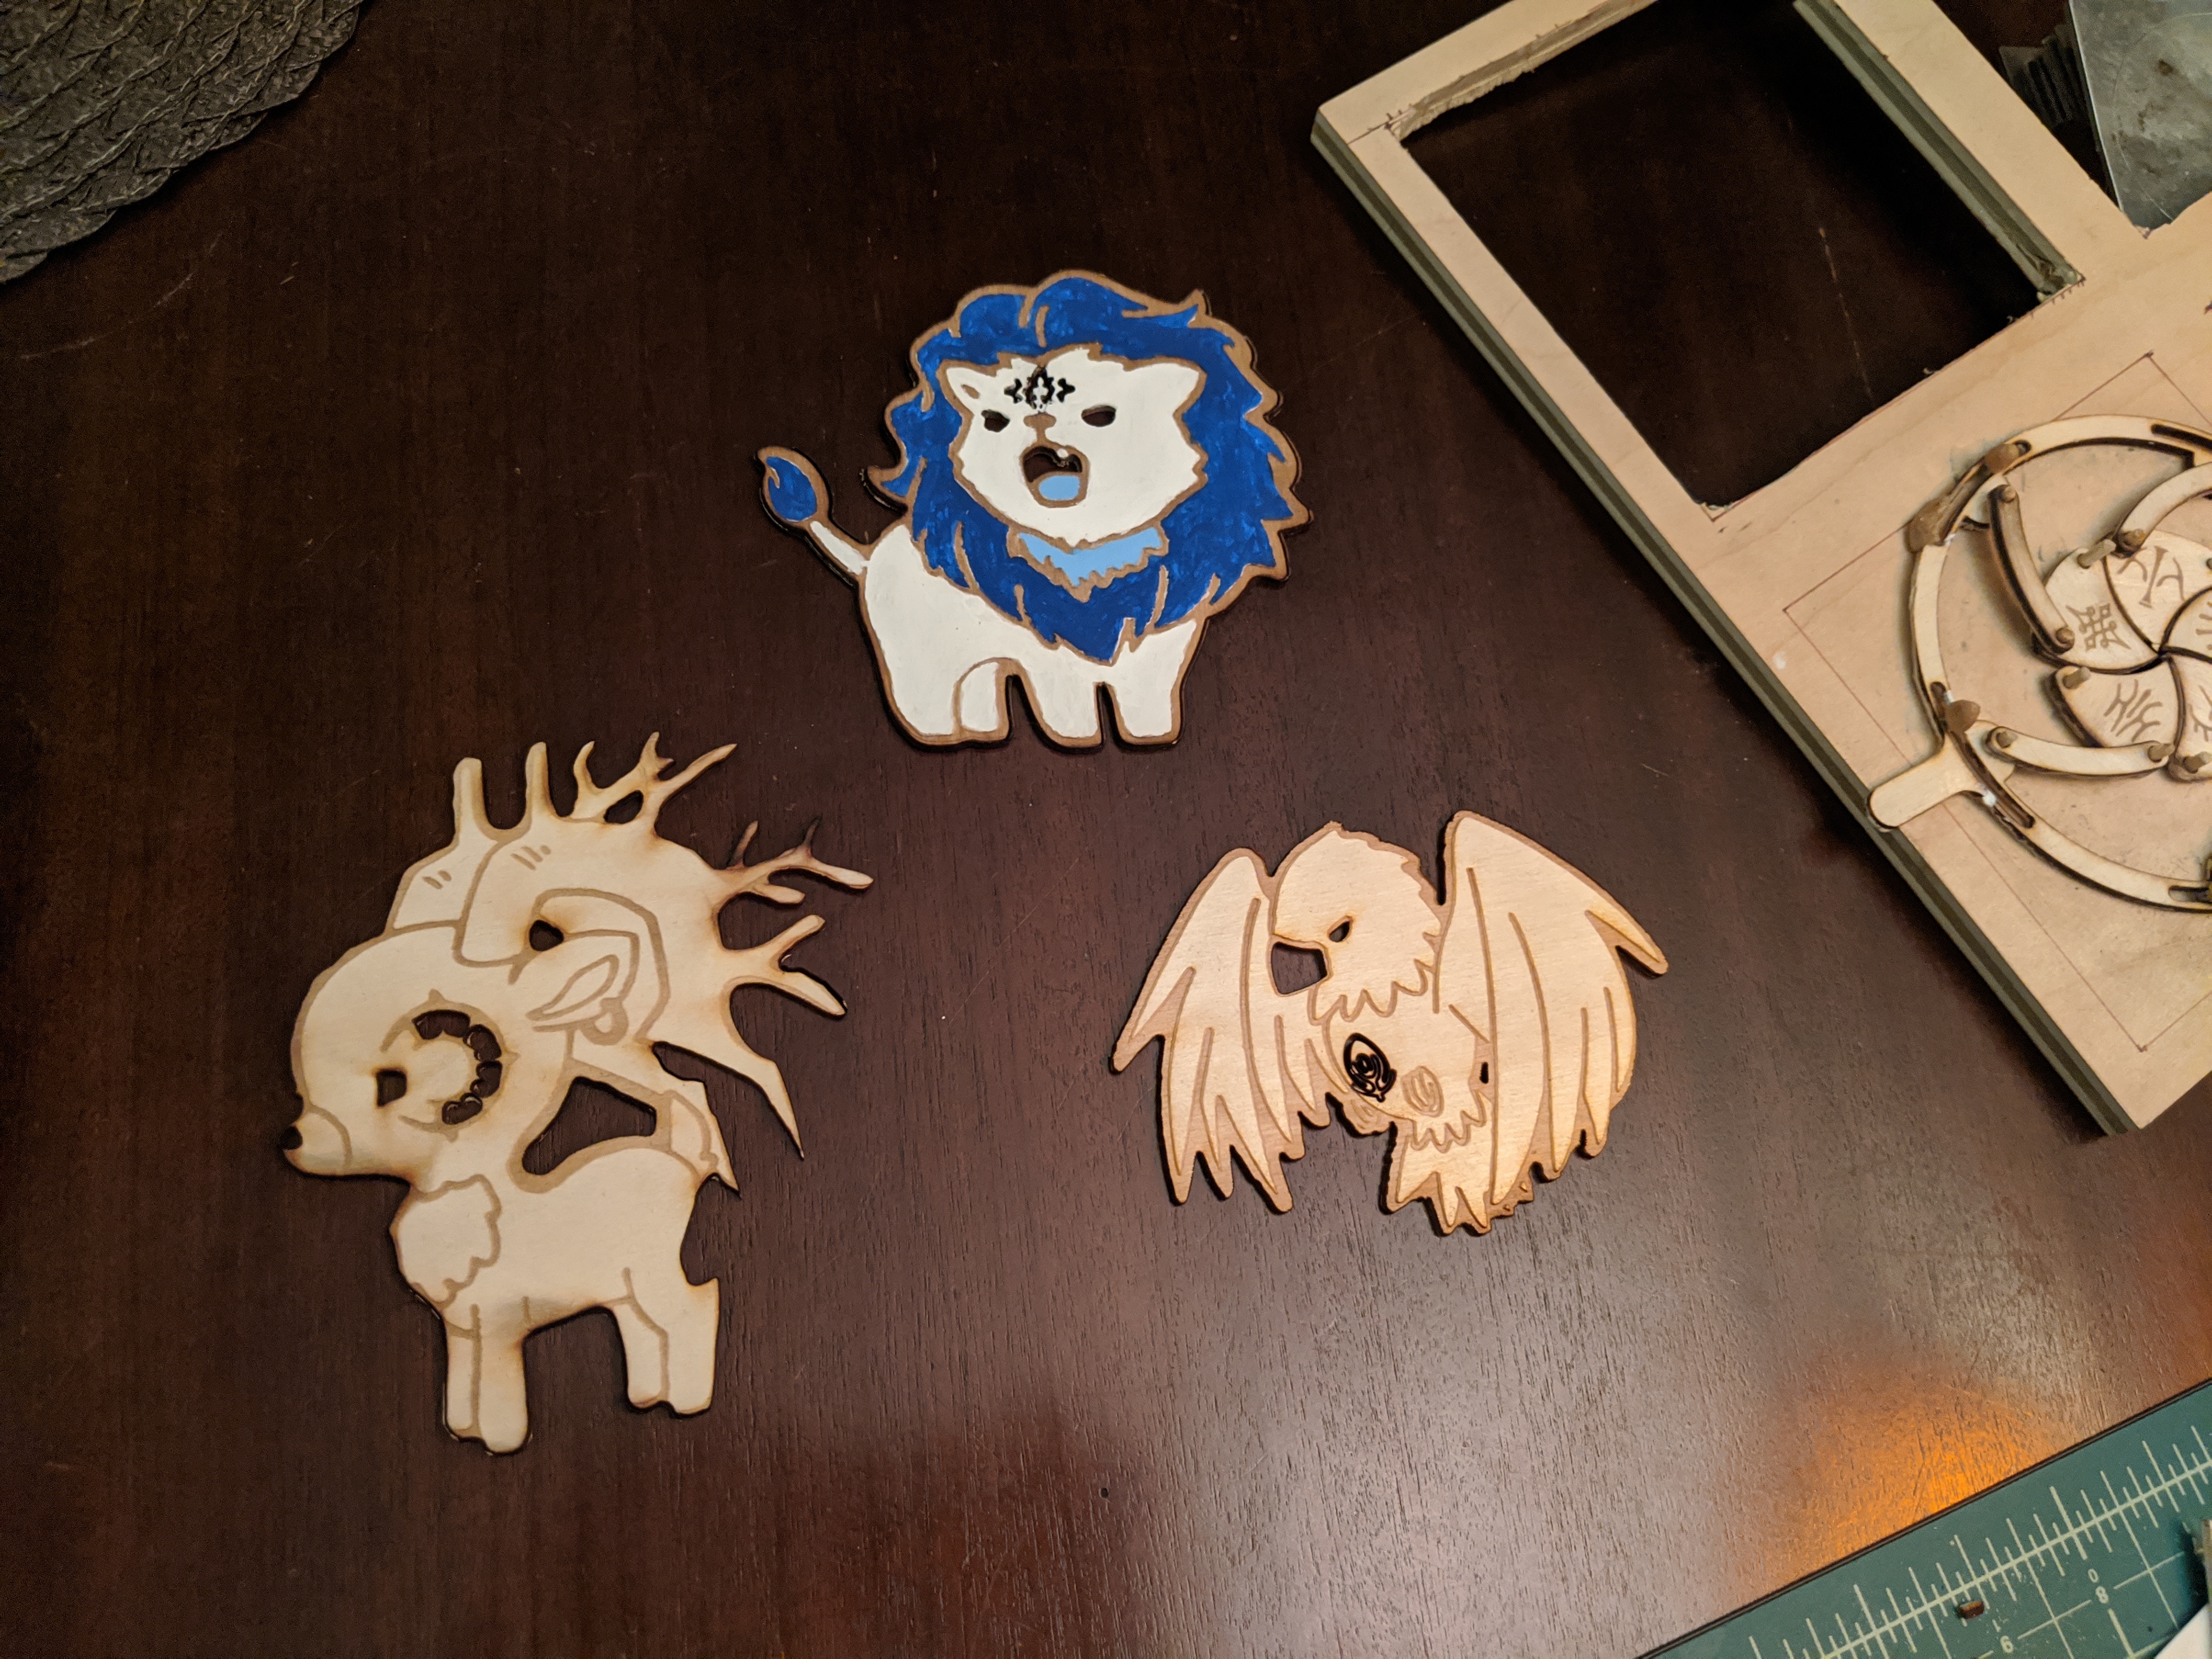
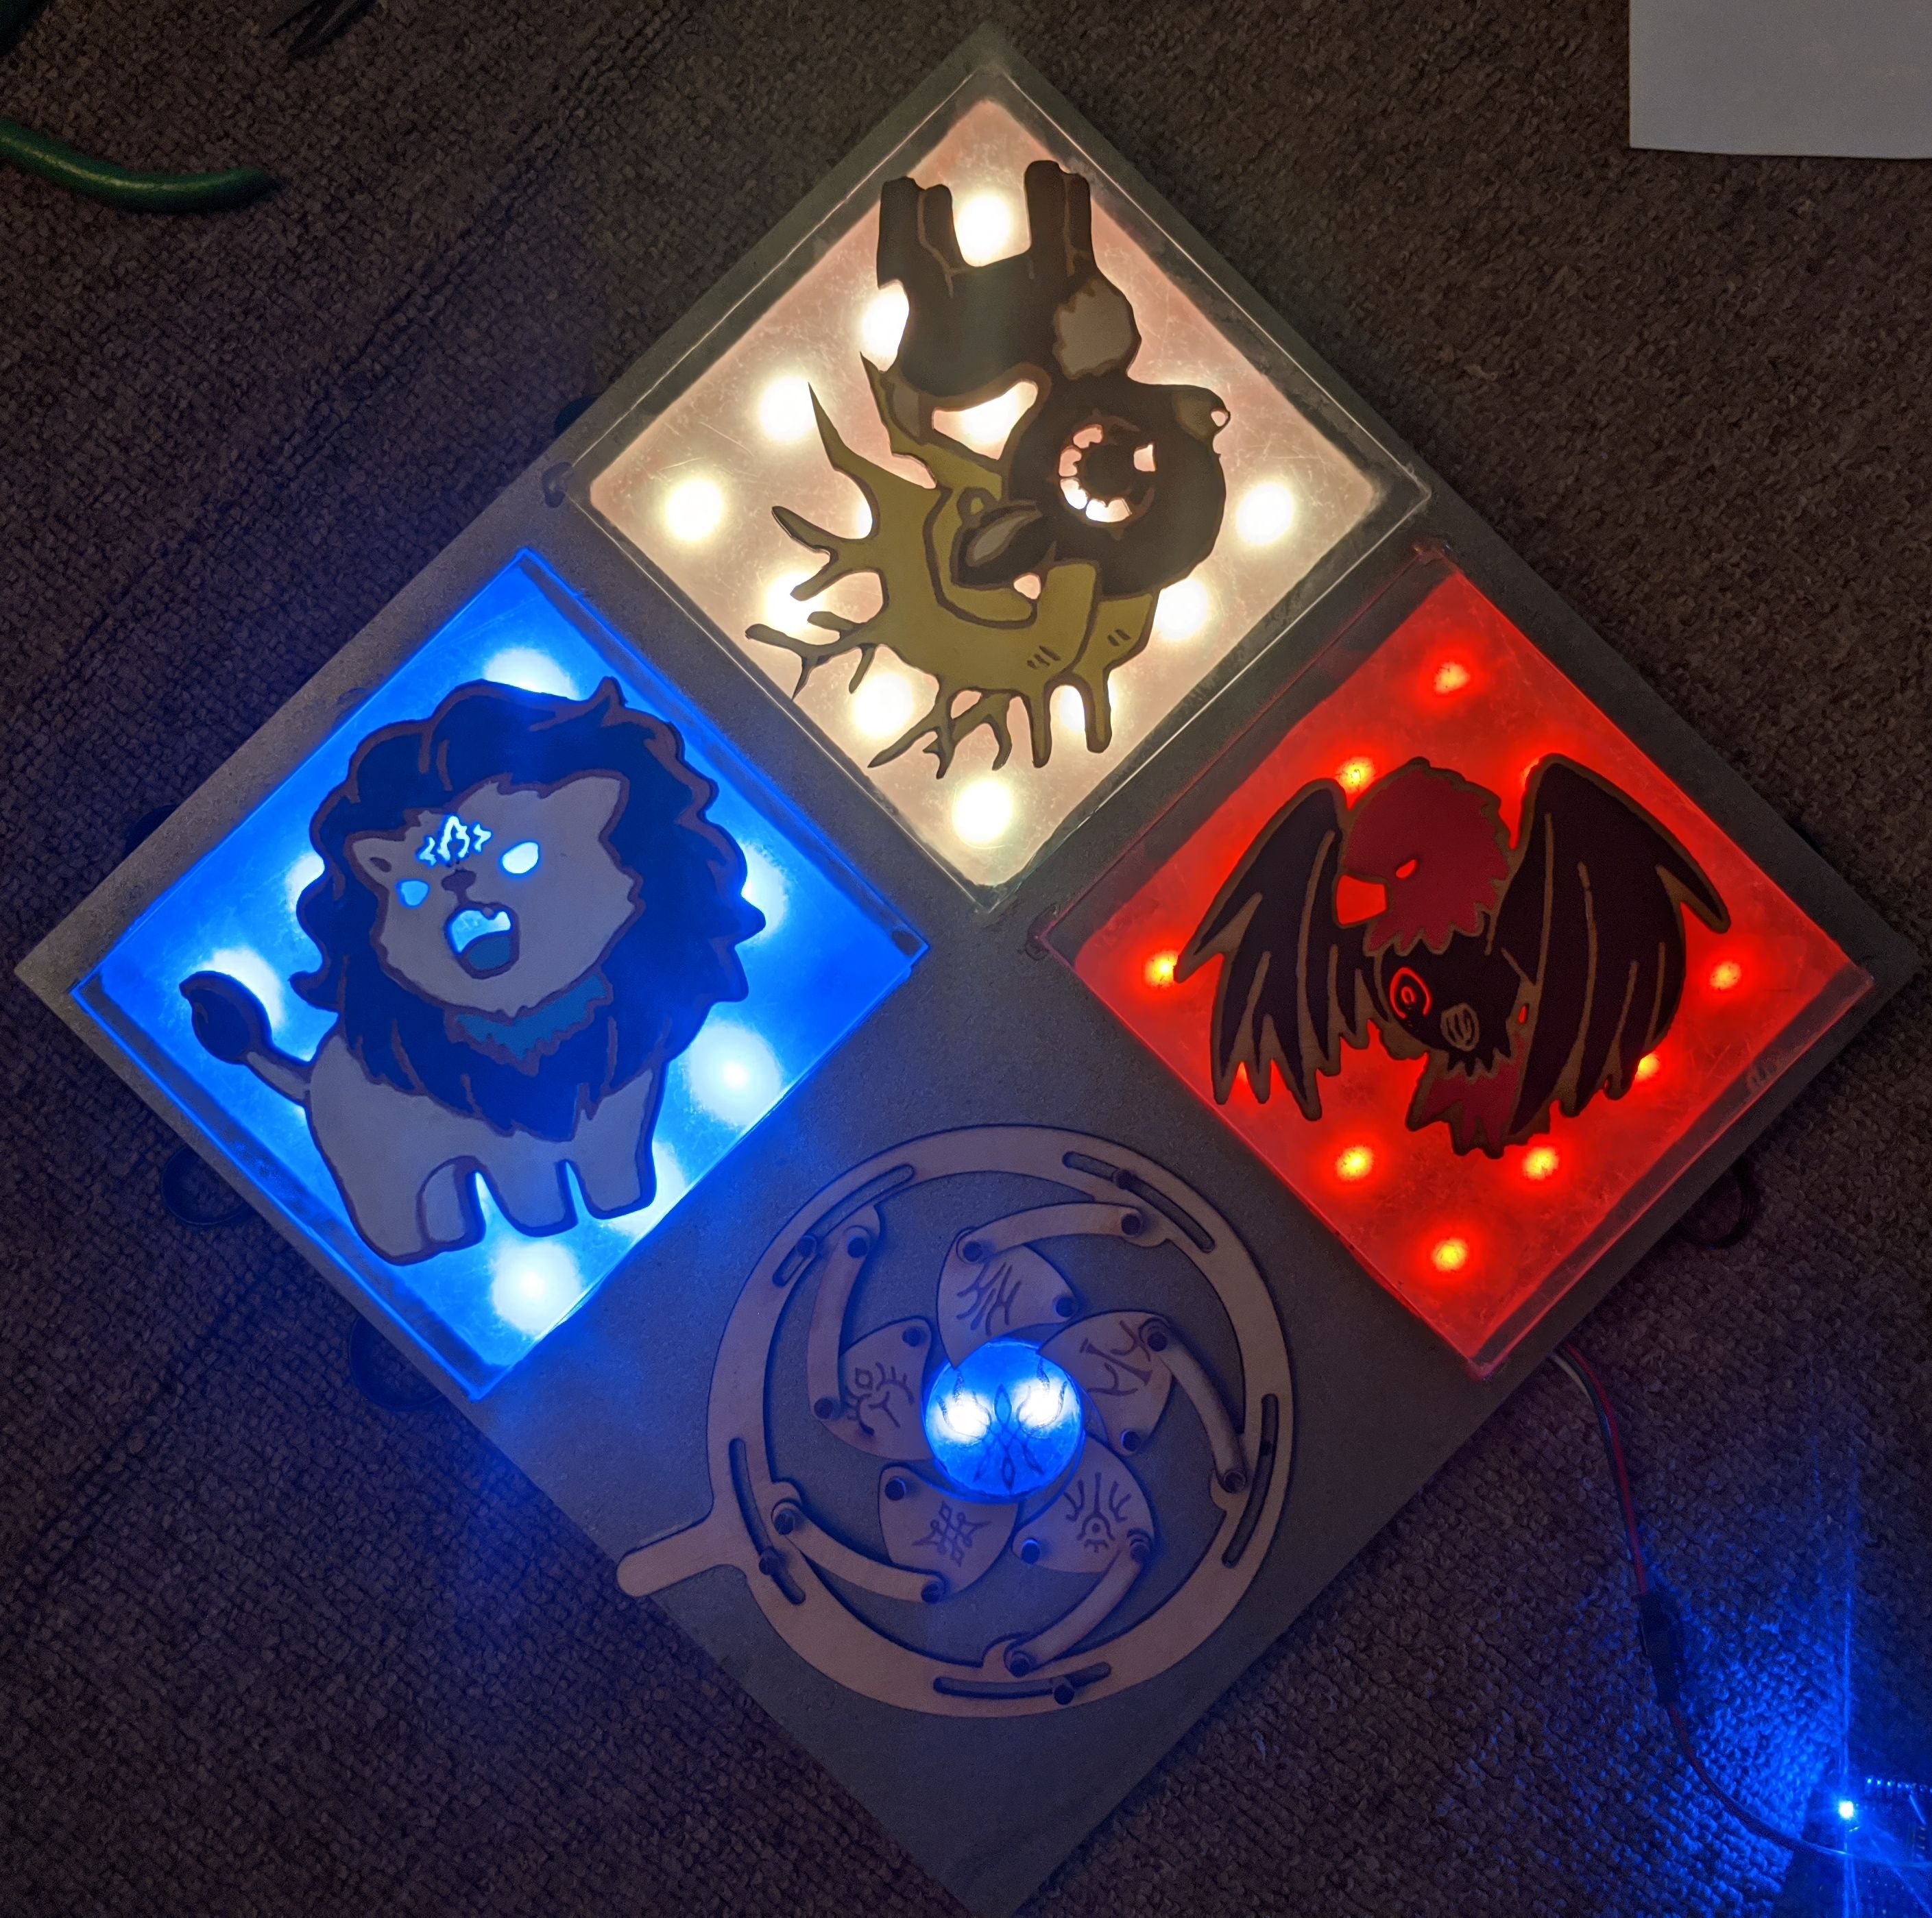
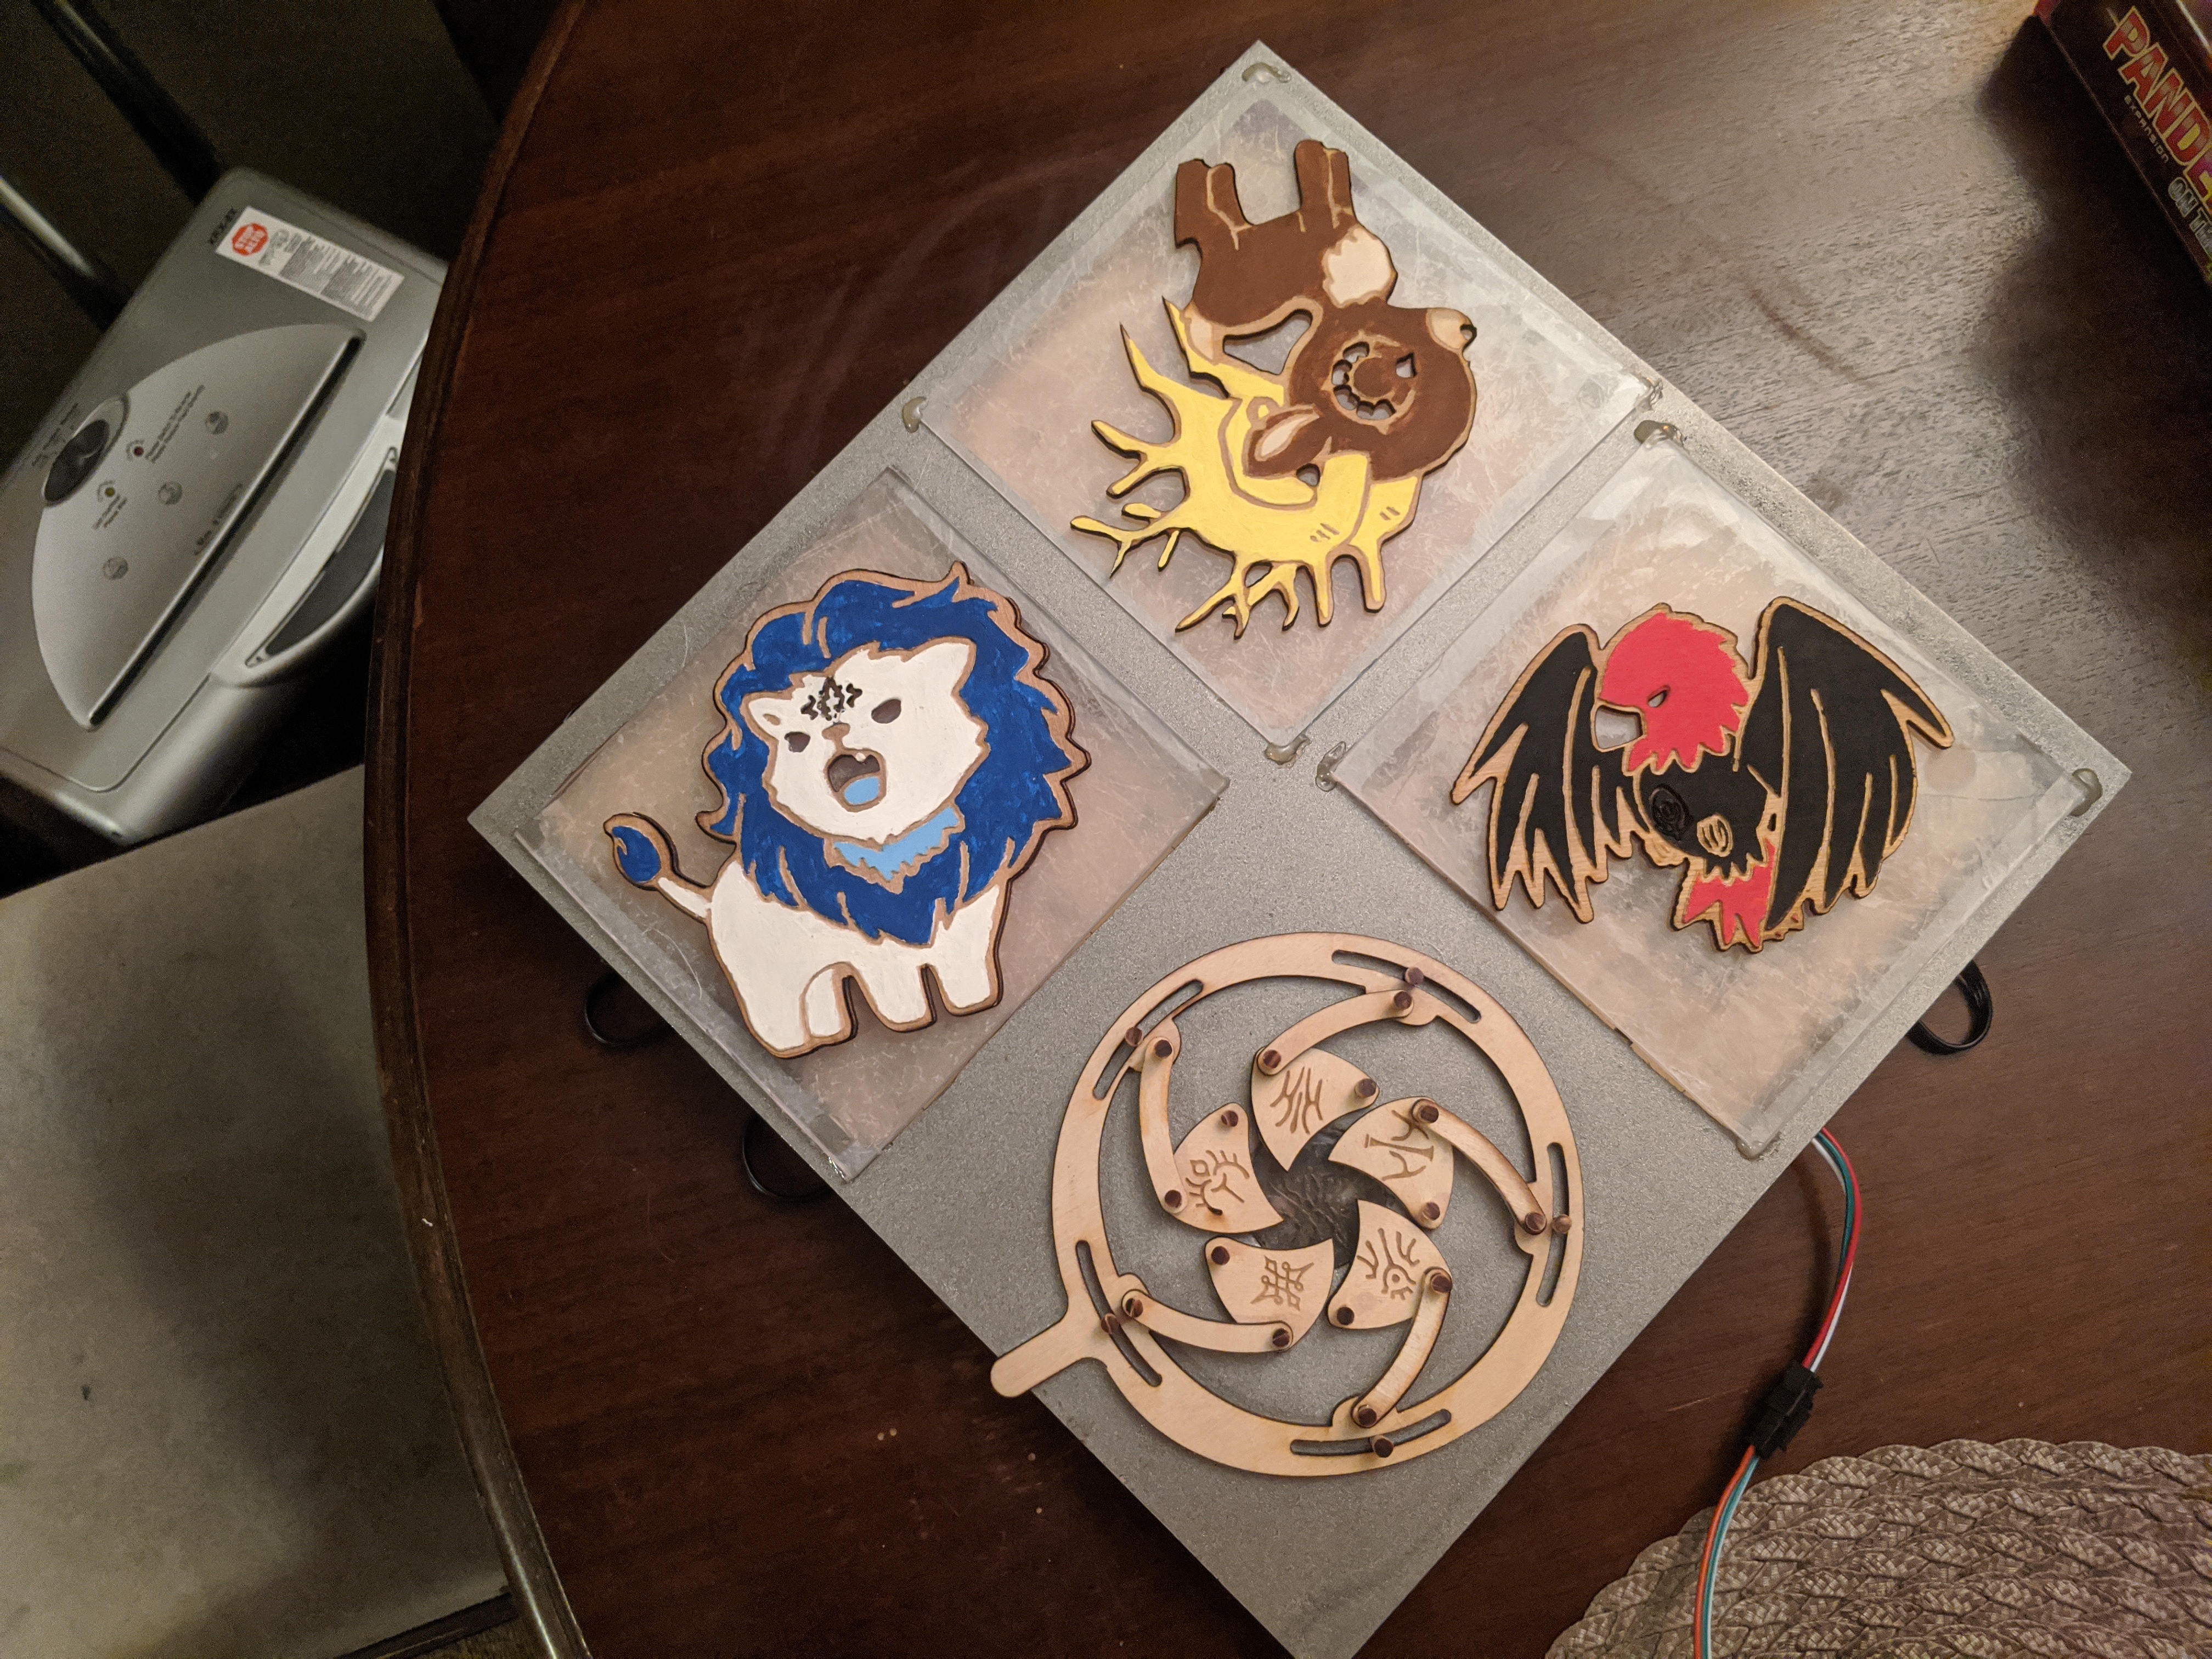
For the design I decided to reproduce some chibi pins https://www.etsy.com/listing/731039509/fe3h-hard-enamel-pins and engrave crests for some of our favorite characters on a wooden iris design I found here https://www.instructables.com/id/mechanical-iris-1/
I worked on cleaning up the various designs I found and converting them into SVG’s with GIMP and Inkscape. You can see my design files here.
Choosing the Software Approach
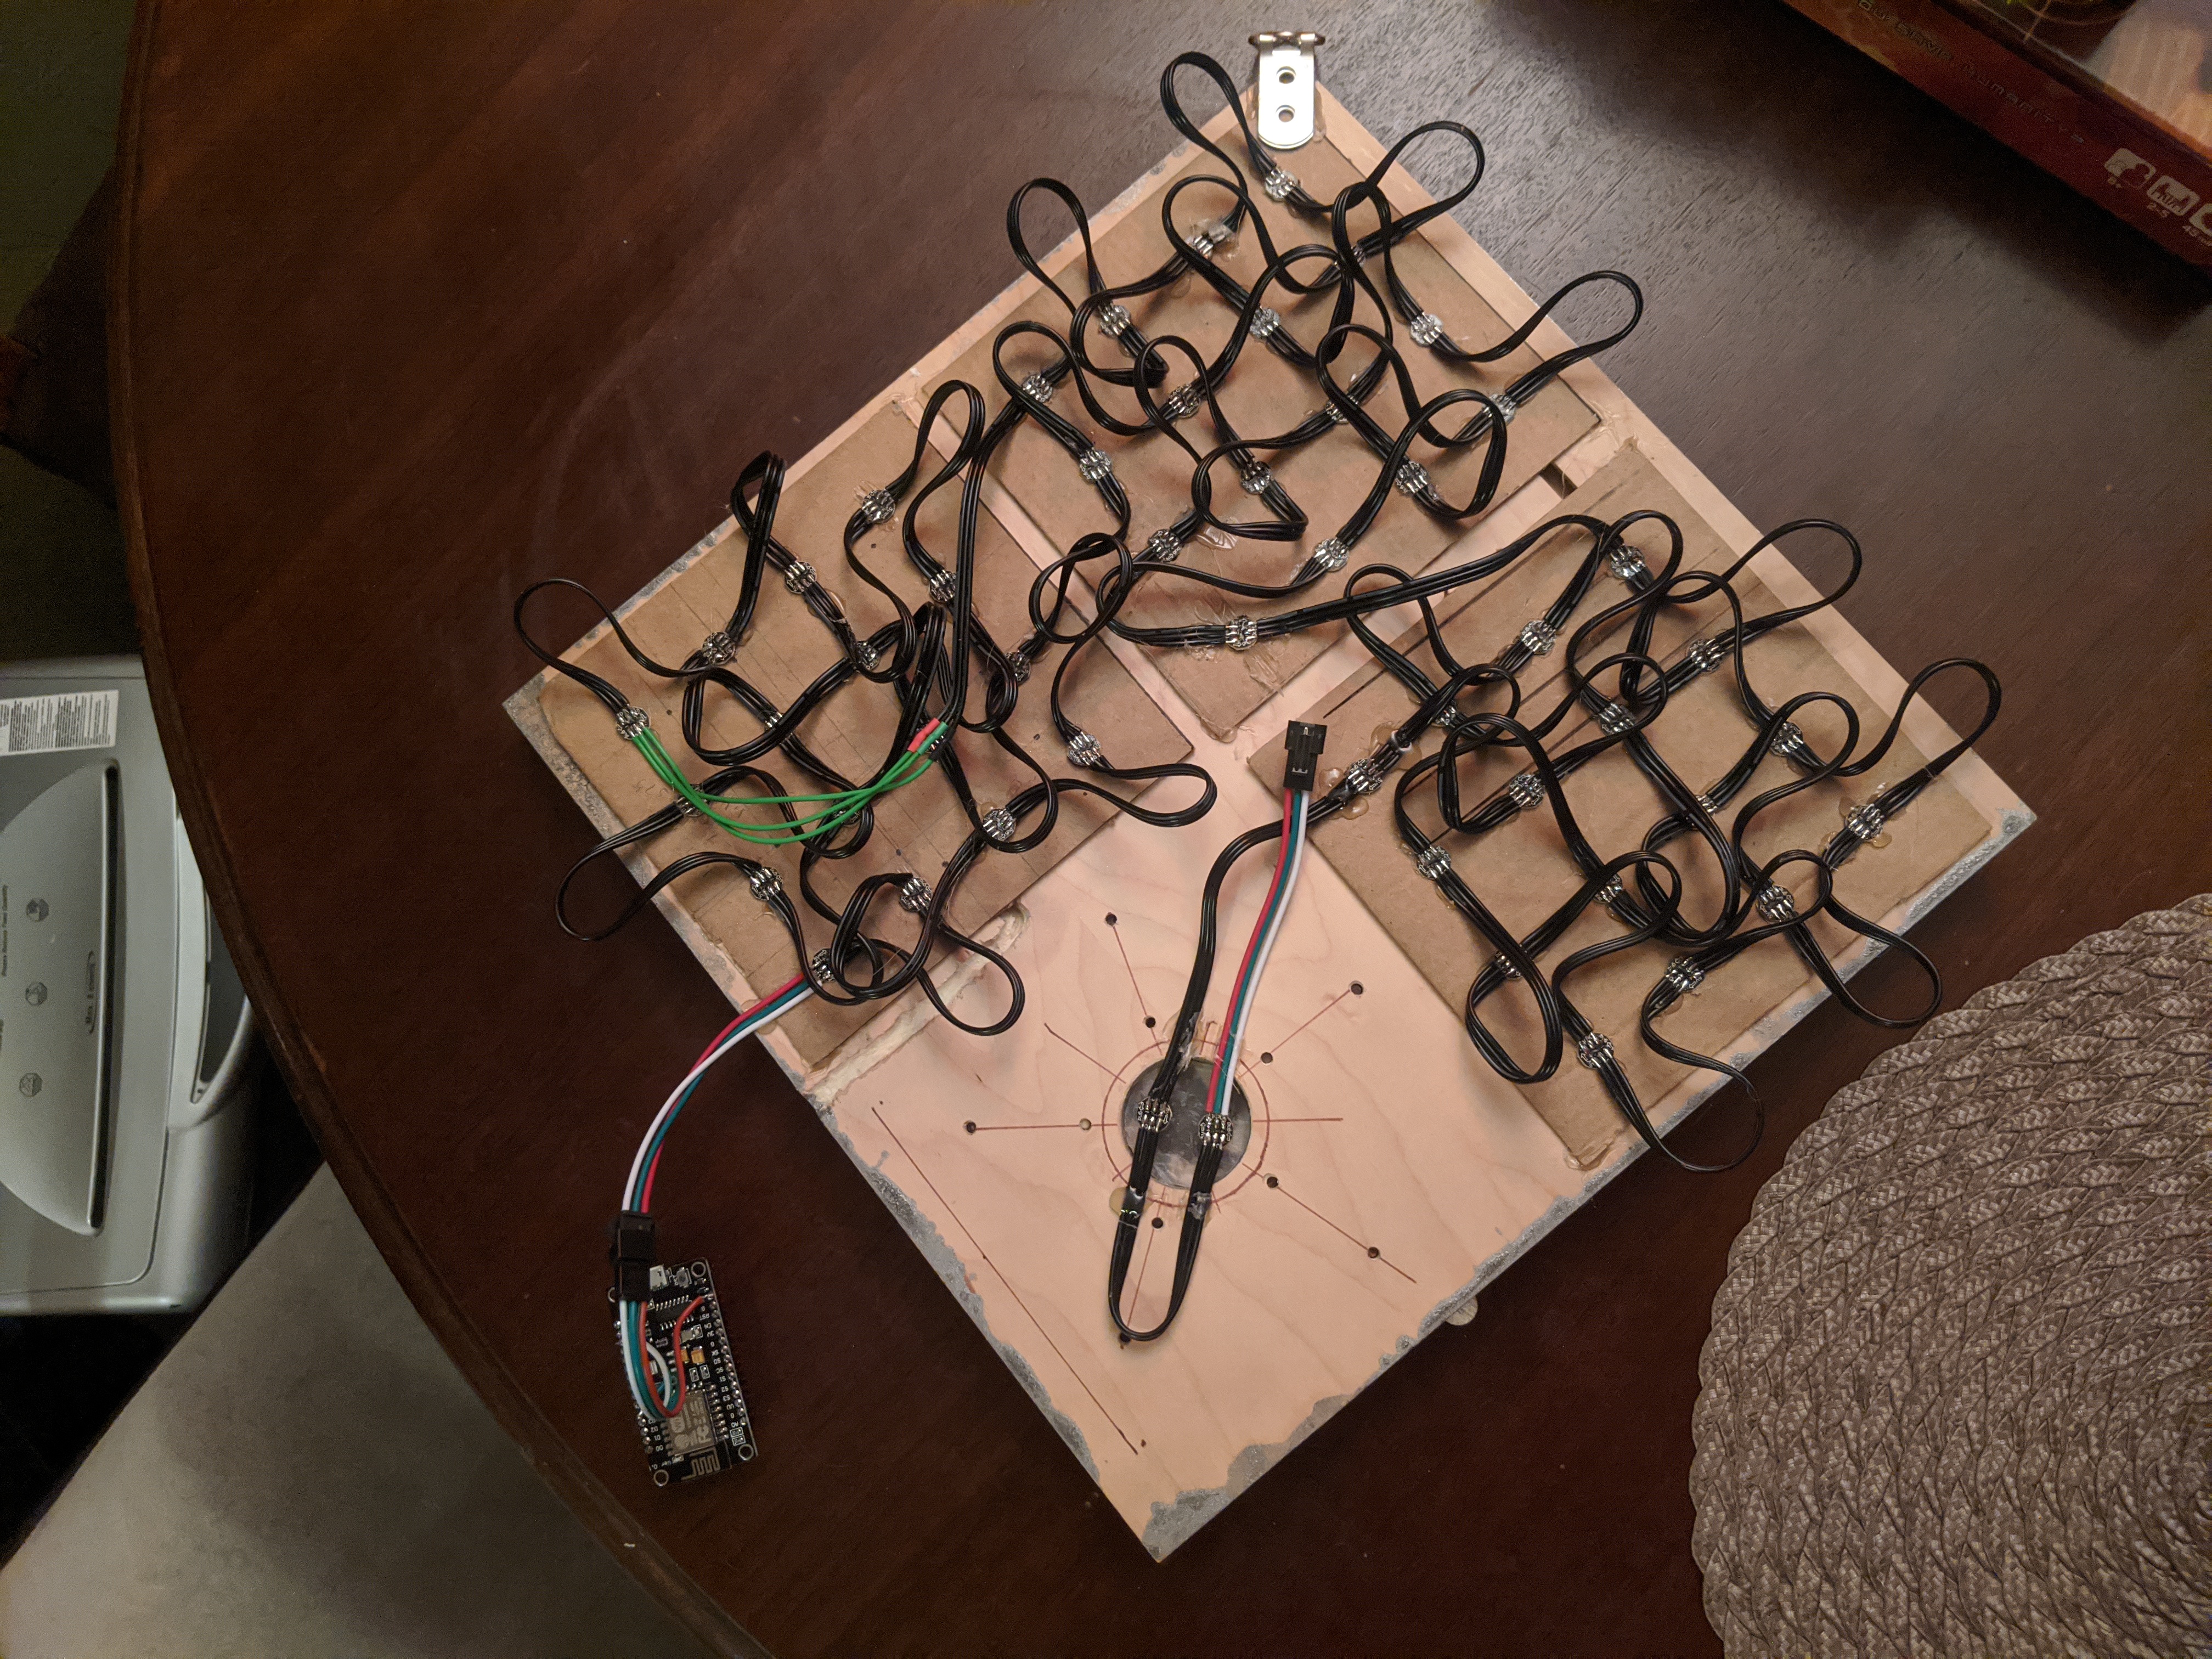
I wanted to keep using WS2812B LEDs and a NodeMCU like in the (Wreath Pixel Display project. Doing a quick look through other projects and Amazon, confirmed they were still a good way to go.
The last couple projects I did (NodeMCU Development and AWS IoT Setup) were somewhat preparatory. I was spending a lot more time doing research to see if I could find a good base of software to build off of.
Looking into lighting controls took me down the rabbit hole of Christmas light shows. Seems like a ton of hobbyist time has gone into controlling massive Christmas light arrays and syncing them with music. https://www.asante.com/christmas-light-controller/how-to-make-your-christmas-lights-flash-and-synchronize-to-your-music/ was a good run down. After spending some time messing with Vixen it seemed like making a controller support ACN(E1.31) would be the relevant standard to support to make my project compatible with these open controllers.
As I was looking into ACN Arduino libraries, I stumbled on something that ended up giving me the perfect solution. The WLED project is one of the best projects I’ve found. It basically put together everything I’ve learned about making IoT LED projects, and packages it in an easy to use interface. Basically it sets up a series of services on the NodeMCU. The most basic functionality is to act as a web server with a UI for controlling an attached array of LEDs. It has:
- Good documentation
- An easy to use web interface, and Android app
- Extensive features list
- Highly customizable. Both in persistent settings and with sections reserved for custom code and features
- Long set of built in lighting effects with built in previews in the UI
It supports MQTT as well as ACN to, making it easy to interface with other controllers. Once I found this project, there was no longer any need to write any firmware for the project.
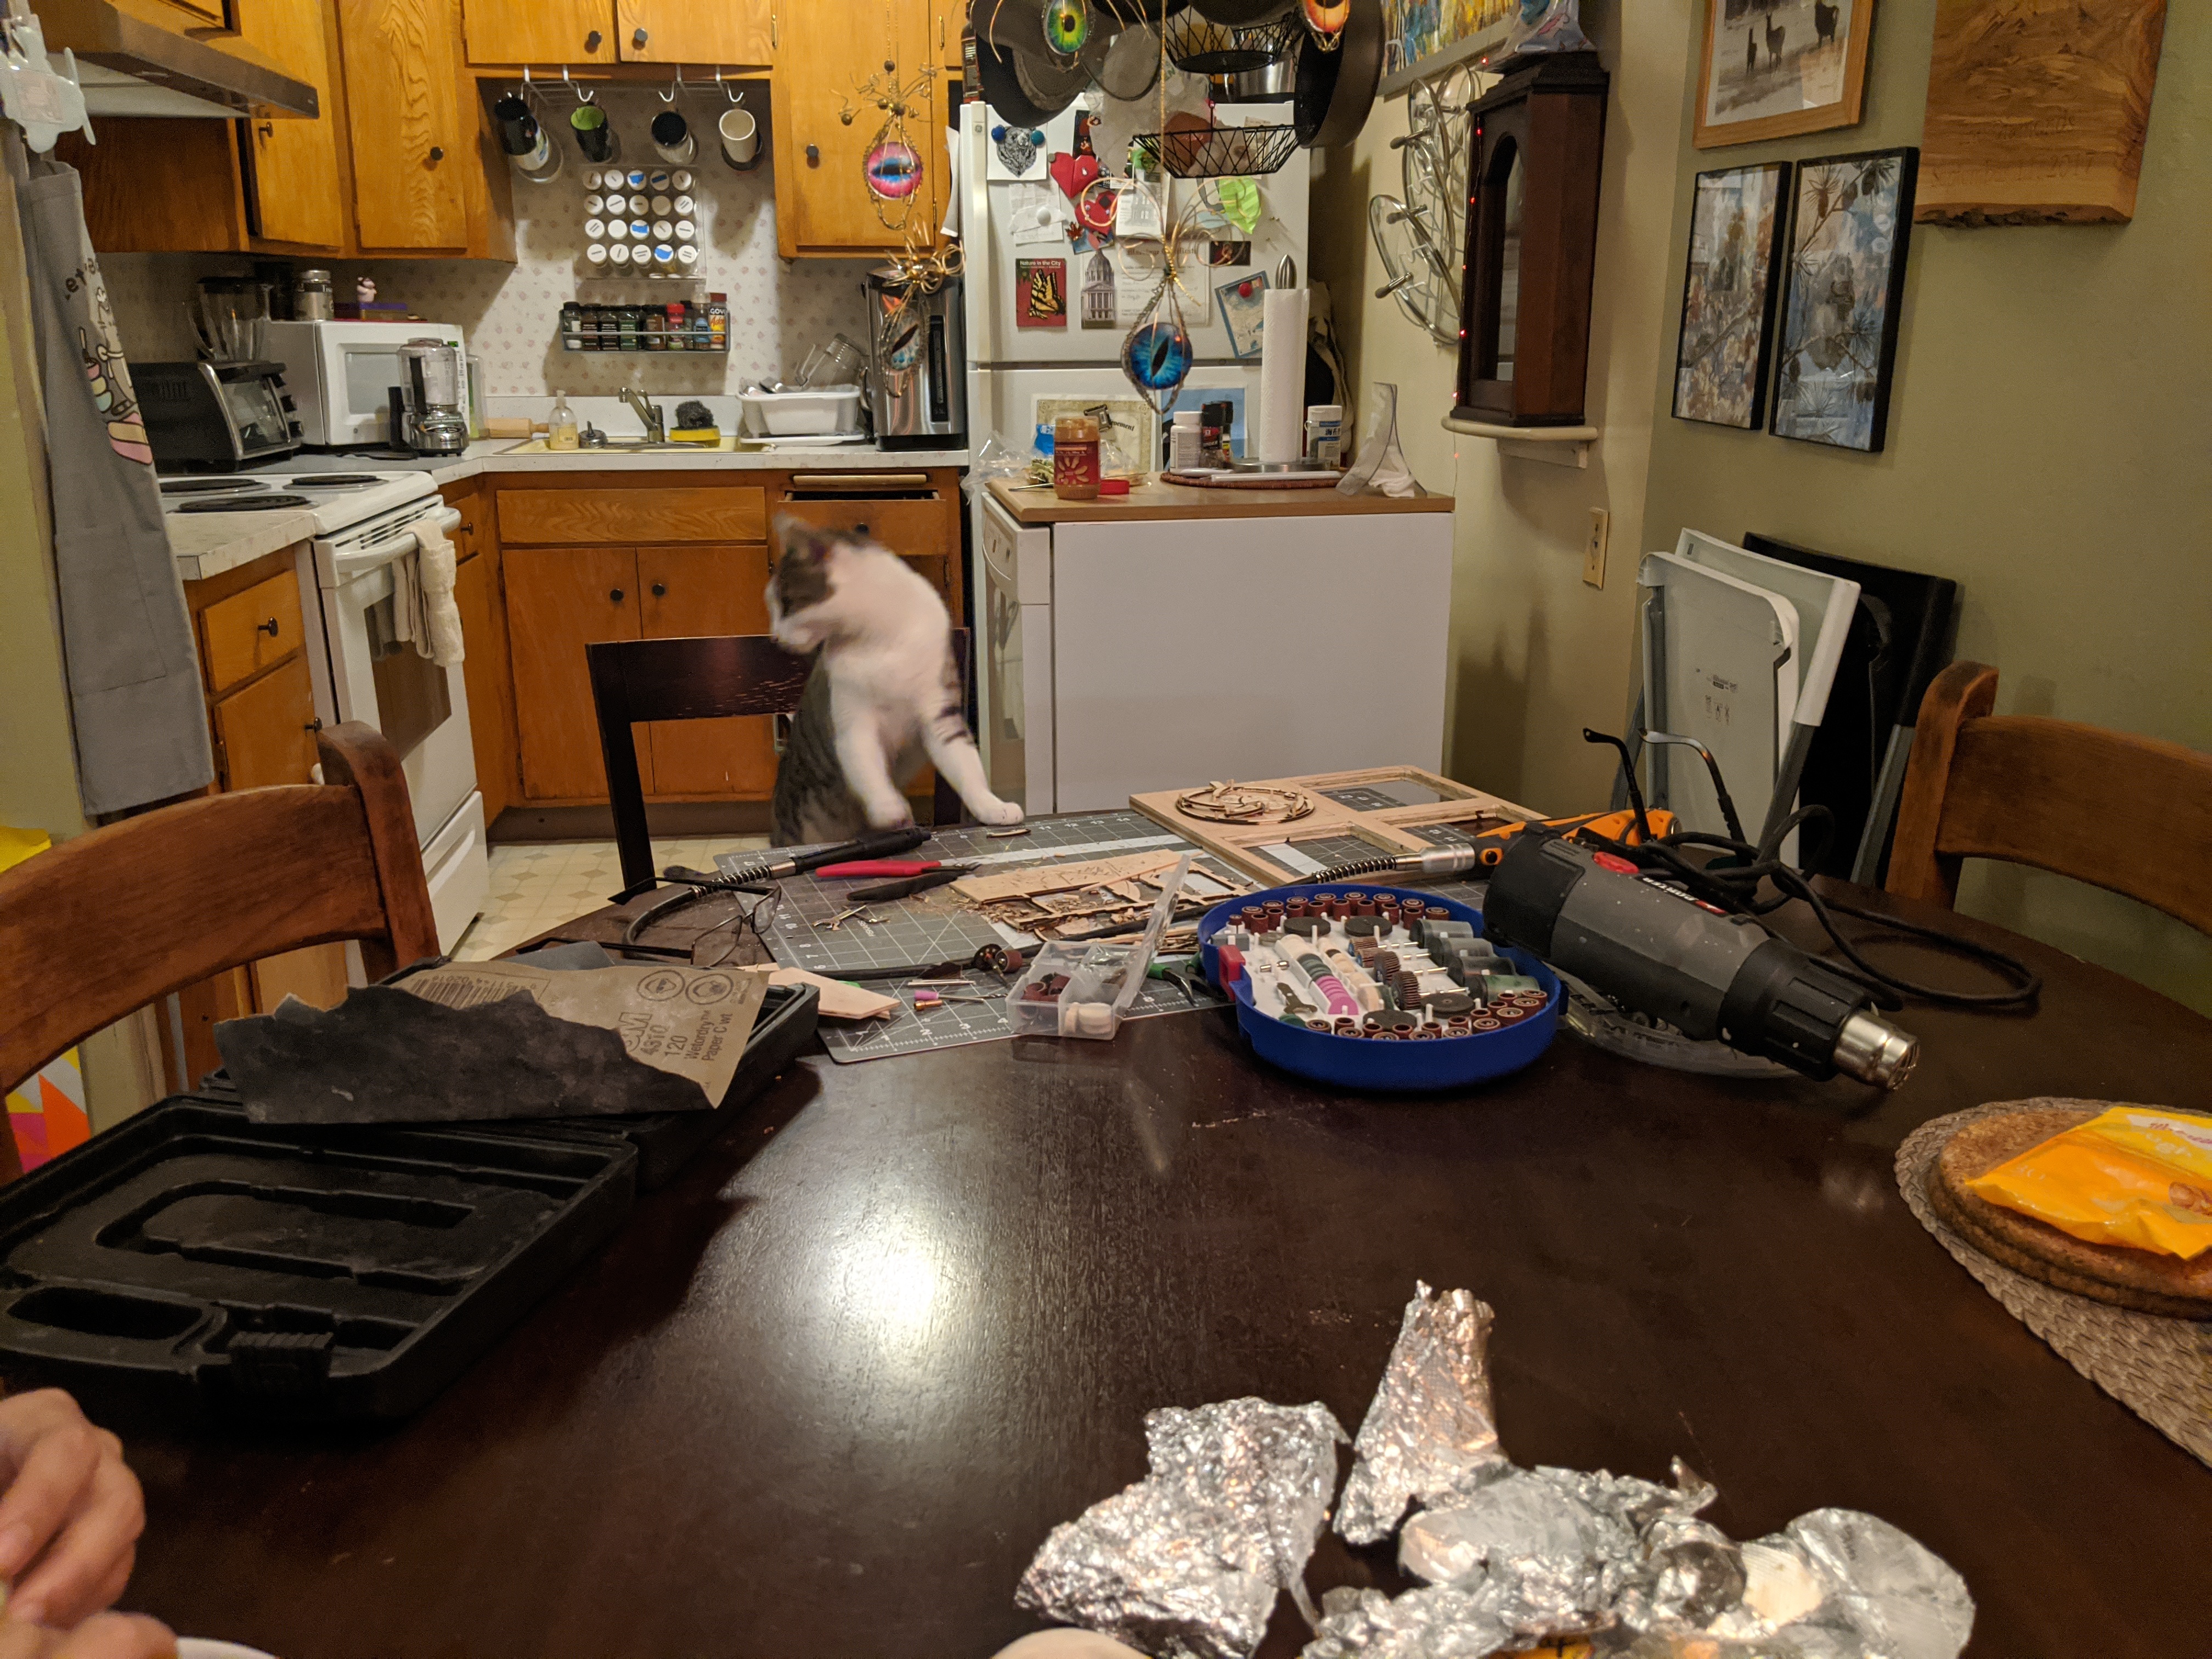
Build Process
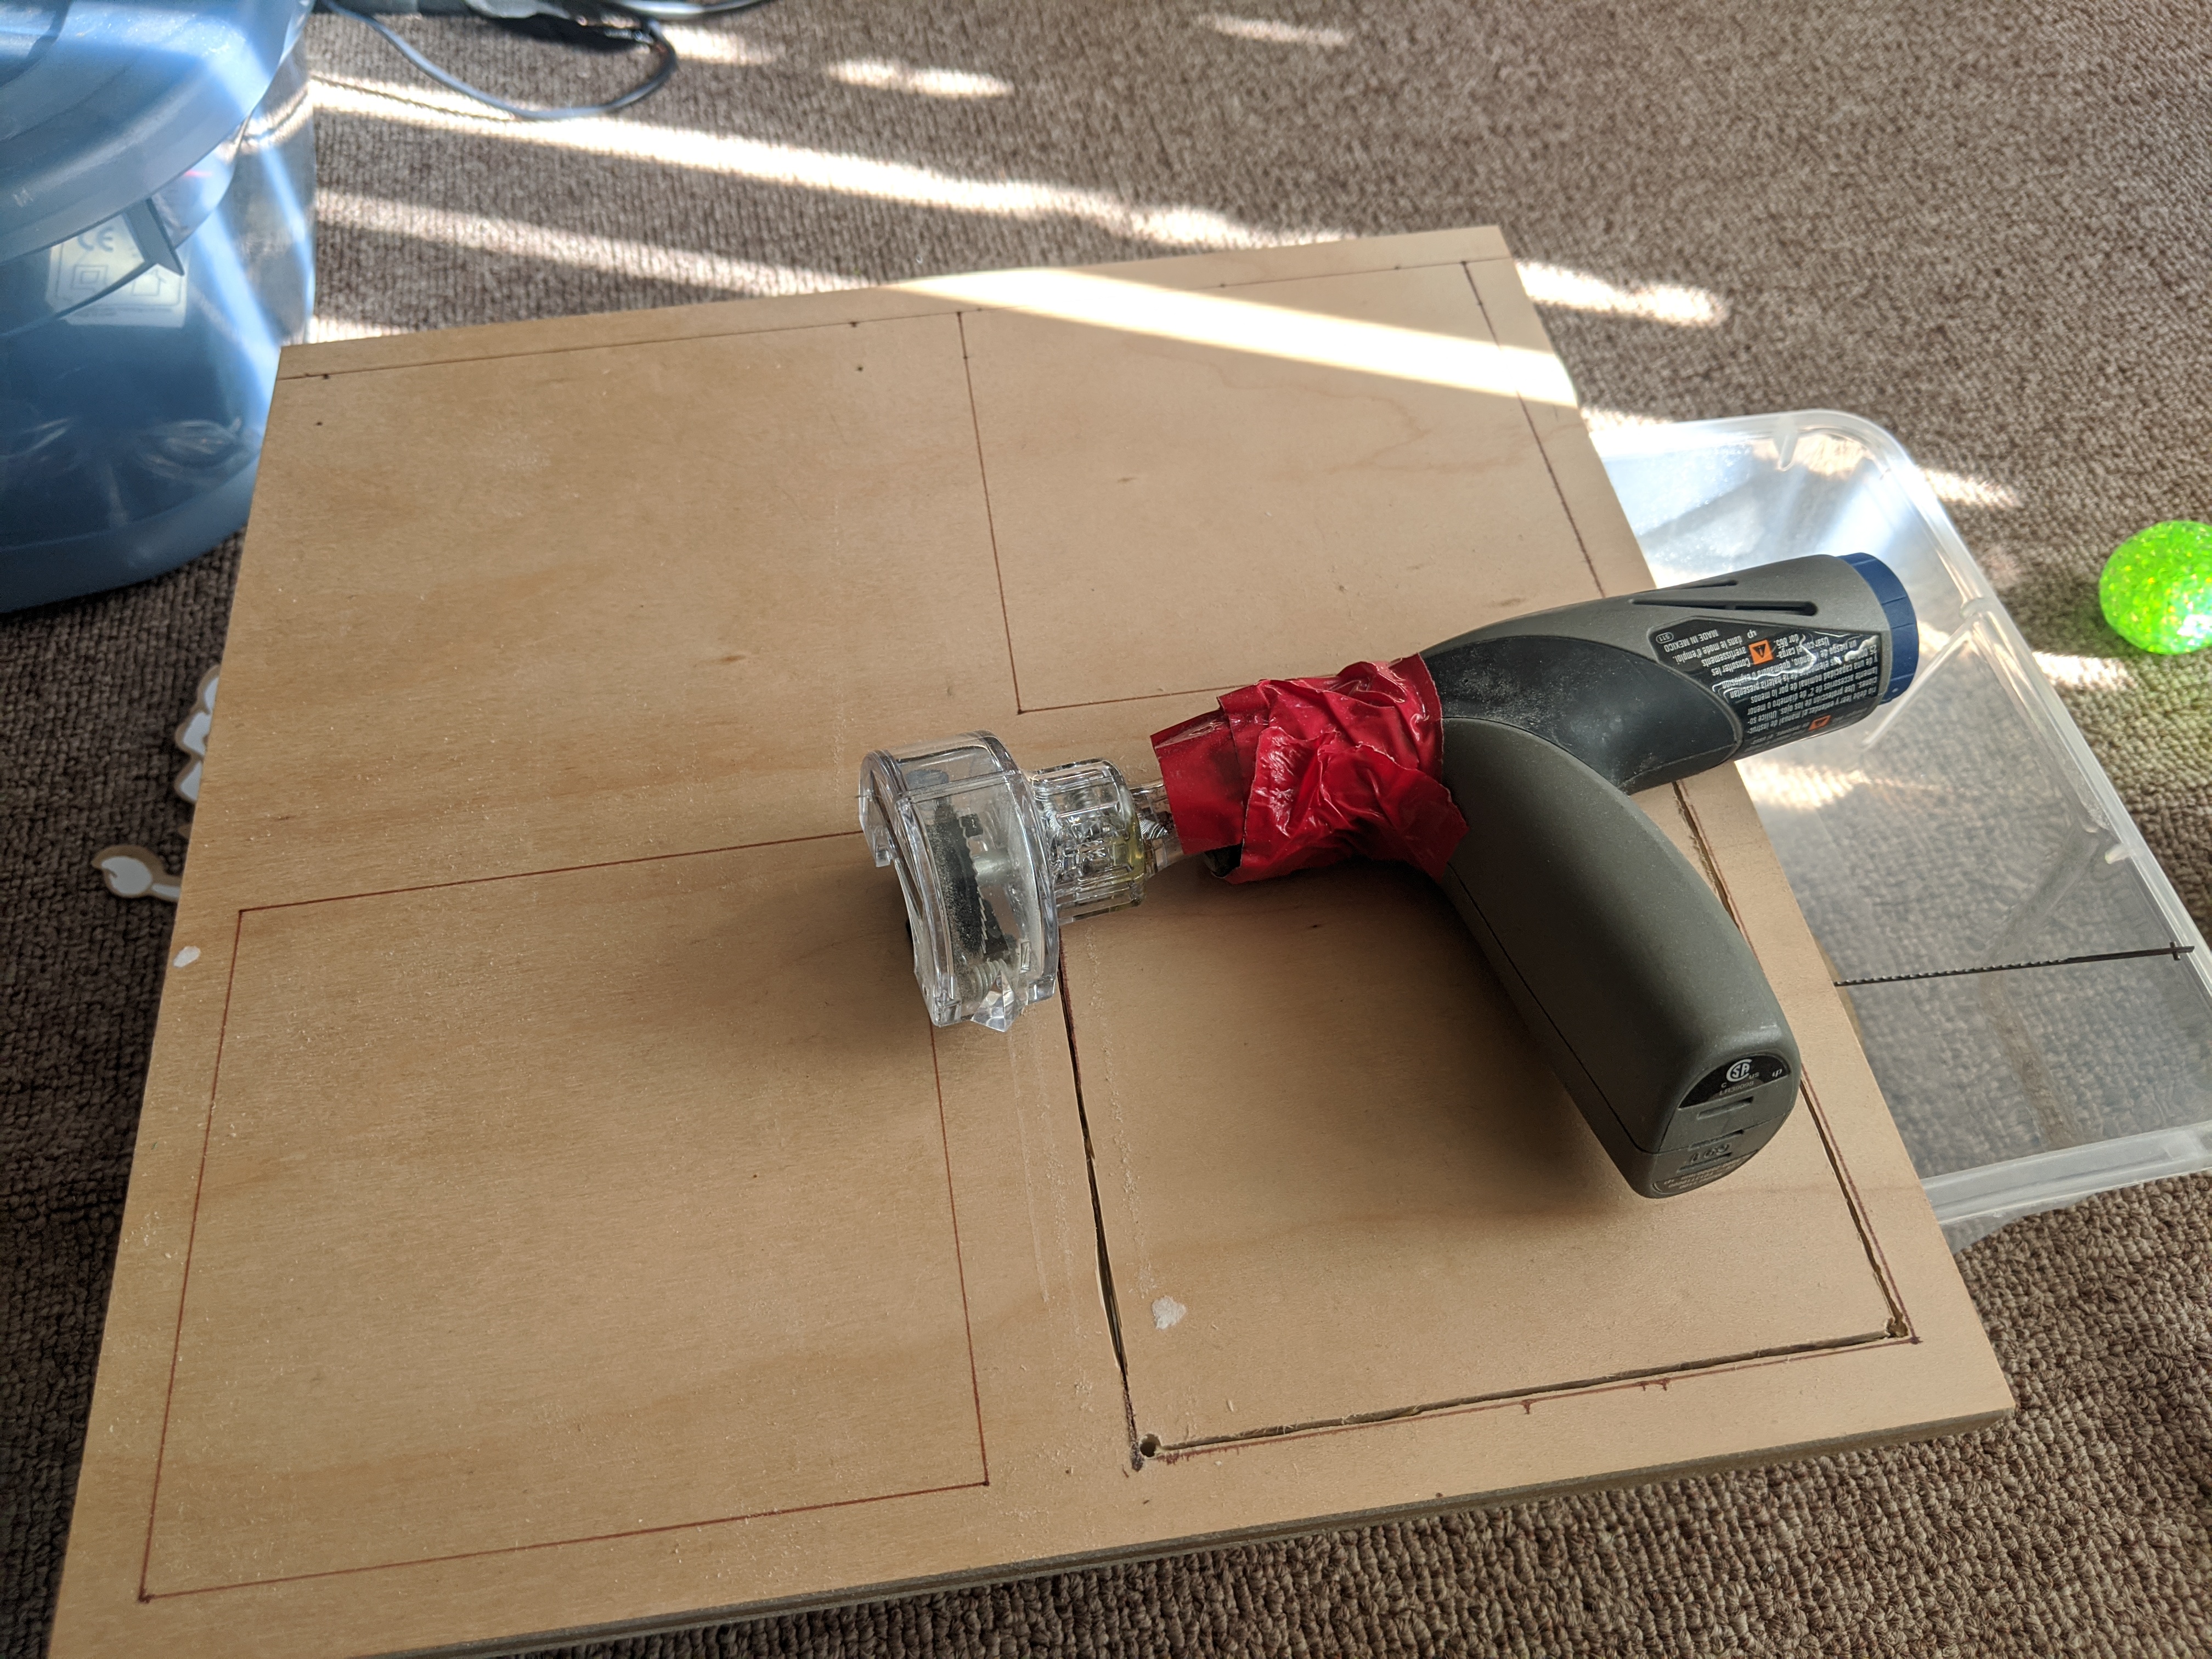
The first step was cutting out the frame. I didn’t really have a great way to do this, so I bought a tiny saw attachment for my Dremel.
Next was cutting out the chibi characters to put in it. I had a to take a bit of a detour when one of the mirrors in the cutter shattered:
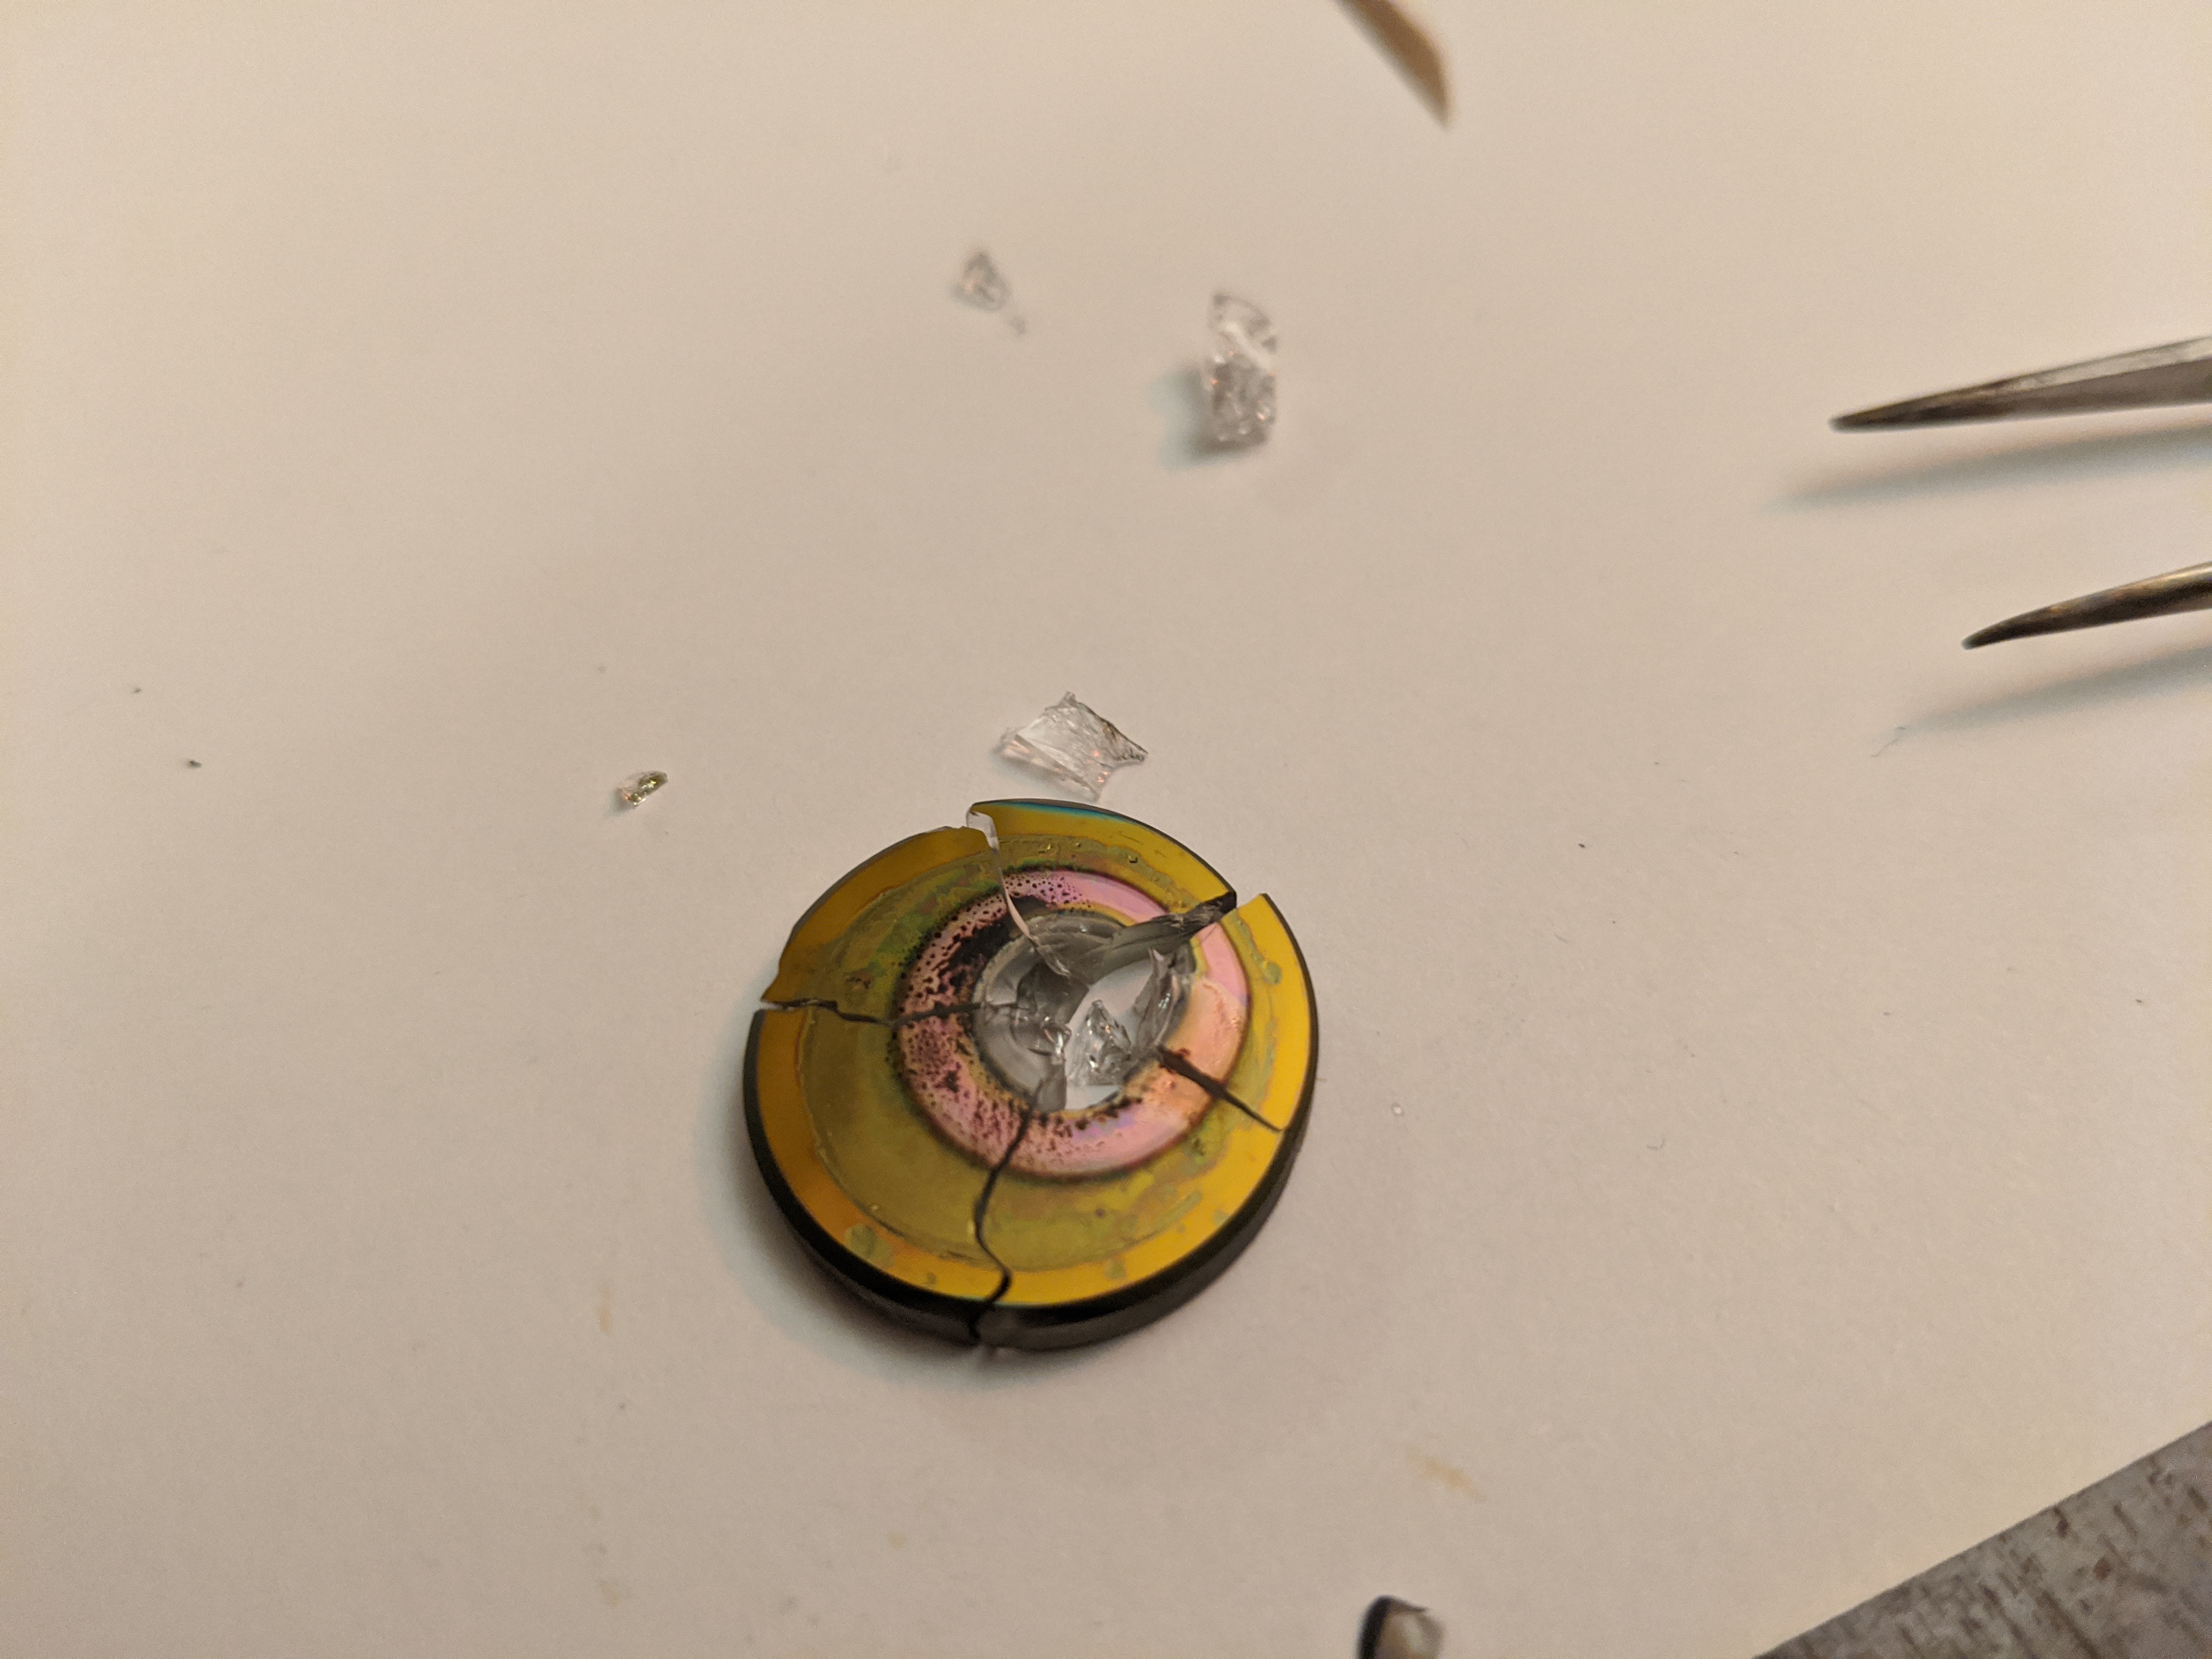
I got a 20 mm gold coated Si mirror as a replacement, and had to spend some time recalibrating everything. I even tried to fix the placement of the workspace inside the cutter:
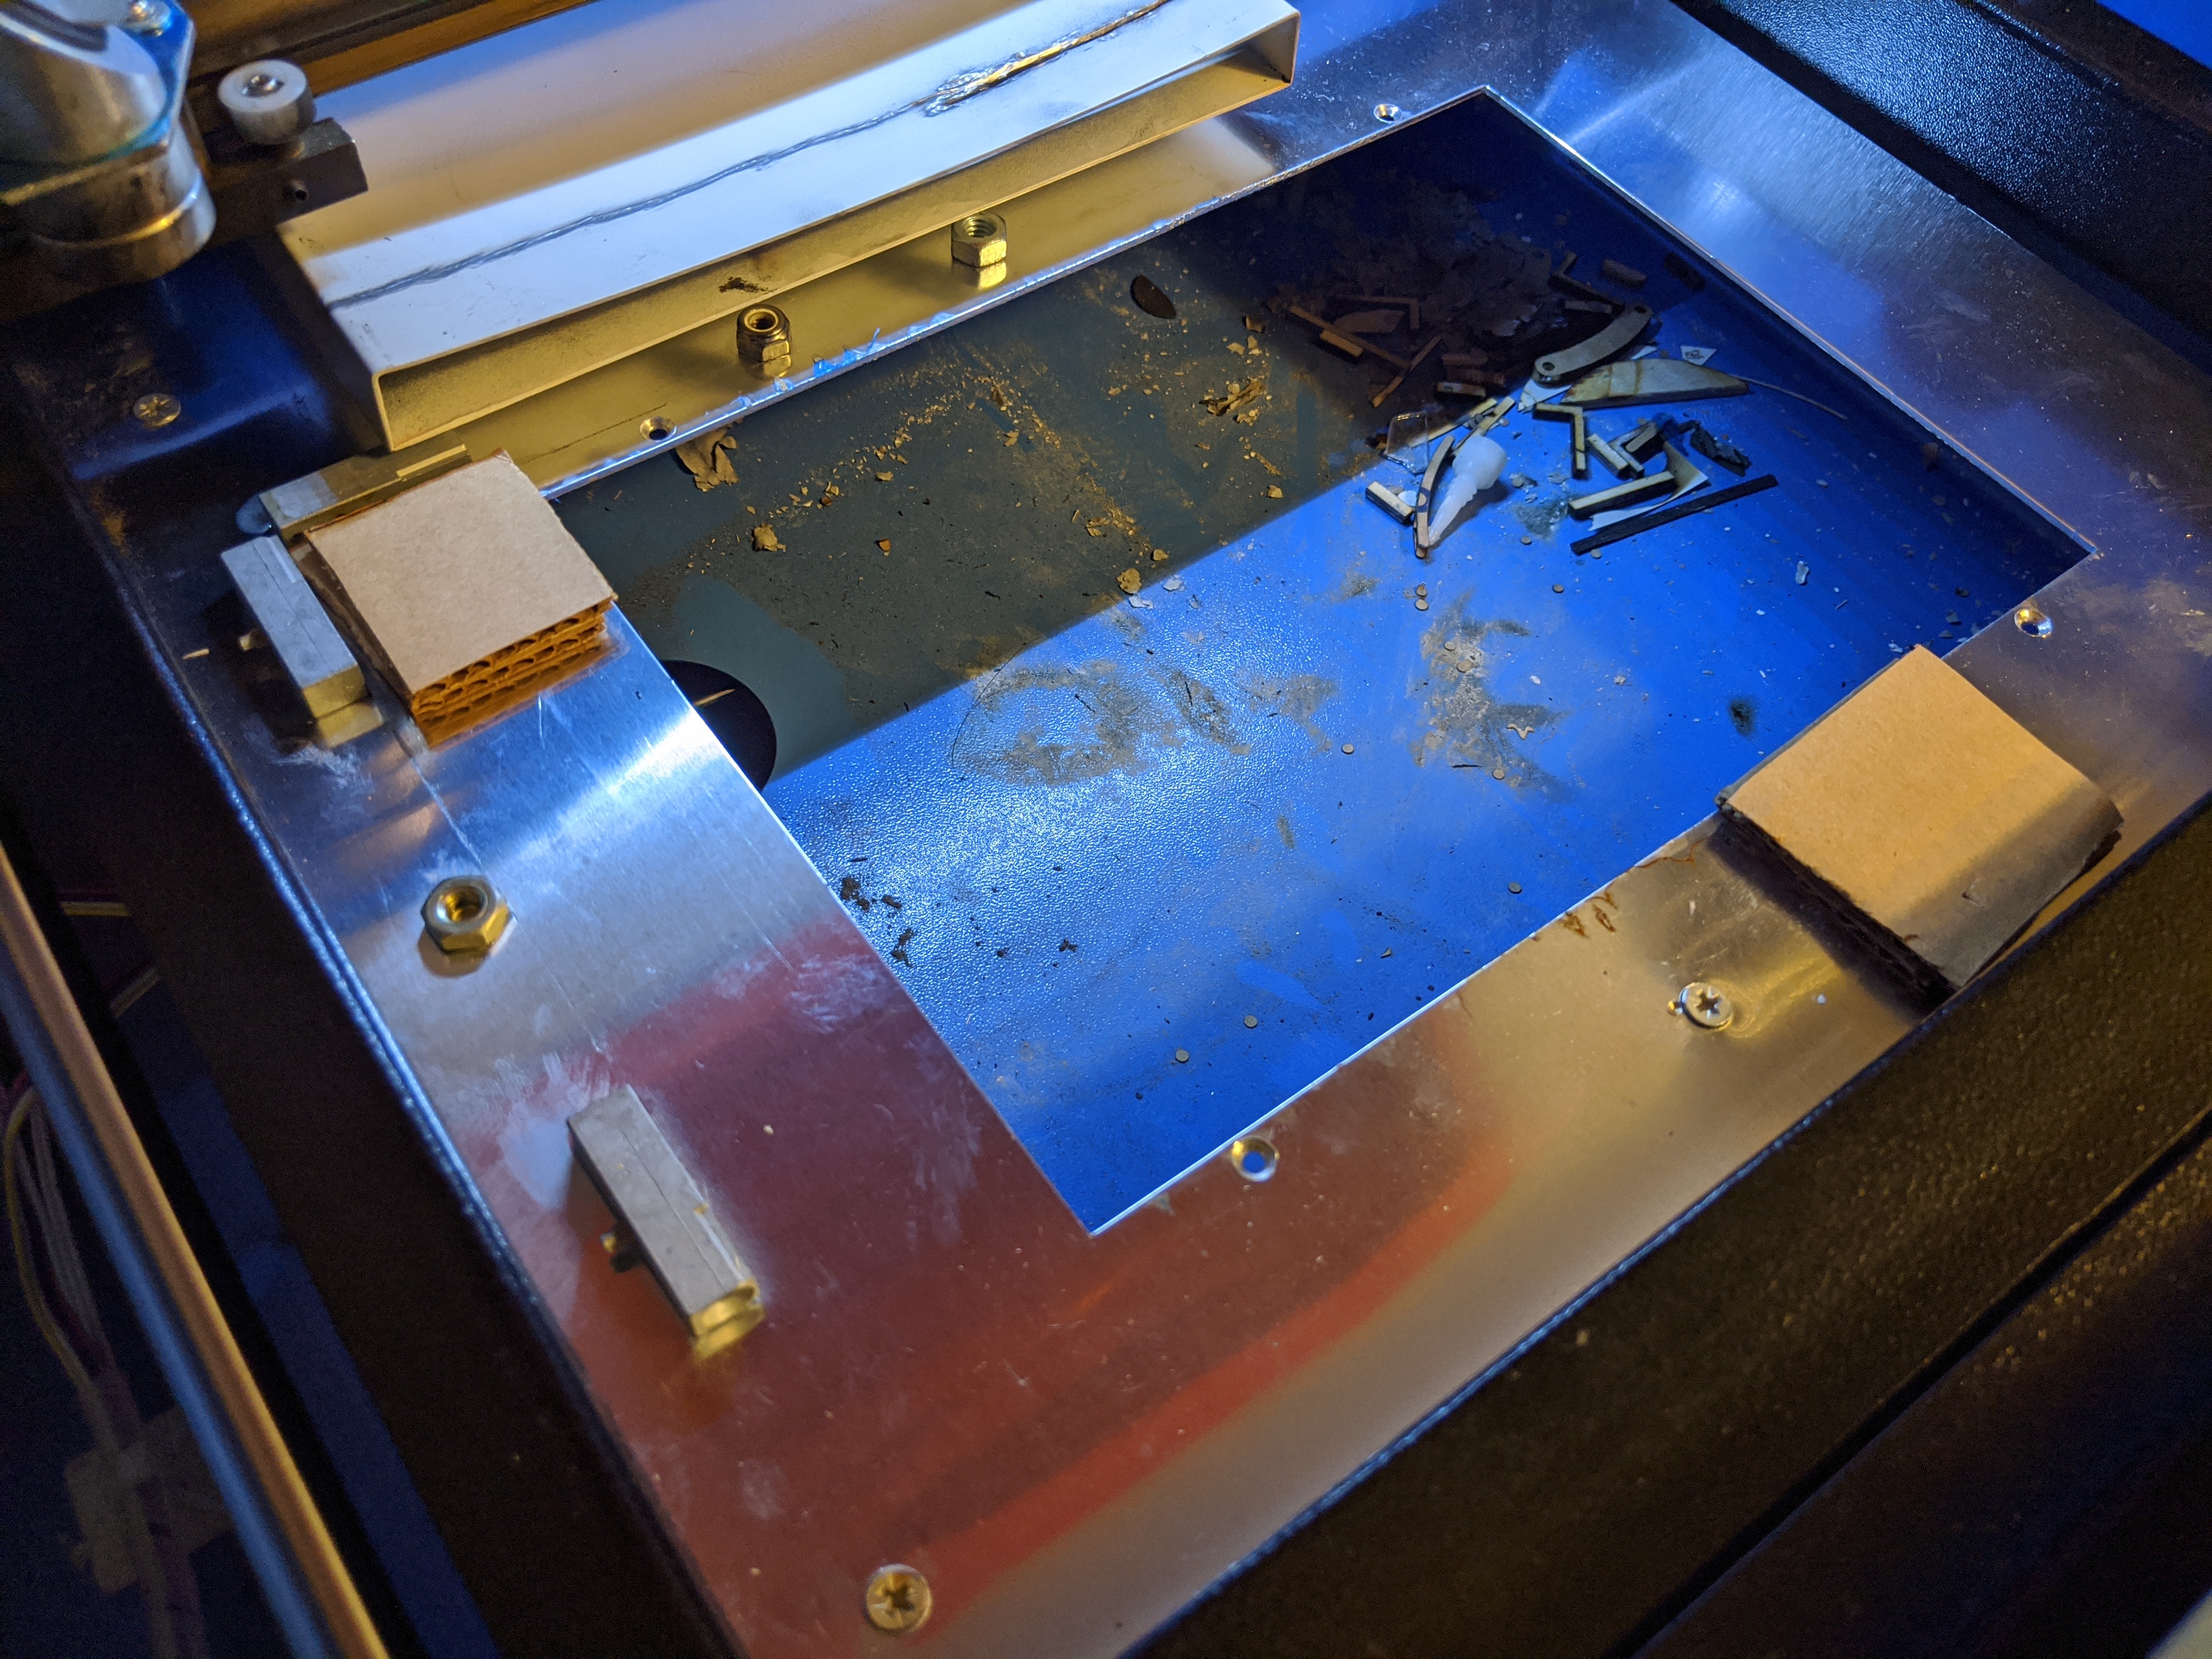
One of the flaws is that the exhaust port blocks the laser for the first 15mm or so. I managed to cut into it with my Dremel, but would have been extremely slow going. I did figure out that the laser focus was a centimeter or so above the work surface, so I added some spacers and guiding pieces to make it easier to line pieces up and have them in focus.
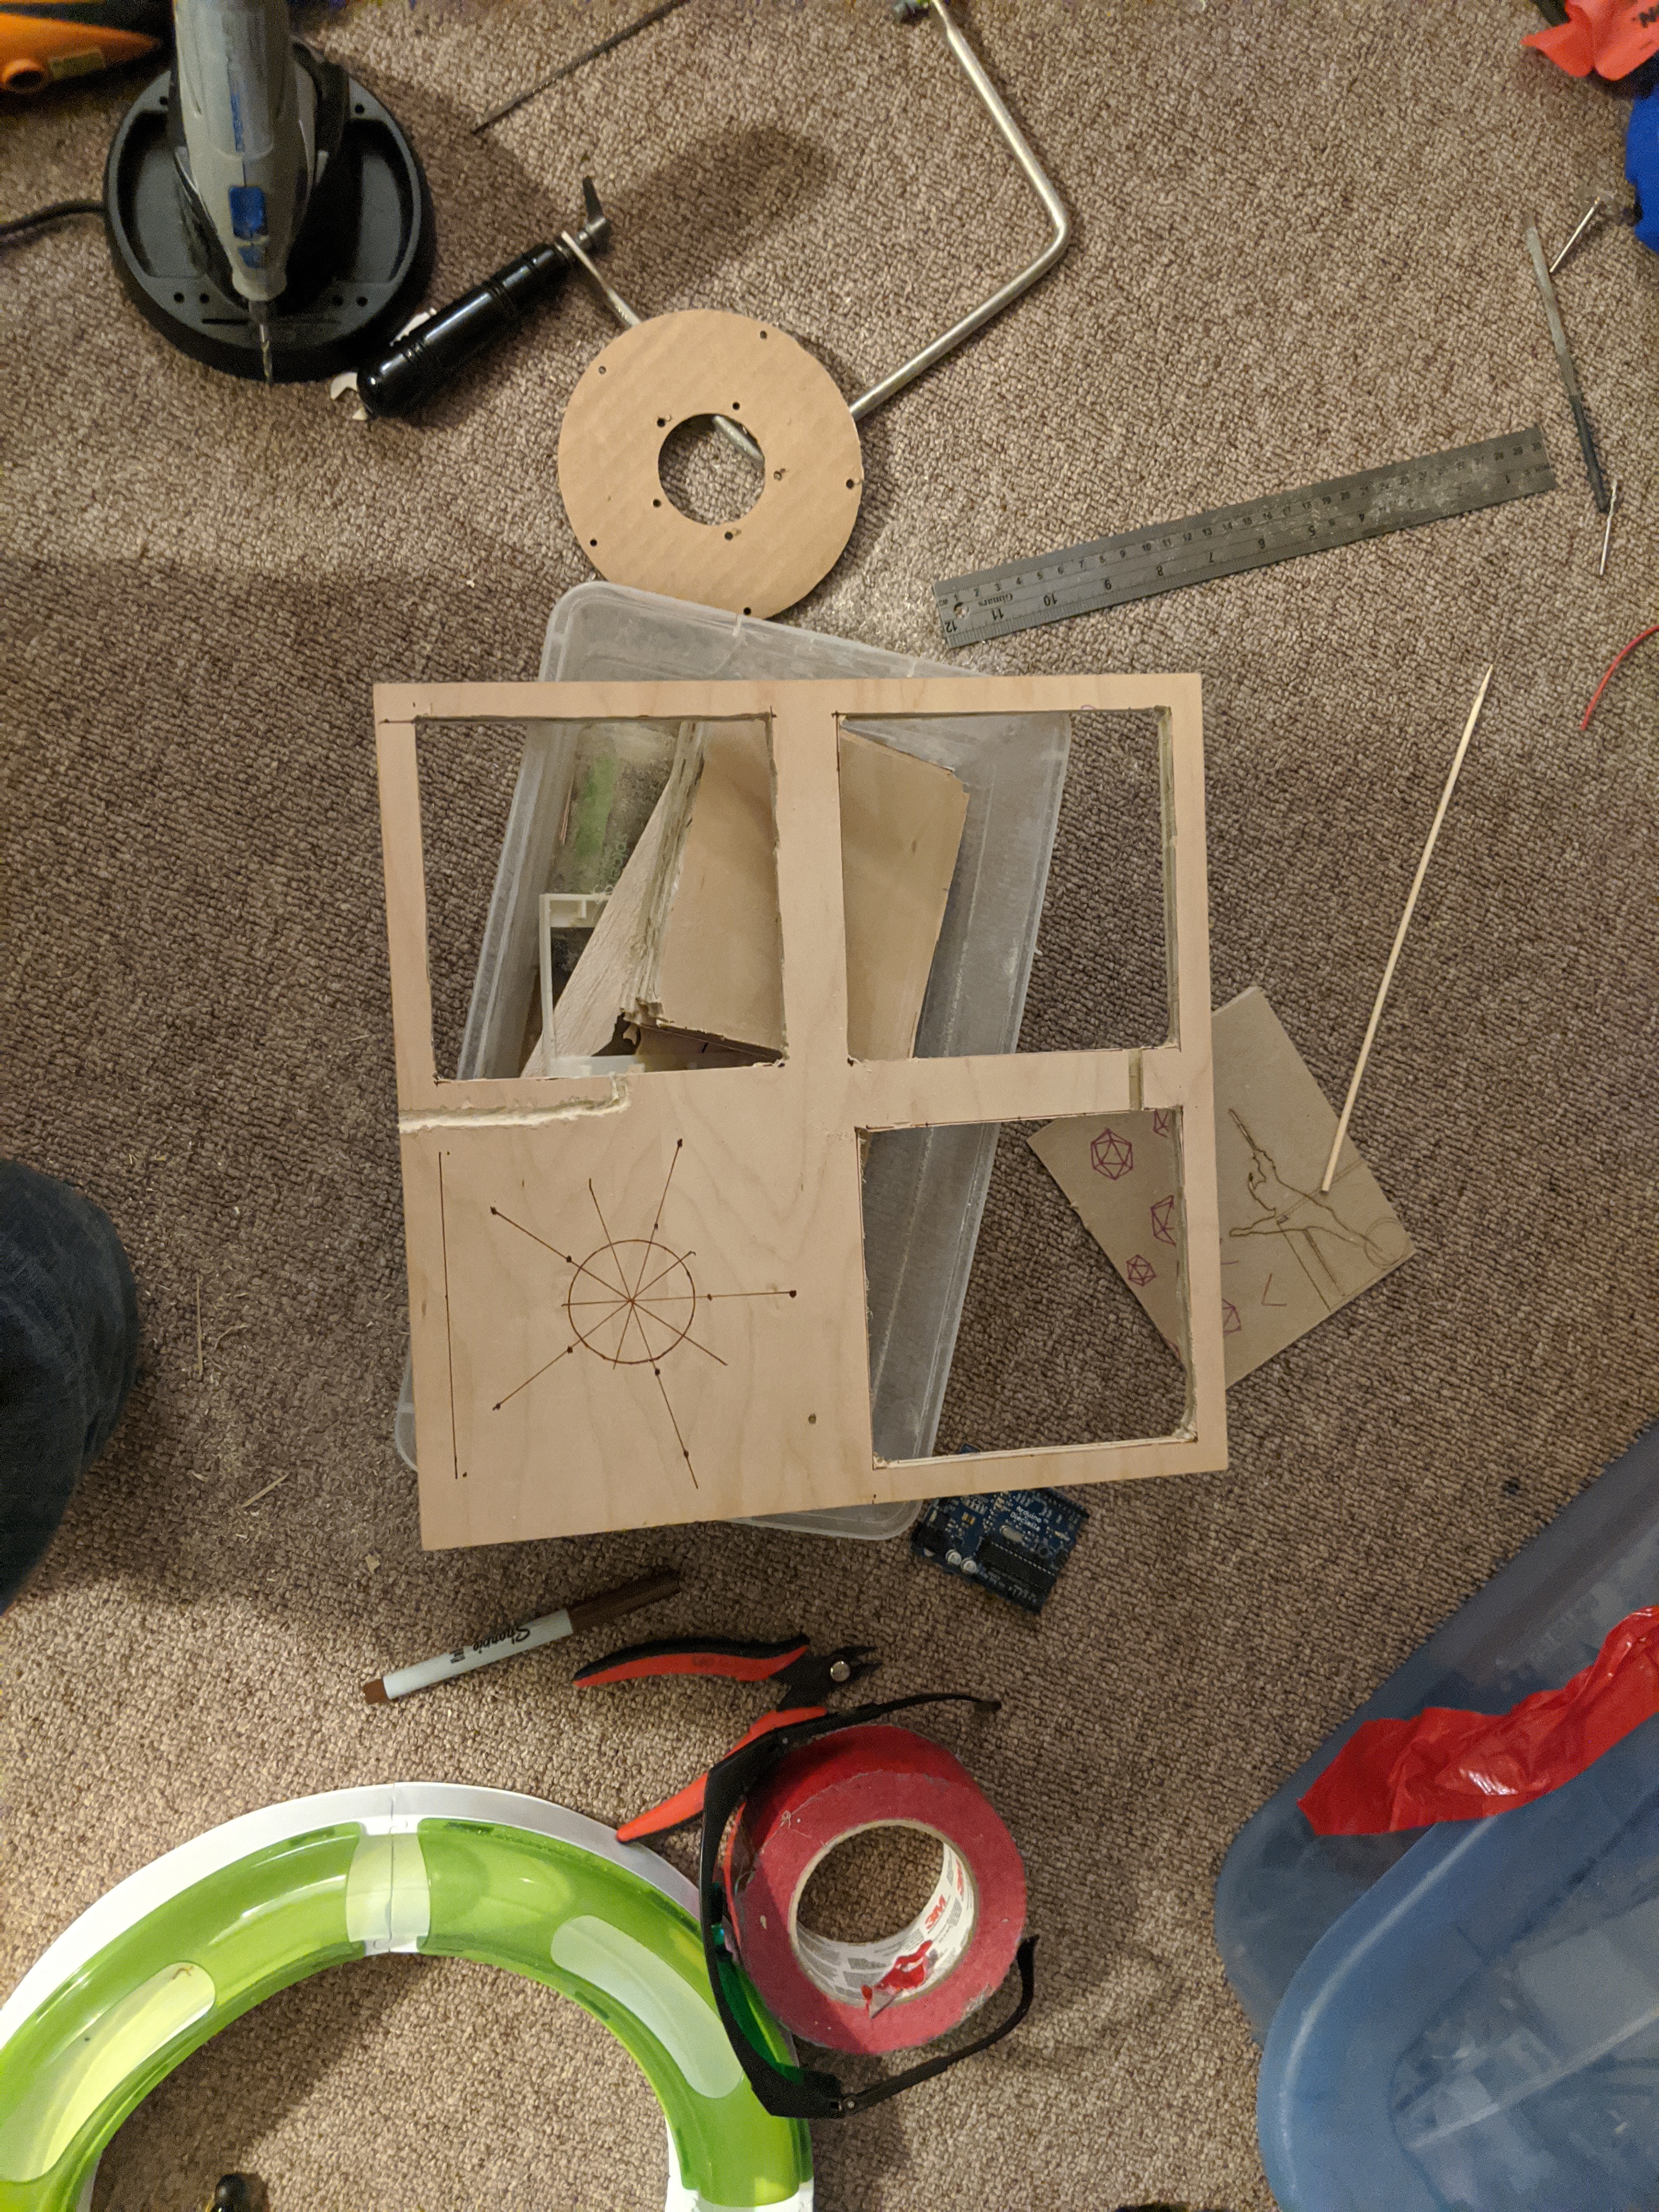
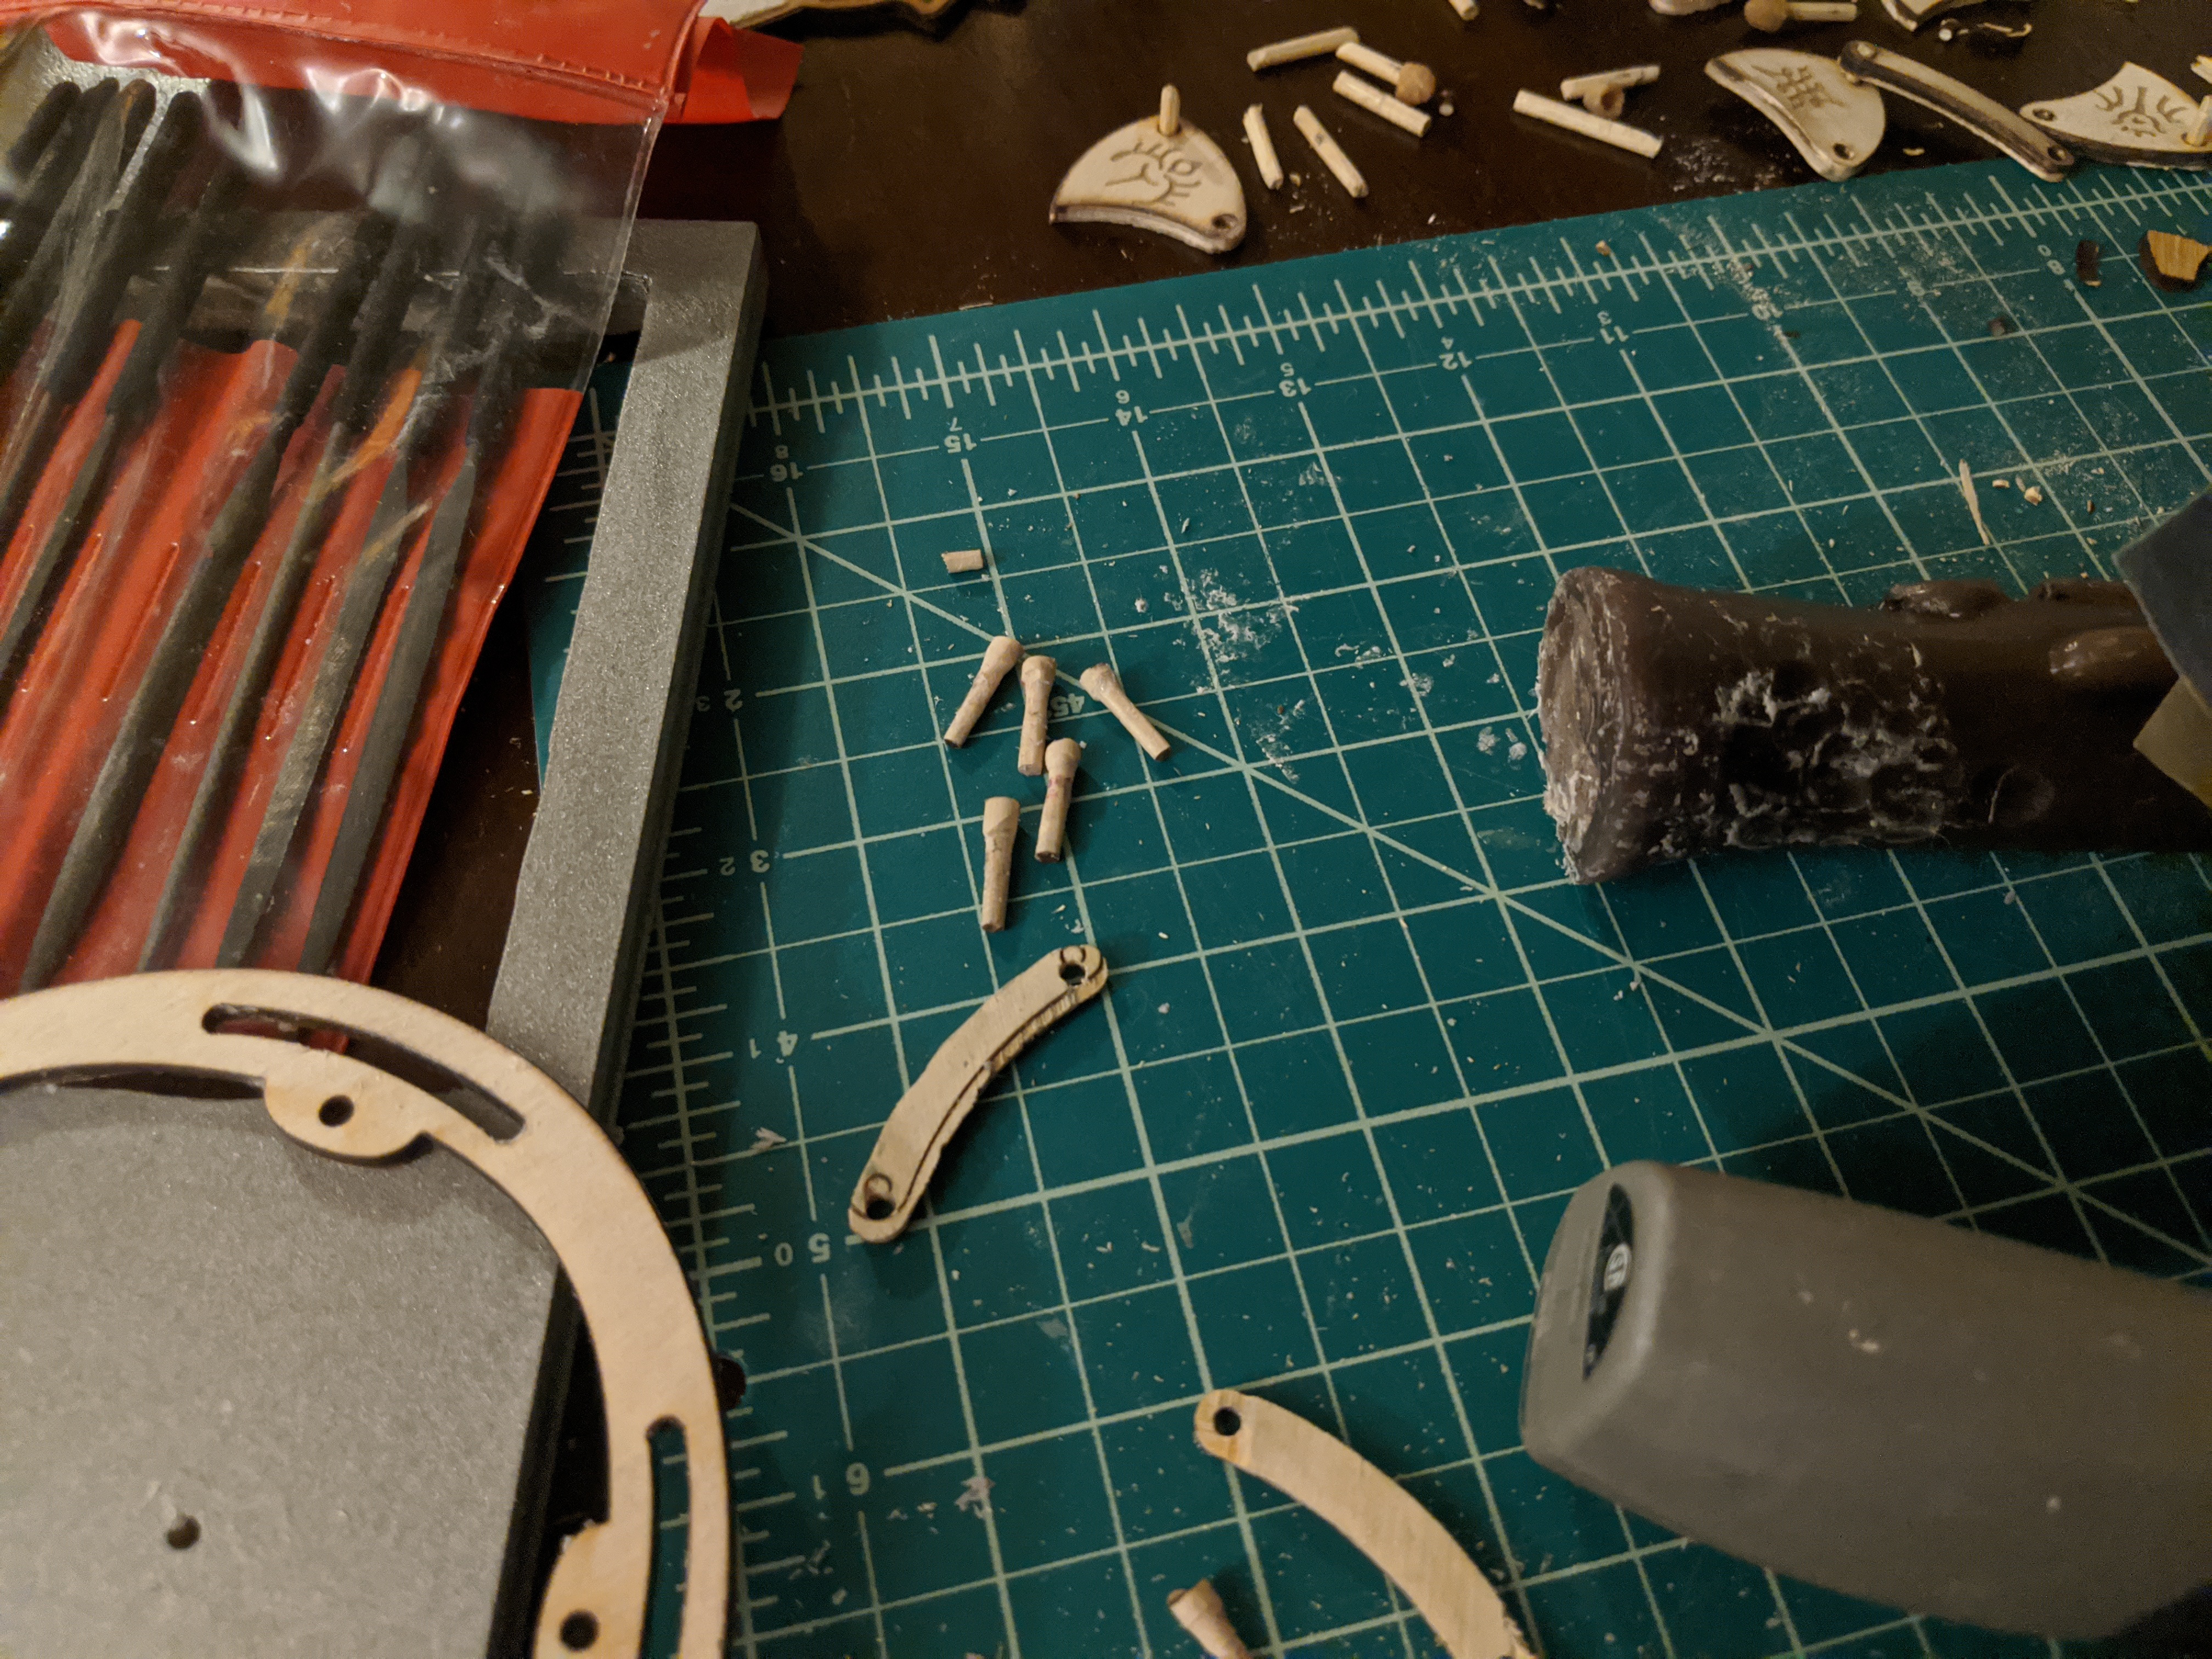
Finally I was able to start cutting out the pieces and painting them.
I had resized the iris pieces to fit some cooking skewers I had lying around. Unfortunately, this compromised the designs structural stability and I ended up having to redo it.

Our cat was mildly interested in helping.
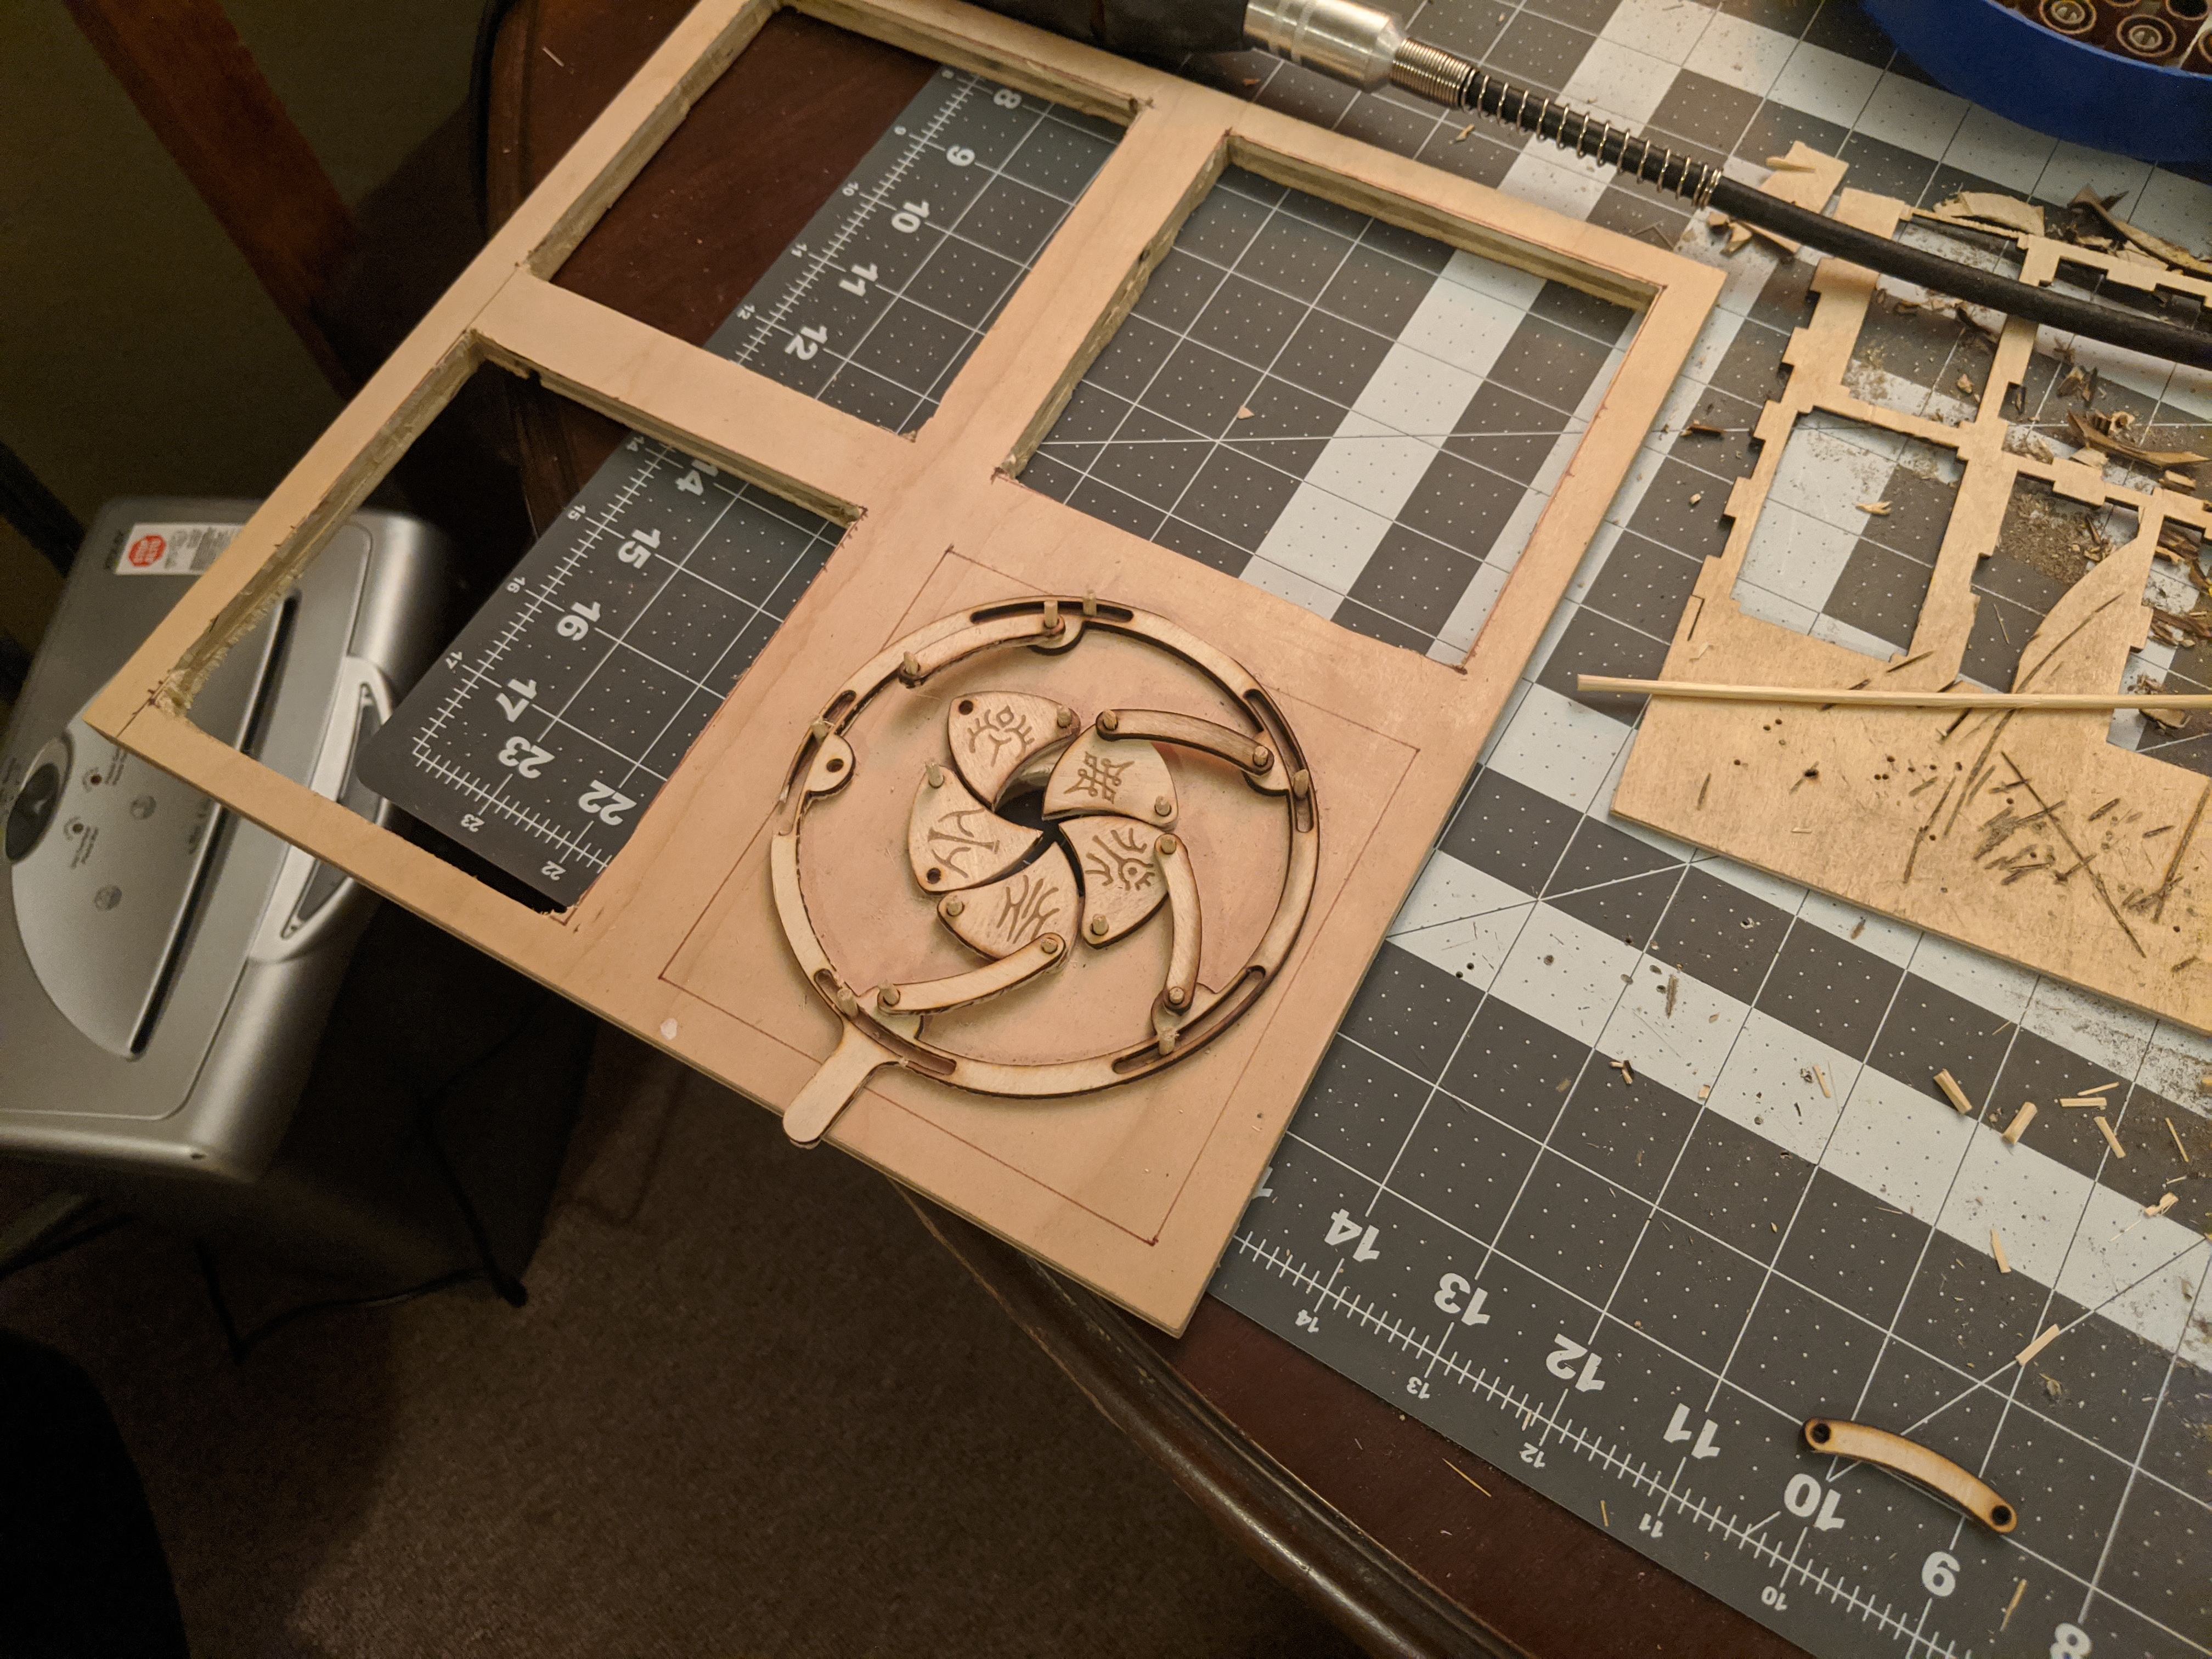
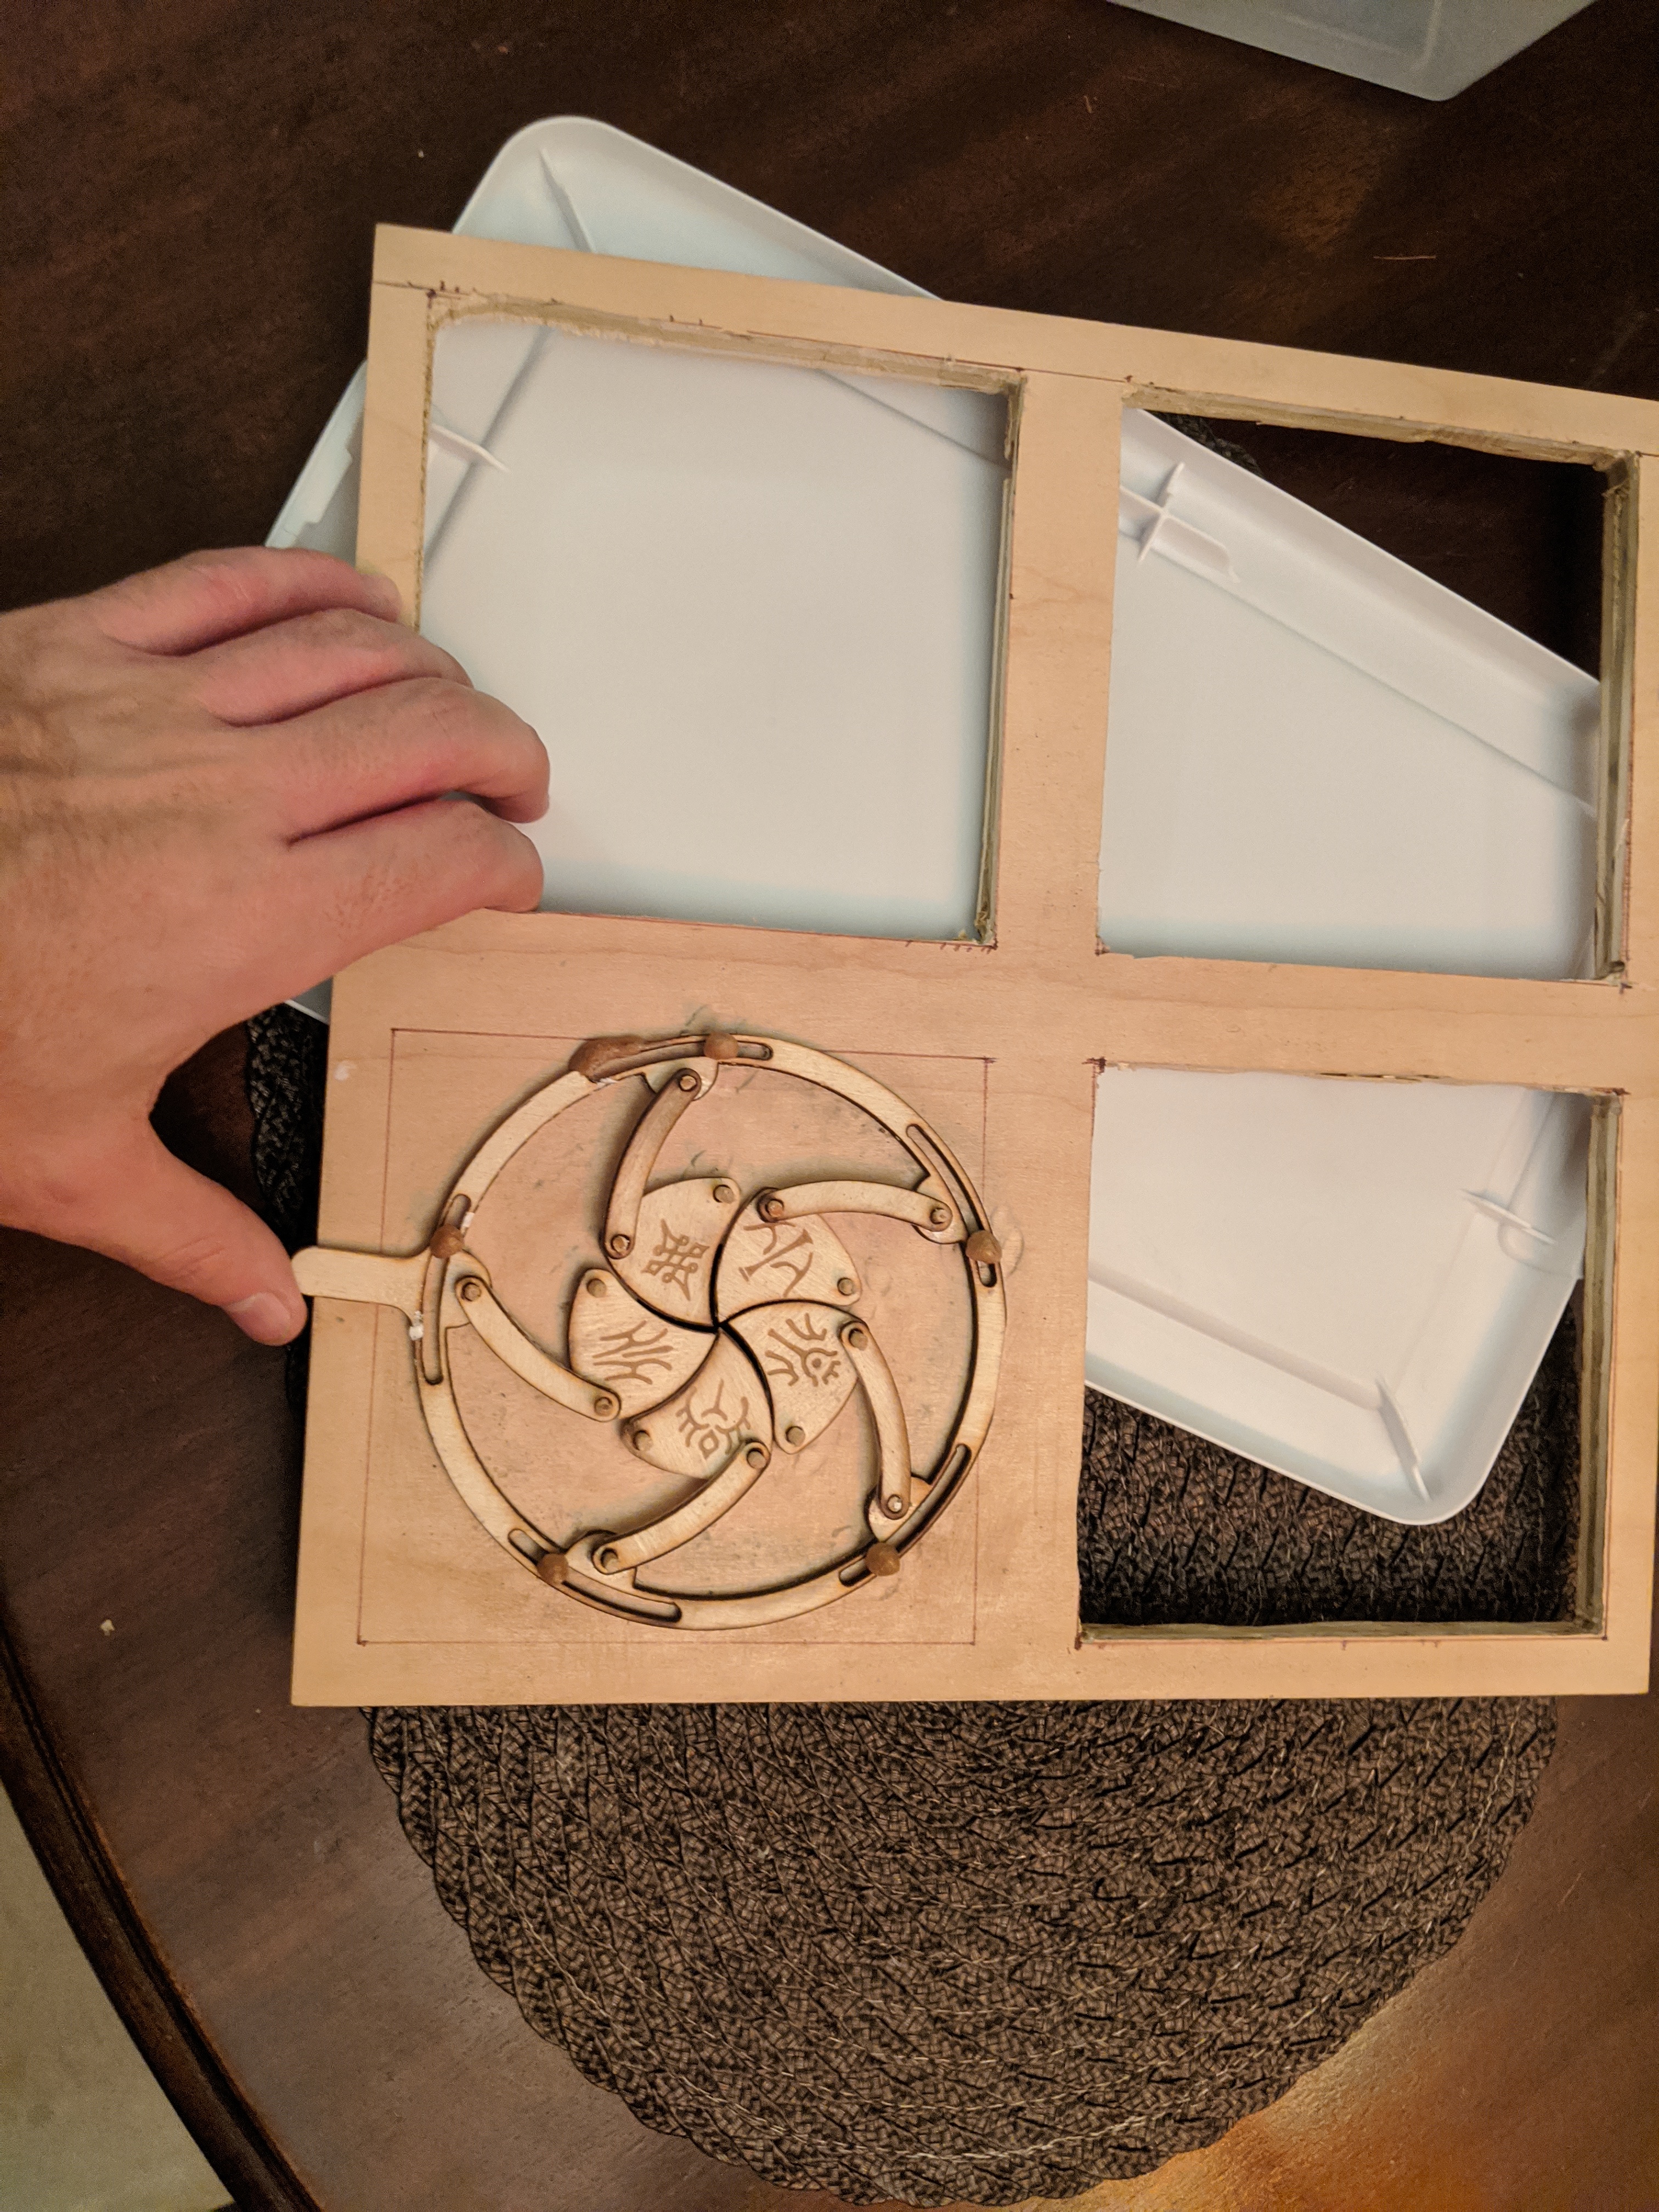
I ended up using thicker wooden dowels and sanding them down to make more effective pegs.
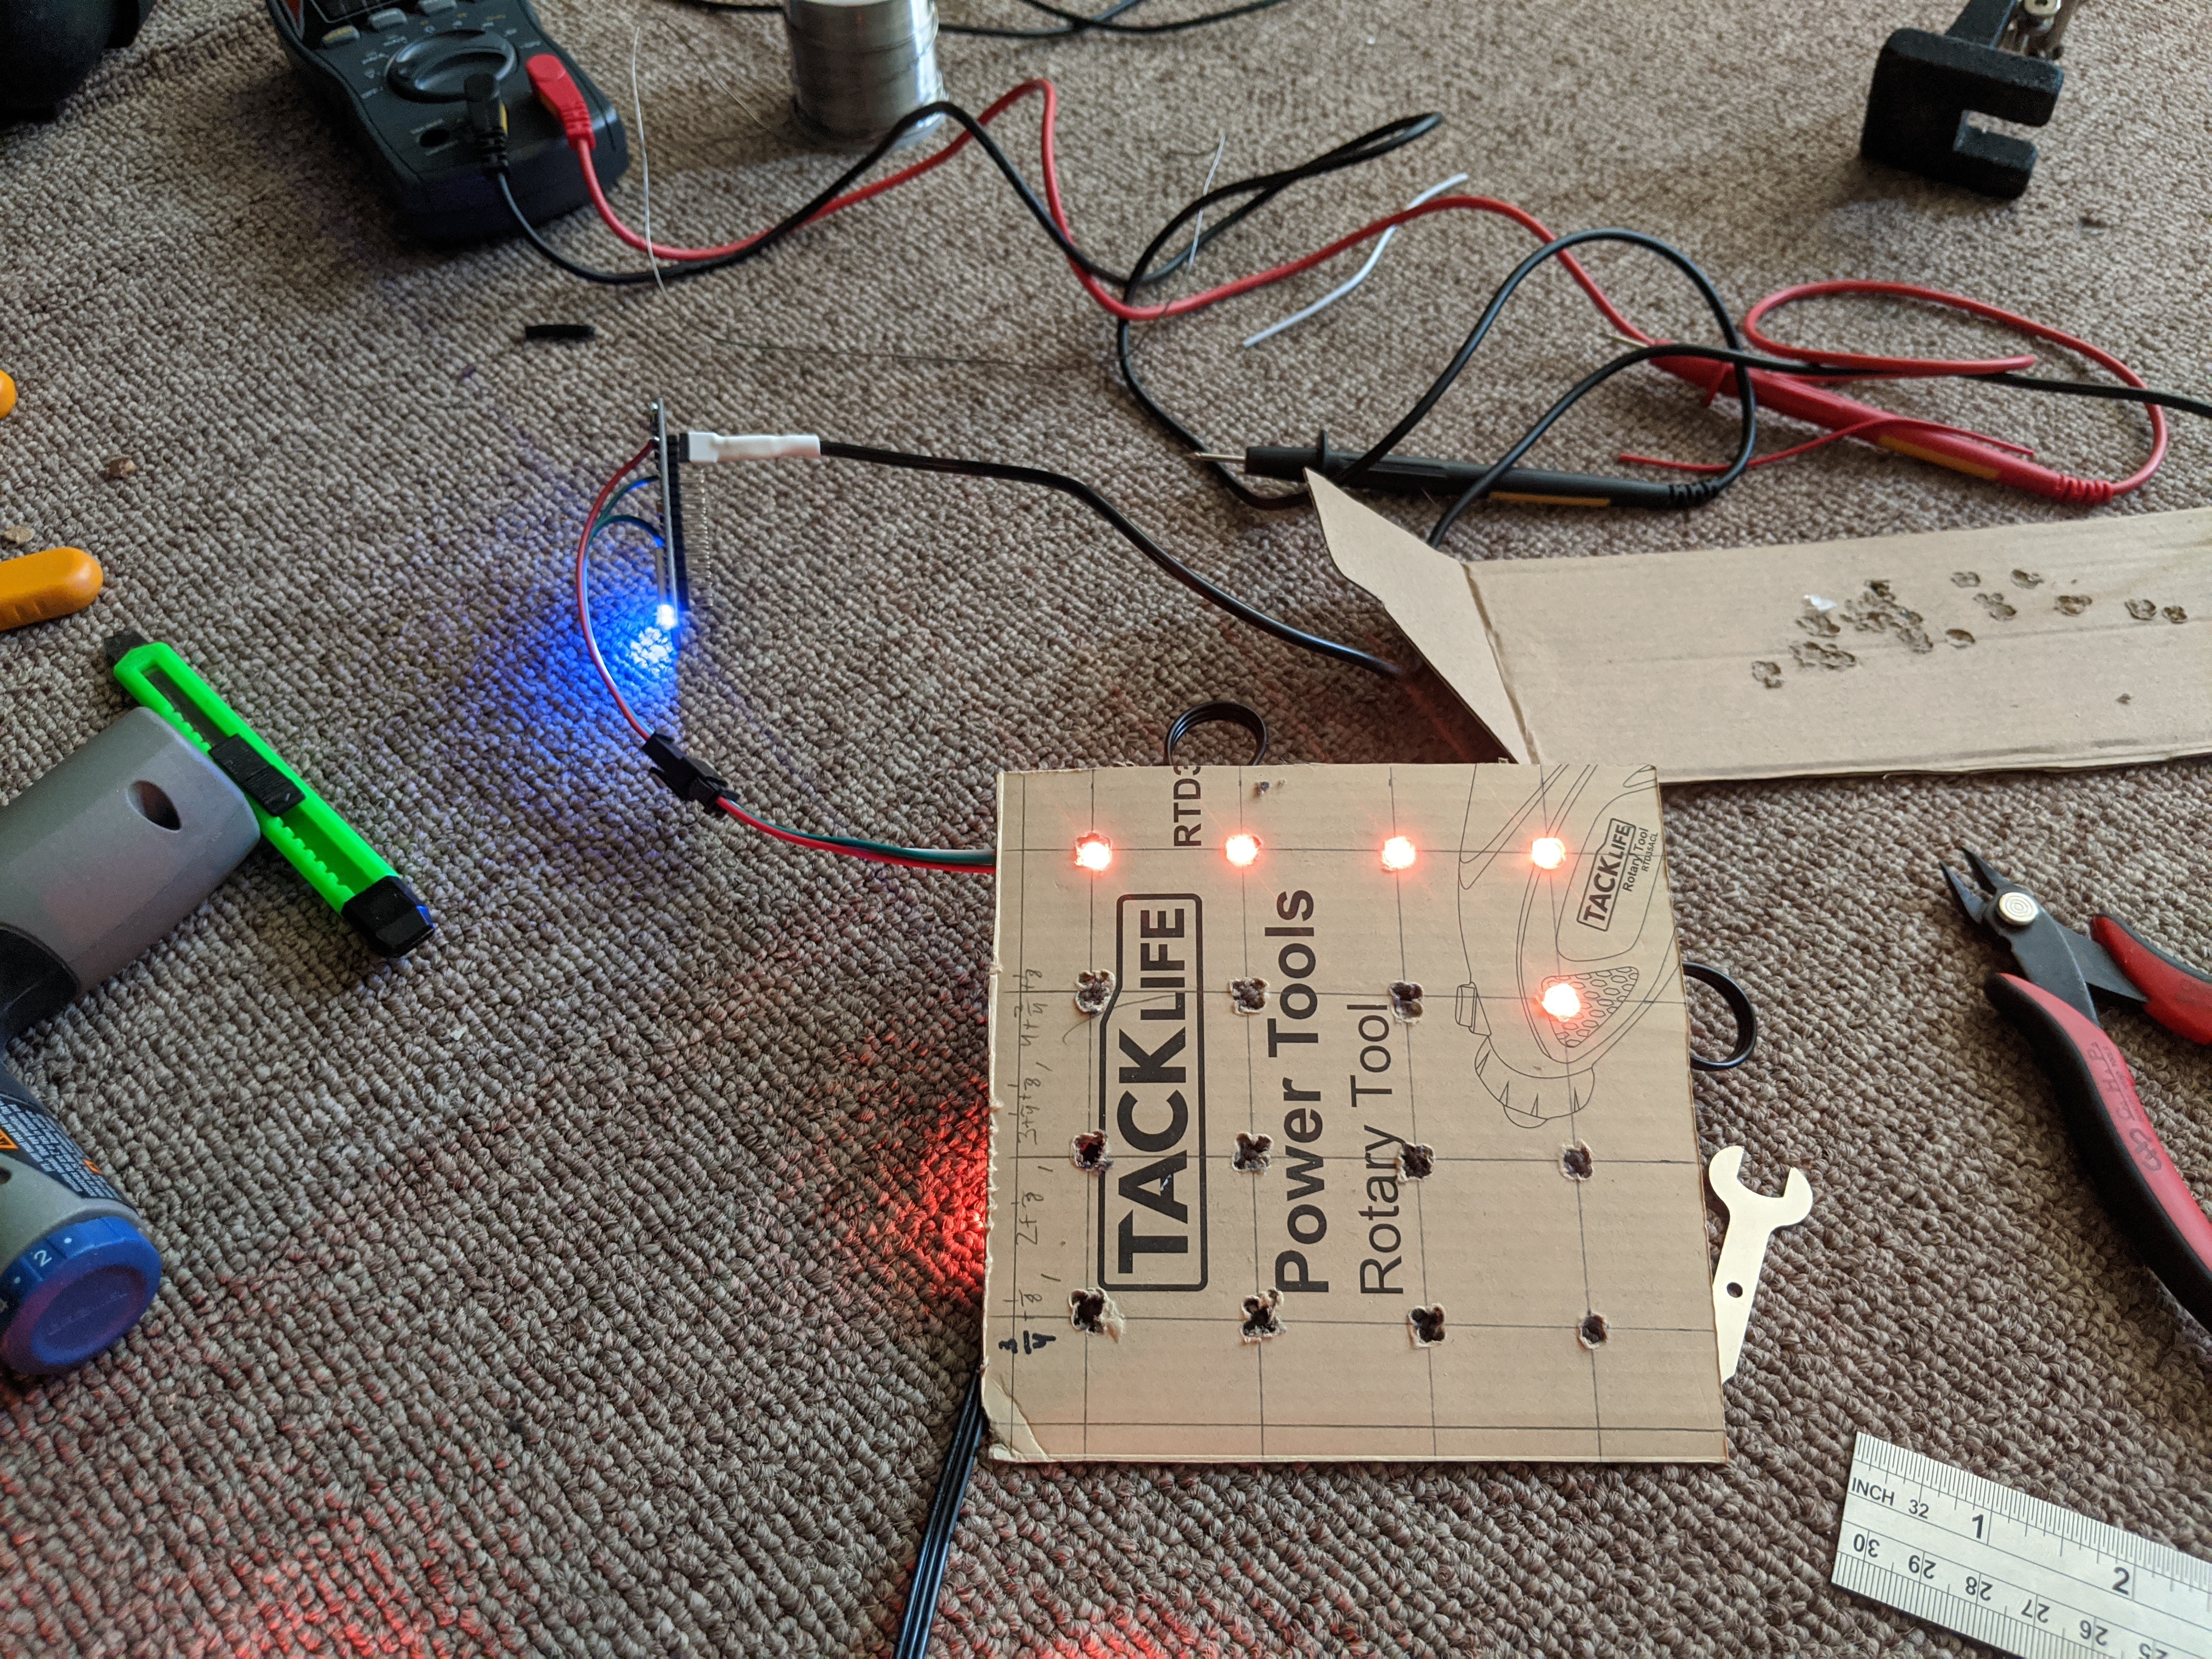
The last piece to make was to mount the LEDs onto the display. I had bought a string of the LEDs this time to make the soldering less tedious, and I decided the best way to mount them was as a matrix to back light each chibi. I measured and cut holes into a piece of cardboard, then glued the LEDs in place.

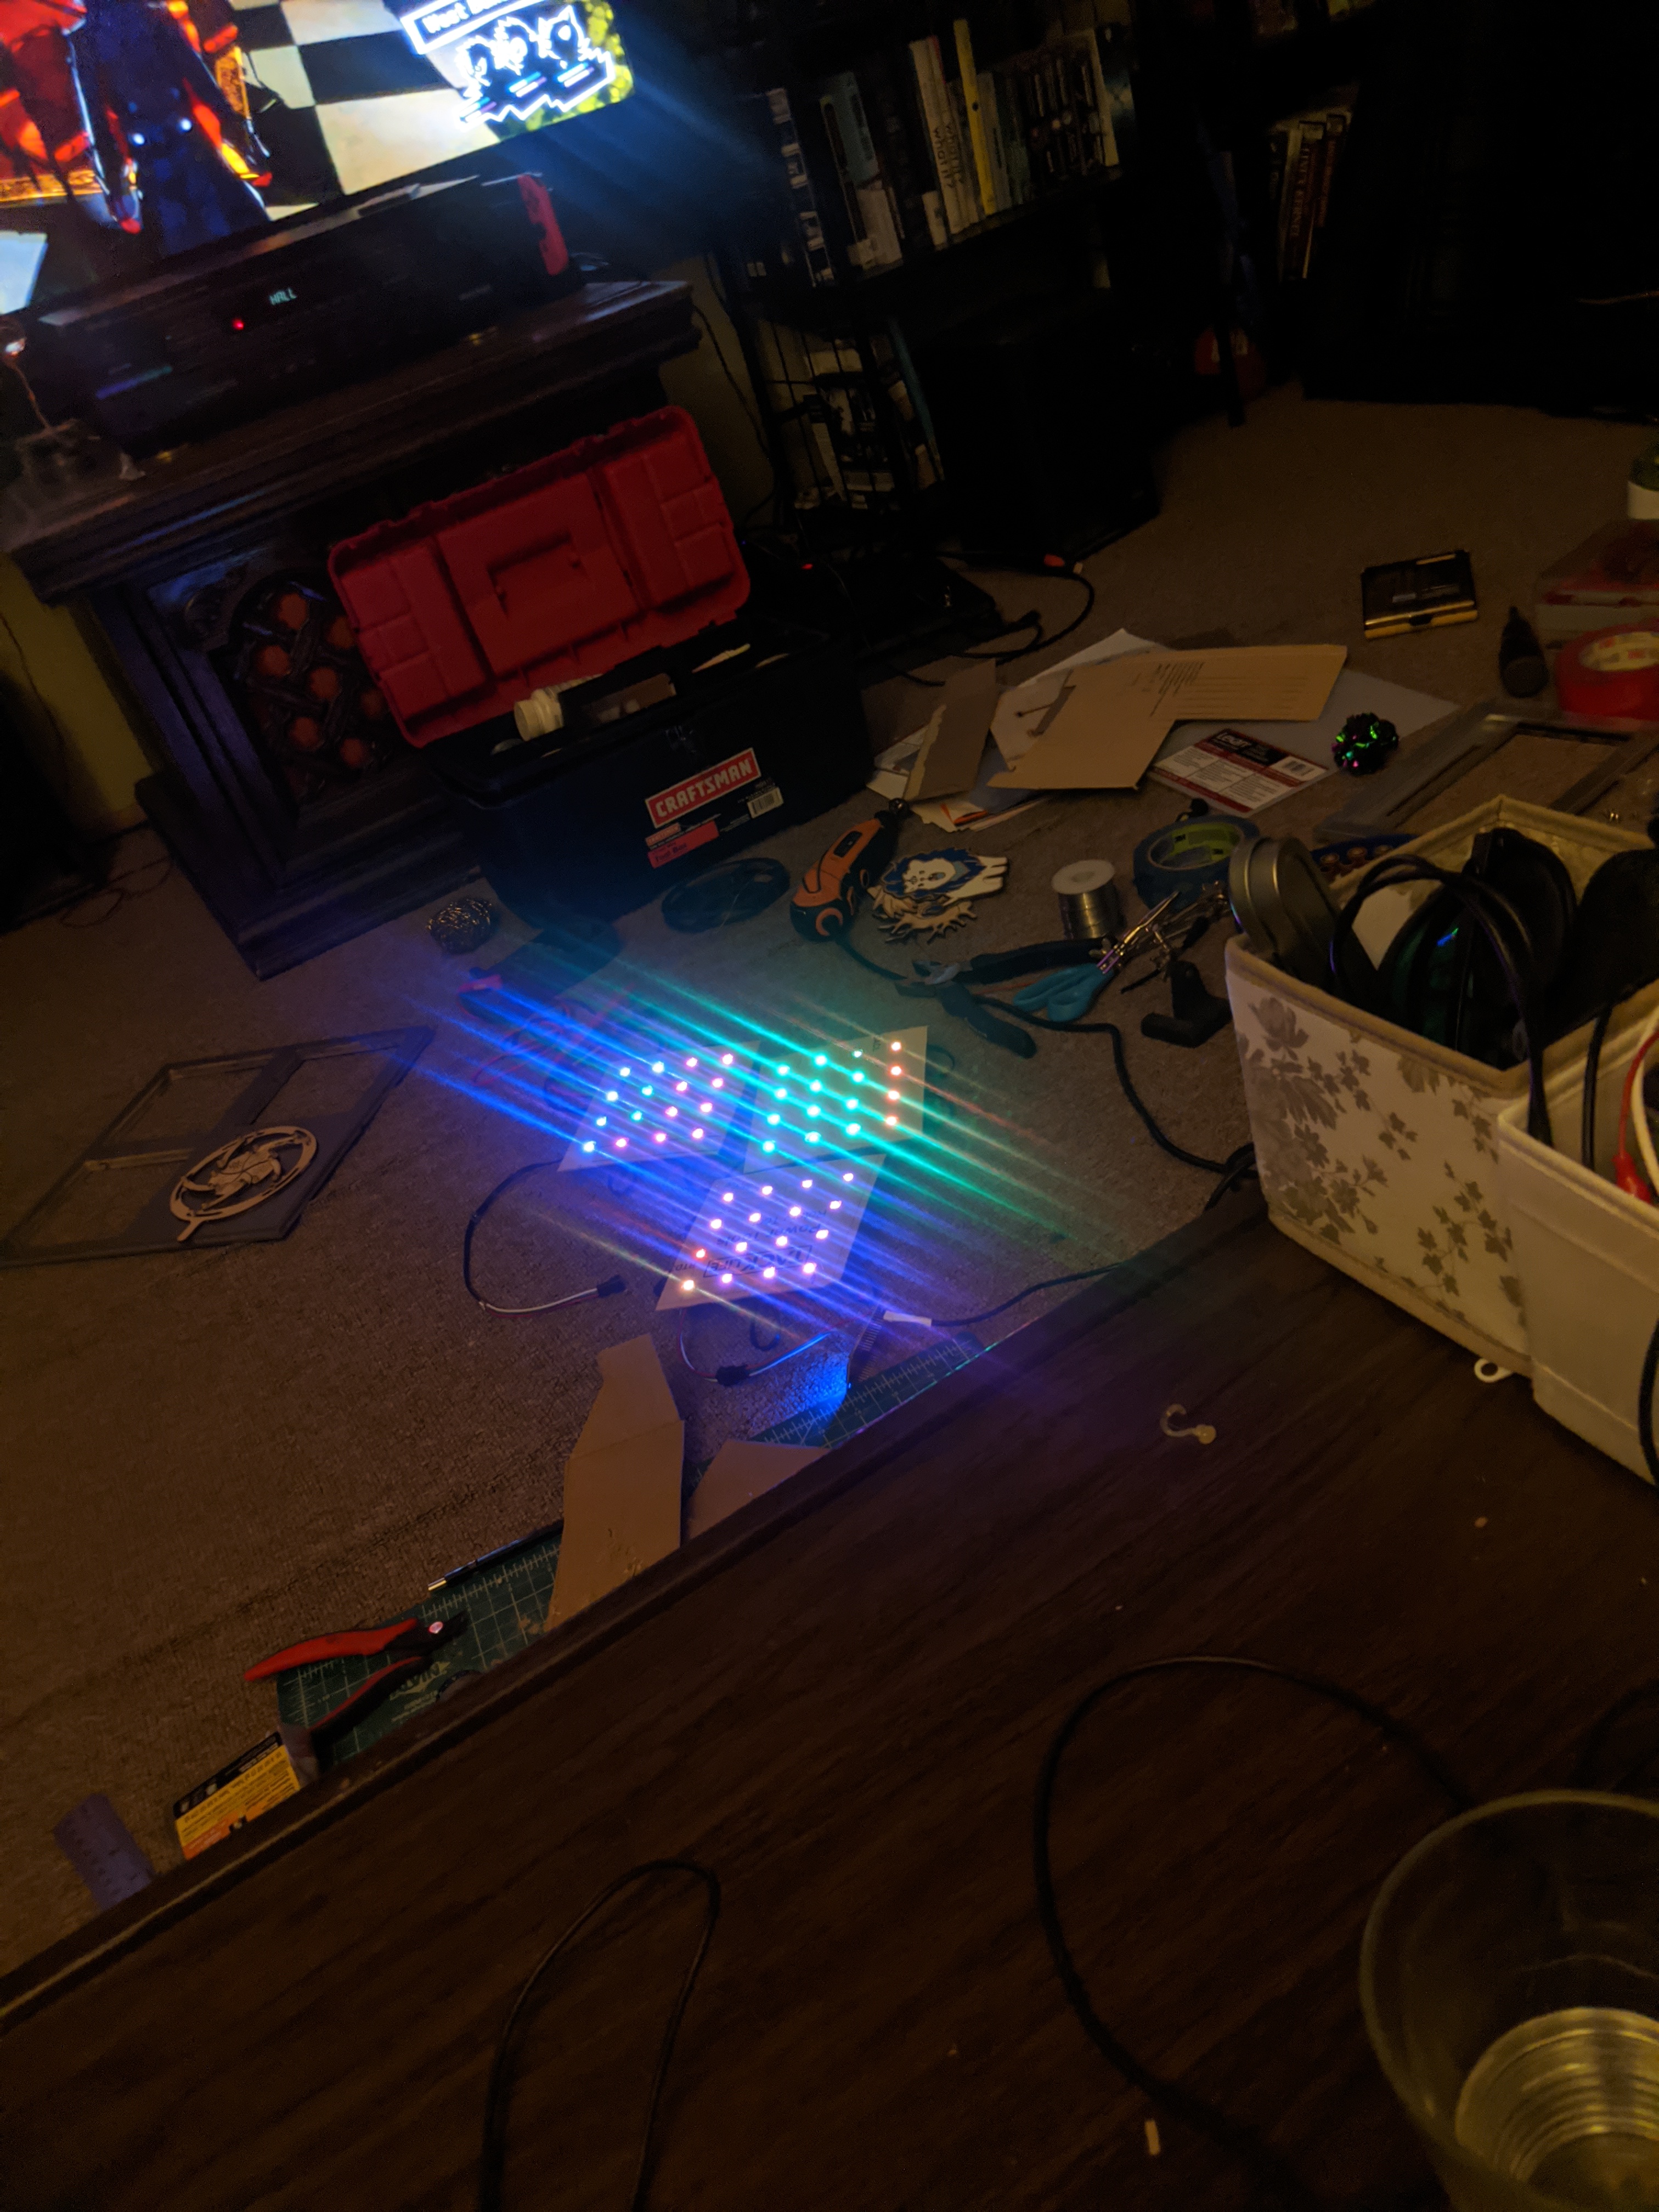
With all the pieces done, I just needed to assemble things. I wanted to defuse the light a bit, but only had clear plastic. I ended up cutting up a shopping bag and gluing it to the back of the plastic panels that I cut out.
I also engraved the crest of flame to sit in the center of the iris.
Video + LED Sync
As one last touch I needed to make a sequence to show off the display. I decided to find a music video like I remembered being uploaded to Kazaa in the early aughts.
There were surprisingly few uploaded, so I decided to make my own. I downloaded HitFilm along with a bunch of the cut scenes from the game. Initially I was going to make one for real, but eventually I decided it would be better to just make a comedy one:
Next I had to sync it with the frame. Turns out Youtube’s embedded player has an API that let’s you sync Javascript with what’s going on in a video: https://developers.google.com/youtube/iframe_api_reference. I used this to create a page that would check the Youtube progress on a timer, and make AJAX calls to the WLED server to send the updated state for the LEDs. There’s an array of states with time codes and the state for the current time gets sent. You can see the page here. This only controls the lights if it’s opened in my LAN.
Abridged Javascript
    // 2. This code loads the IFrame Player API code asynchronously.
    var tag = document.createElement('script');

    tag.src = "https://www.youtube.com/iframe_api";
    var firstScriptTag = document.getElementsByTagName('script')[0];
    firstScriptTag.parentNode.insertBefore(tag, firstScriptTag);

    // 3. This function creates an <iframe> (and YouTube player)
    //    after the API code downloads.
    var player;
    function onYouTubeIframeAPIReady() {
        player = new YT.Player('player', {
            height: '640',
            width: '1280',
            videoId: 'x80iYZsz9io',
            events: {
                'onReady': onPlayerReady,
                'onStateChange': onPlayerStateChange
            }
        });
    }

    var initState =  {
        ...
    }


    // 4. The API will call this function when the video player is ready.
    function onPlayerReady(event) {
        event.target.playVideo();
        var myVar = setInterval(myTimer, 50);

        sendData(initState);
    }

    function onPlayerStateChange(event) {

    }
    var effects = [
        ...
    ];

    function getEffect(name) {
        return effects.indexOf(name);
    }
    var states = [
        {"start": 0,
            "data": {"seg": [
            {
                "col": [
                    [160,82,45]
                ],
                "fx": getEffect("Twinklefox")
            },{
                "col": [
                    [160,82,45]
                ],
                "fx": getEffect("Twinklefox")
            },{
                "col": [
                    [160,82,45]
                ],
                "fx": getEffect("Twinklefox")
            },{
                "col": [
                    [128, 0, 128, 0]
                ],
                "fx": getEffect("Solid")
            }
        ]}},
        ...
    ]

    function sendData(data) {

        $.ajax({
            type: "POST",
            url: "http://192.168.1.123/json",
            // The key needs to match your method's input parameter (case-sensitive).
            data: JSON.stringify(data),
            contentType: "application/json; charset=utf-8",
            dataType: "json",
            success: function(result){
                console.log(result);
            },
            failure: function(errMsg) {
                console.log('error: ' + errMsg);
            }
        });

    }

    var curStateIdx = -1;

    function myTimer() {
        curTime = player.getCurrentTime();

        var i;
        var data;
        var idx;
        for (i = 0; i < states.length; i++) {
            if (states[i].start > curTime) {
                break;
            }
            idx = i;
        }
        if (idx != curStateIdx) {
            curStateIdx = idx;
            sendData(states[idx].data);
        }

    }
Here’s the display syncing to the video playback: