
Controlling WLEDs with Scratch
Scratch is an online visual programming tool meant to introduce children to programming. I made an extension that allows the language to control LEDs through a WLED controller.
Here is the result:
I modified a simple game that seemed like a good Scratch demo, and made it control the panels of my previous Fire Emblem Lights Project.
Credits for the game go to UltraJordan.
All my code for this project is in https://github.com/axlan/scratch_leds
Coming Up With the Idea
A friend of mine mentioned introducing his seven year old son to programming. He jokingly suggested I make my next project something that would help make programming more tangible. It seemed like an interesting challenge so I decided to give it a shot.
There were many different directions I could go in, but my general idea was to integrate a board with lights, sounds, sensors, etc. with a kid friendly programming interface. There are, unsurprisingly, a lot of products like this out there. Some are basically just a more guided version of an Arduino, and others are closer to remote controlled robots with simplistic scripting.
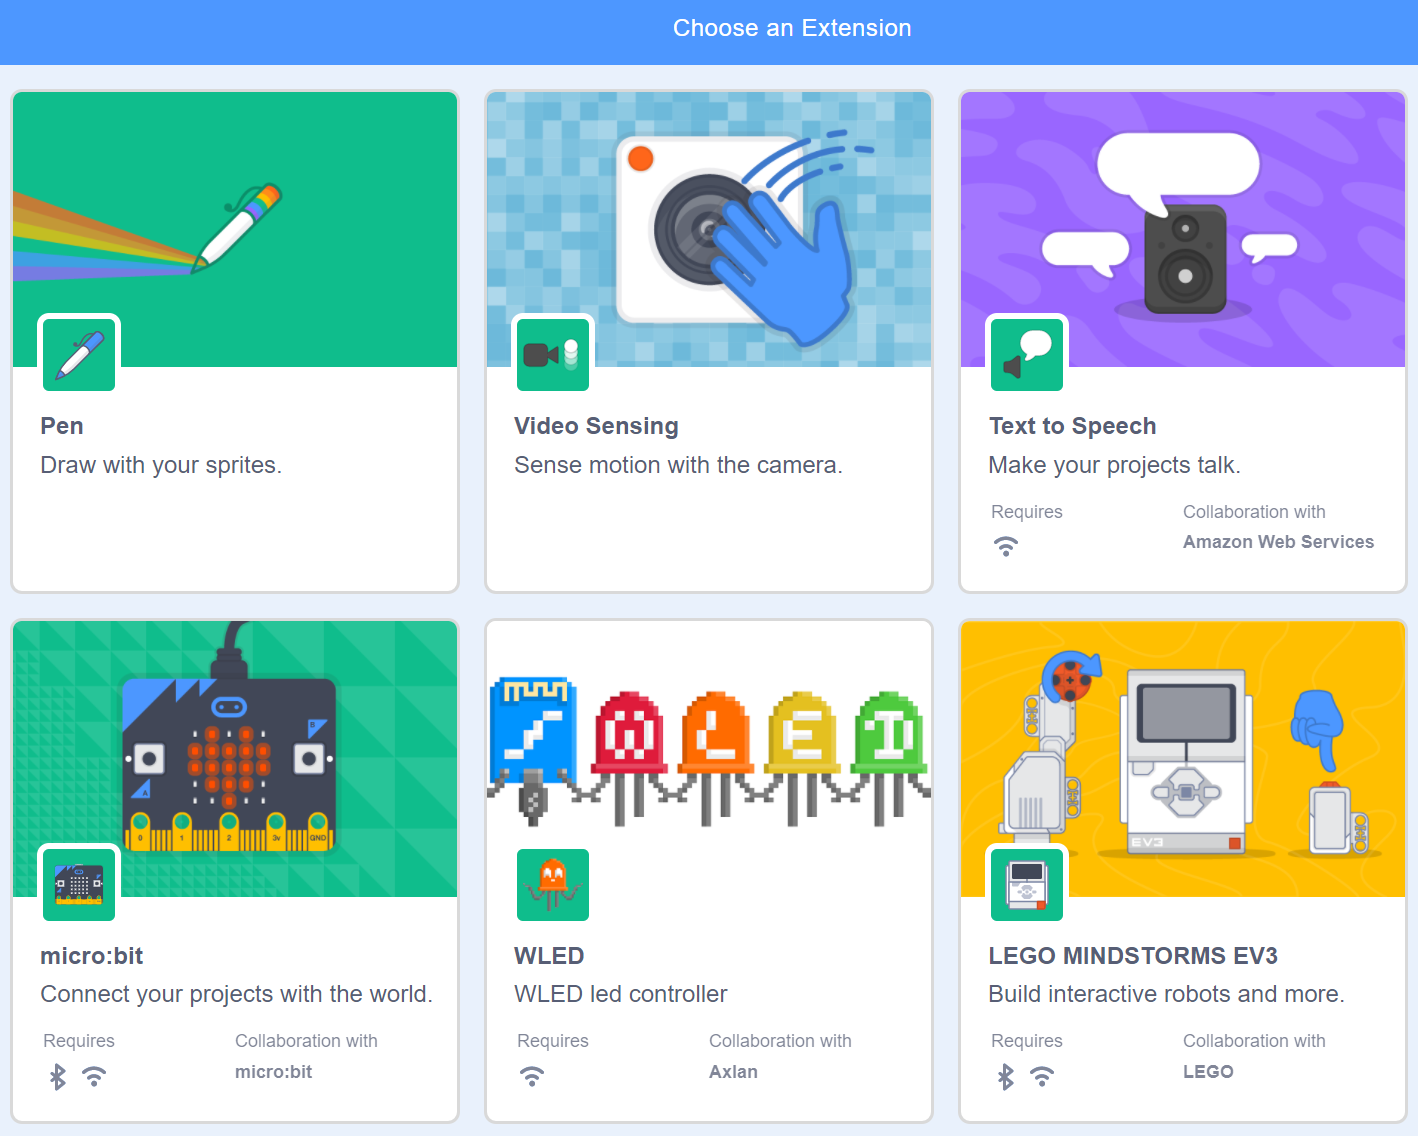
In researching, I found out that Lego was a big company in the space. It has kept iterating on their robotics product Lego Mindstorms over the years. Seeing that they used a visual block based language, I was immediately reminded of Scratch. It turns out that Lego actually has contributed extensions to scratch to integrate with their robots. I wanted to see what it would take to integrate my own hardware into the language.
I figured I’d try to do a very basic extension that integrates with my favorite IoT LED controller software WLED as a starter project, and if I wanted to go further I might use it as an opportunity to actual get a PCB board printed. My past WLED projects can be seen at </categories.html#WLED>
I didn’t realize it until later, but there was already a company that made almost the exact design I was thinking of https://microbit.org/. They even implemented a graphical LED layout menu that I had thought up, but didn’t want to actual figure out the Javascript for.
Getting Started Extending Scratch
As of writing, Scratch is on version 3. It seems like they overhauled their extension system, making it a somewhat friendly tool for adding new features. However, the documentation I found was somewhat lacking. In addition I’m not very familiar with the intricacies of Javascript development, so I had to fight my way through the tooling and language..
How many ways are there to make an extension?
Part of the confusion is that there are multiple overlapping paths you can take to extend Scratch. The most official guide I found is: https://github.com/LLK/scratch-vm/blob/develop/docs/extensions.md. This shows how you can create a Javascript class that maps block definitions to the business logic that gets run.
This documentation mentions the difference between “Unofficial” and “Official” extensions. It turns out you can actually write either type.
The “Unofficial” extensions can’t import external libraries, and need to be fully self contained. They can be easily run using a Scratch fork called E羊icques that can load extensions dynamically. For example https://sheeptester.github.io/scratch-gui/?url=https://jamesbmadden.github.io/scratch-extensions/dictionary-stable.js loads a dictionary datatype from a github io page. A list of some of these extensions can be found here. I actually found that there are further limitations. It appears that you can’t store state on a per sprite basis, and you can’t make the block’s dropdown menus dynamic.
You can also use the “Official” extension interface. Scratch is broken up as multiple repos that create multiple Node.js libraries. This page gives some documentation for getting started. The extensions integrated into the source, can import external libraries, and can take advantage of deeper modifications to the scratch code base and the full set of features.
I ended up implementing my extension both ways as I figured out what I was doing.
False starts
A lot of the time I spent on this project was going down rabbit holes that didn’t end up leading anywhere.
MQTT
The first thing I thought about doing was using MQTT to control WLED. The idea was that it would be easier to get bi-direction communication using a broker rather then having Scratch need to directly communicate with WLED. I even set up a docker compose script that would run scratch in one container, and the docker broker “Mosquitto” in another.
1
2
3
4
5
6
7
8
9
10
11
12
13
14
15
16
17
18
19
20
21
22
version: "3.9"
services:
  broker:
    image: eclipse-mosquitto
    volumes:
      - type: bind
        source: ./mosquitto
        target: /mosquitto/config/
    ports:
      - "1885:1883"
  scratch:
    depends_on:
      - broker
    image: node
    volumes:
      - type: bind
        source: ./scratch-gui
        target: /app
    ports:
      - "8888:8601"
    working_dir: /app
    command: bash -c "npm install && npm start"
What I didn’t realize is, that the whole scratch project is a React app. It all runs in the clients browser, so you can’t make requests from the server. There doesn’t appear to be any client MQTT apps, so this is probably off the table. I would need to poll or set up Websockets if I wanted to detect events coming from the IoT board.
It seems like the official apps have some sort of mechanism to get around this using Bluetooth. I didn’t really look into it, but that would probably be the next step if I wanted more robust communication.
mDNS
Another challenge I hit was getting around hard coding the WLED boards IP, and LED configuration. WLED boards can be discovered on the LAN using mDNS. I tested out a bunch of mDNS node projects before I realized that they would only work on server size code, and not Javascript running in the browser.
Simplifying Extension Development
The project https://github.com/Richienb/scratcher promised a tool that would let you compile and test scratch extensions without the pain of setting up multiple repos, but despite a bit of poking I was never able to get it to resolve it’s dependencies.
Making my extension.
Initially I went down the path of setting up a full fork of the scratch-vm and scratch-gui repositories. I mostly followed this guide, but ended up needing some modifications. Here’s the changes I needed to make to each repo.
scratch-gui
I just added my extension to the extension list along with some icons for how it will appear in the menu
scratch-vm
The changes here are to add the extension to a list, and implement the actual extension code.
This is pretty much just specifying the blocks along with the logic for generating HTTP requests for controlling WLED.
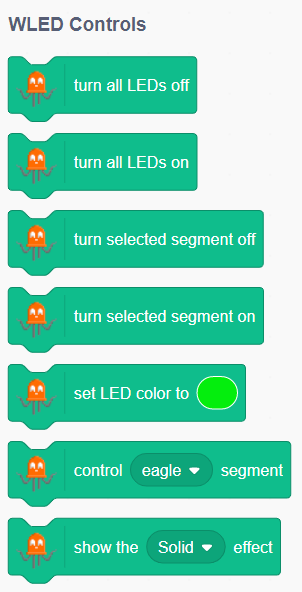
For the initial feature set, I set up the following:
- You can switch between WLED segments to apply changes to
- You can turn the segment on and off
- You can set the color for the segment
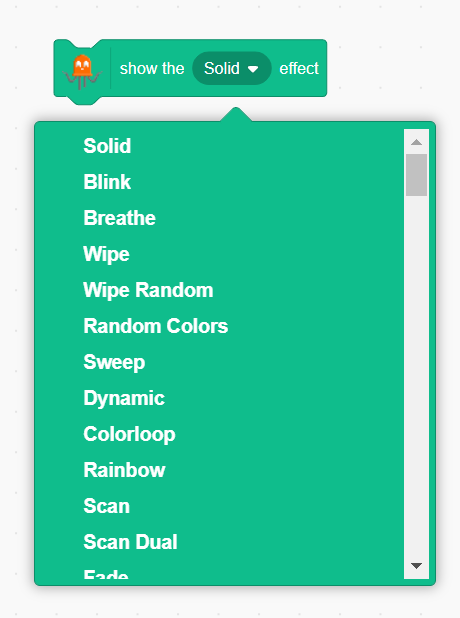
- You can choose an effect from the effect list for the segment to run
Putting it all together
I initially did most of my development by running npm run watch in the scratch-vm and npm start in scratch-gui. I could then connect to <localhost:8601> and load my extension from the menu. I mostly used the chrome debug tools to troubleshoot and get things working. With everything working I could run npm run-script build in scratch-gui to generate a static webpage I could host anywhere.
However, once I realized I didn’t need advanced features, it seemed a lot easier just to publish the single extension Javascript file. I wanted to be able to share it so it would run with https://sheeptester.github.io/scratch-gui/. The first issue I hit was that the file has to have the right Mime type, so you can’t just point to the github source. I just stuck it on a local server by running python3 -m http.server in the file’s director. This made https://sheeptester.github.io/scratch-gui/?url=http://localhost:8000/index.js work, but I hit an error that accessing WLED was http and the rest of the page was https. This is now blocked on most browsers. I had to rehost my own copy of E羊icques over and HTTP connection, but this let me get the whole thing working Example.
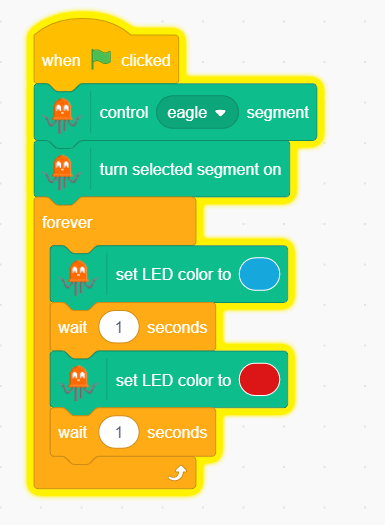
Once I got the basic proof of concept shown in the video, I realized it needed a few changes to make this usable without modifying the extension source:
- Make the IP address a variable you need to activate at the start.
- Load the effects and segments from WLED.
However, this requires dynamic menus which are only available in the official extension and named segments which are only available in the WLED 0.13 beta.
I made these changes in the branch https://github.com/axlan/scratch-vm/tree/scratch-led-load-effects. This version can be tried here. To generate the static version of the sight I ran npm run-script build in the scratch-gui repo.
While it should actually work if you have a WLED display on your LAN, it is a bit annoying to use. You first have to go through the extension menu to select the extension. Then you need to run the connect block with the display’s IP. After that the effects and segments should be populated when you expand their lists. There’s no feedback if you the address isn’t accessible unless you open the developer console.
Future Improvements
The longer term follow up would be things like:
- Make the commands involving the segments specify them together (instead of having a block for just selecting a segment replace the on/off command with something like
turn SEGMENT_XXX ON/OFF - Add options for changing brightness, speed, ect.
- Add mechanism to get events from WLED.
- Add some sort of indication if you tried to run without connecting, or the supplied address is invalid.
- Make my own custom board where I could integrate sound generation and sensors.
I don’t know if I’m up for doing more though. While it’s a pretty neat system, it’s complex enough Javascript that I have to really struggle through it and am looking forward to going back a more enjoyable environment.