
Cat Door Sensor
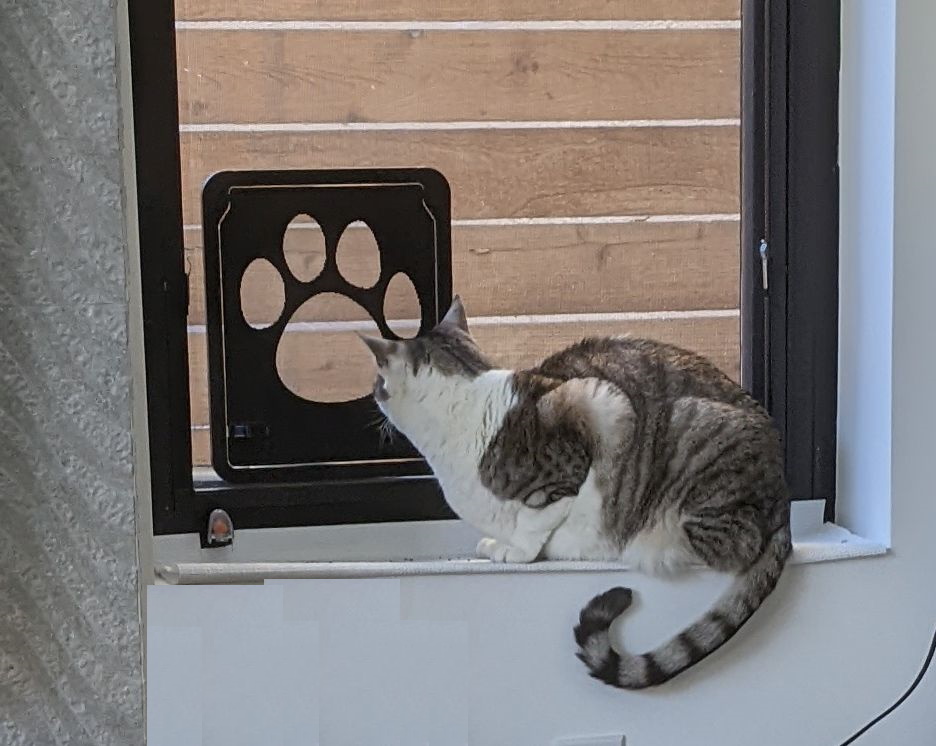
I added a cat door to one of our windows to give our cat a bit more freedom to make up from our lack of attention due to the baby. Since I sometimes want the window closed, I wanted an easy way to check if she was in or outside.
Since we have a sliding door, I was looking for a creative way to allow the cat to come and go. I realized the screen window would be a good option and, lo and behold, there were plenty of screen pet door kits available.
Hardware
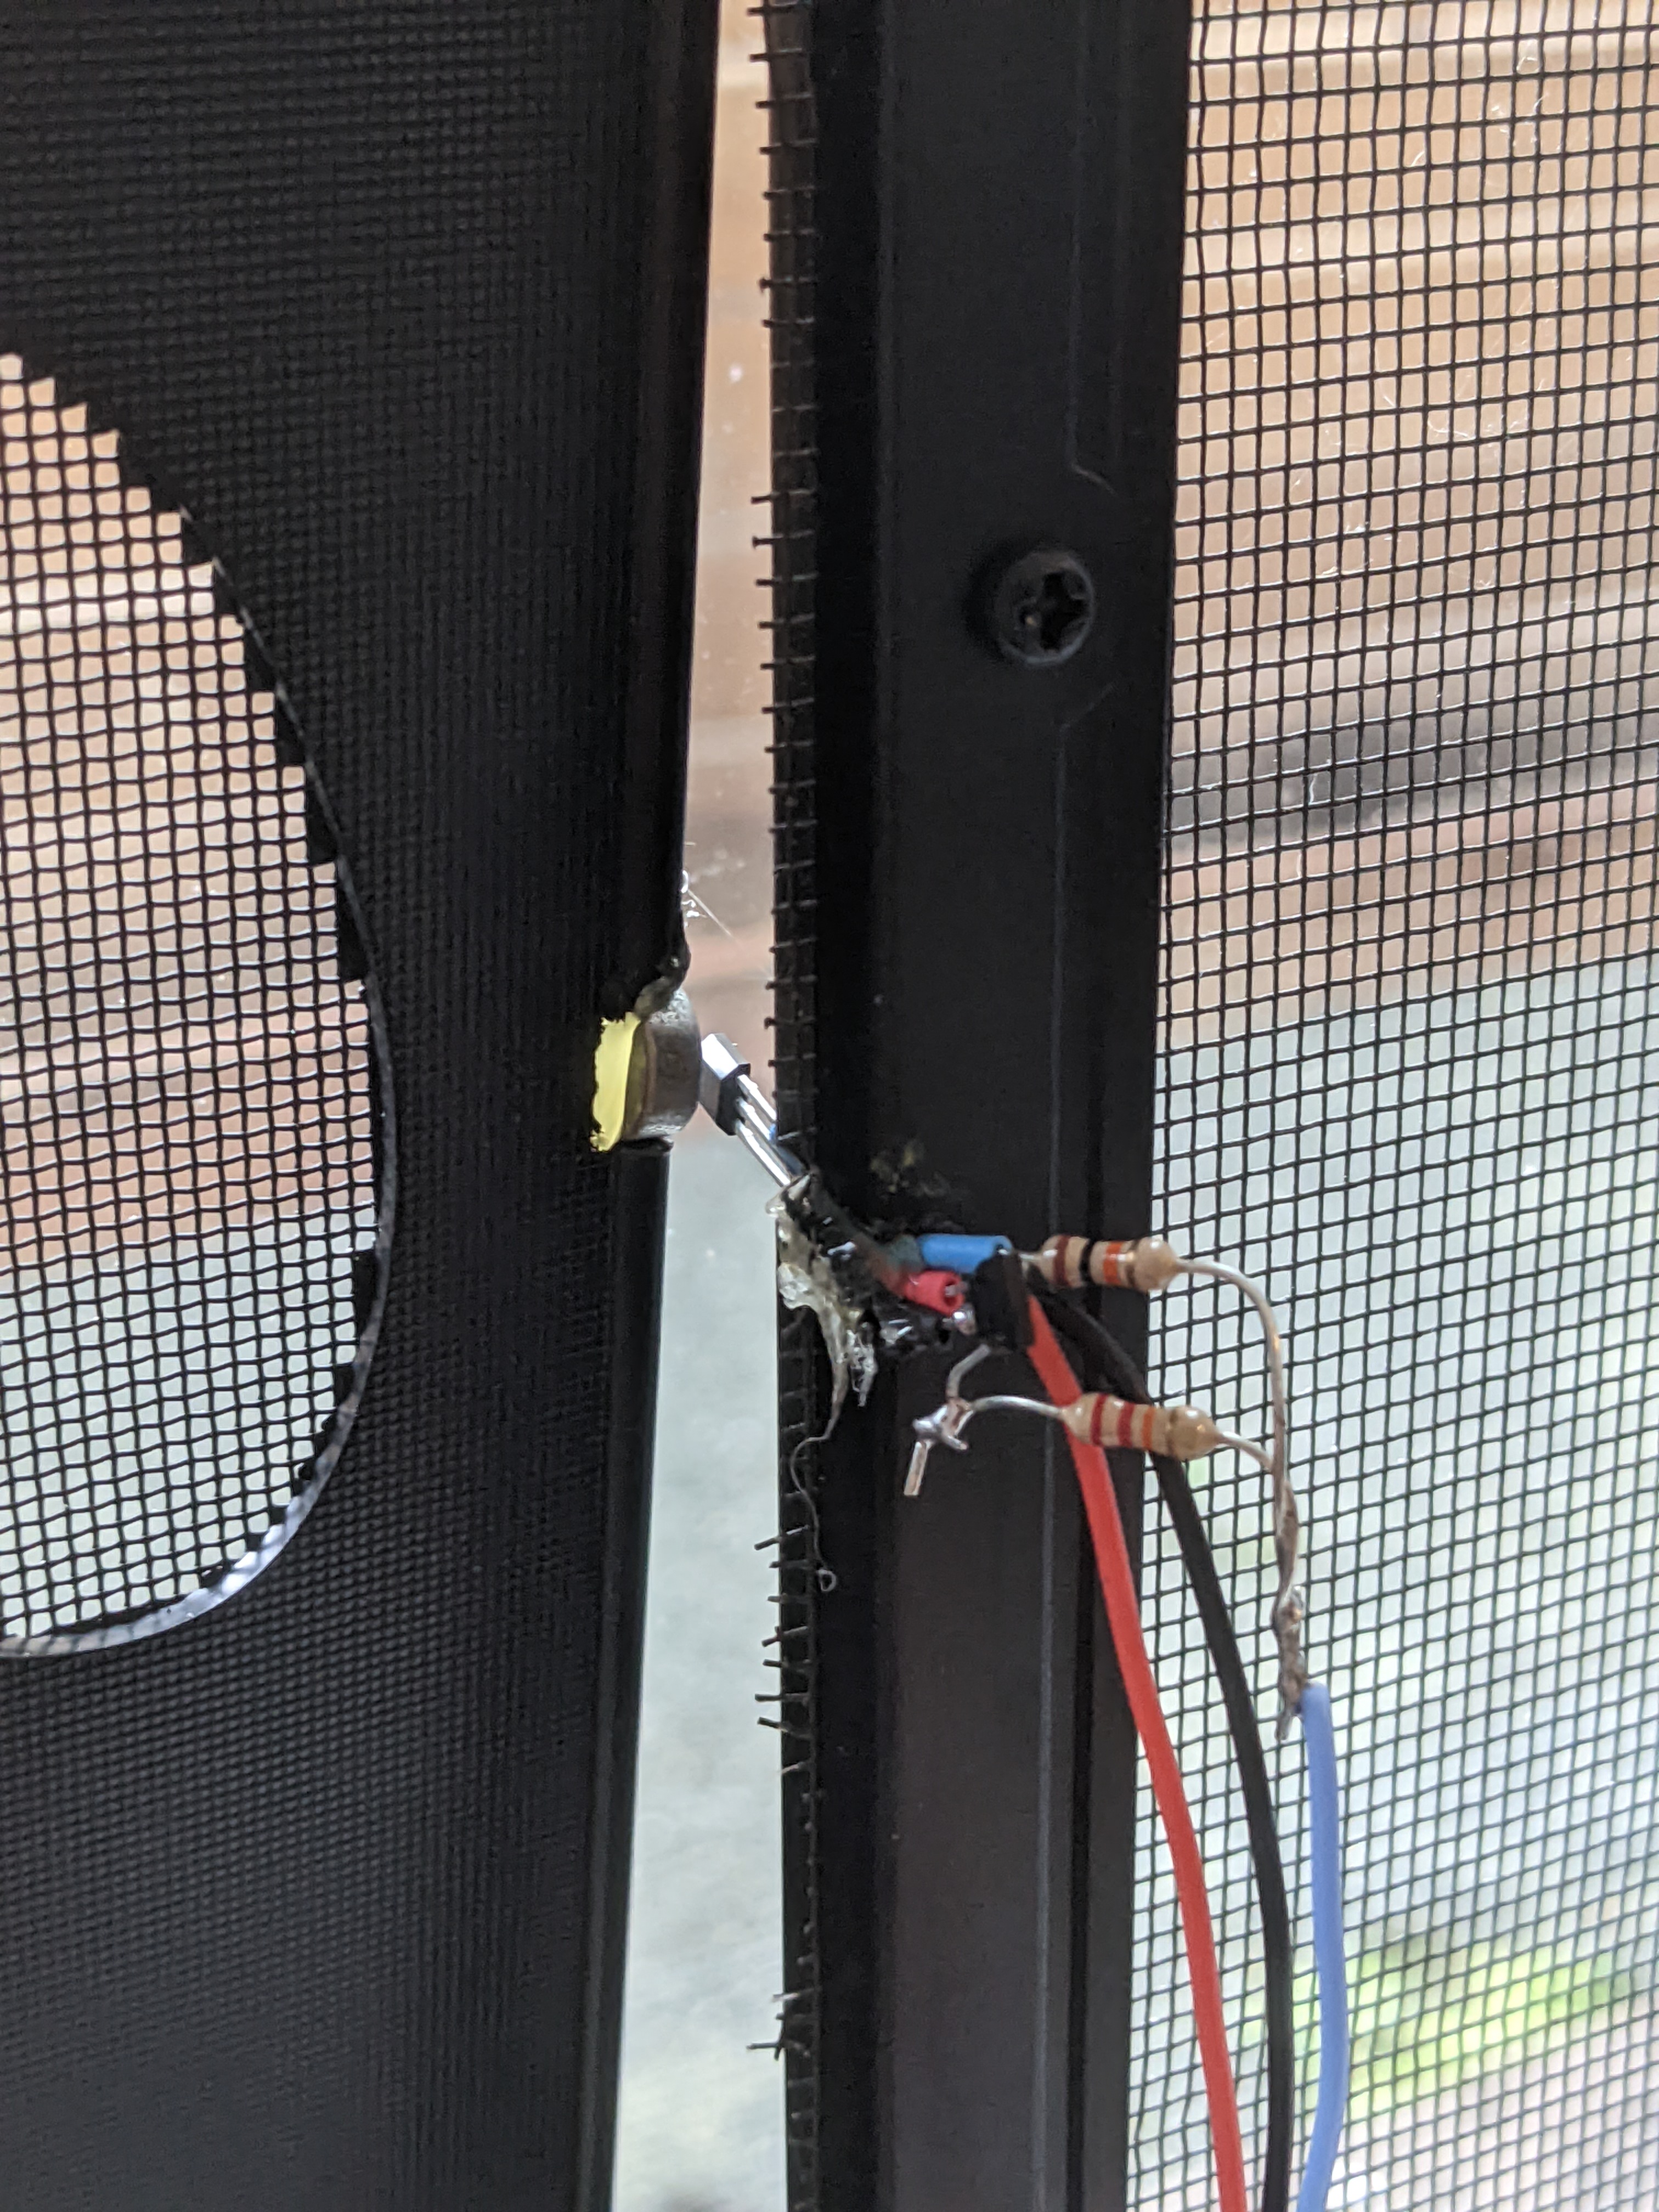
Ideally, I could do remote sensing. For that, I considered a vision system or a sonar range finder. After thinking them through though, I decided a range finder wouldn’t work and a camera was way too much overkill. Instead, I decided to go with hall effect magnetic sensors.
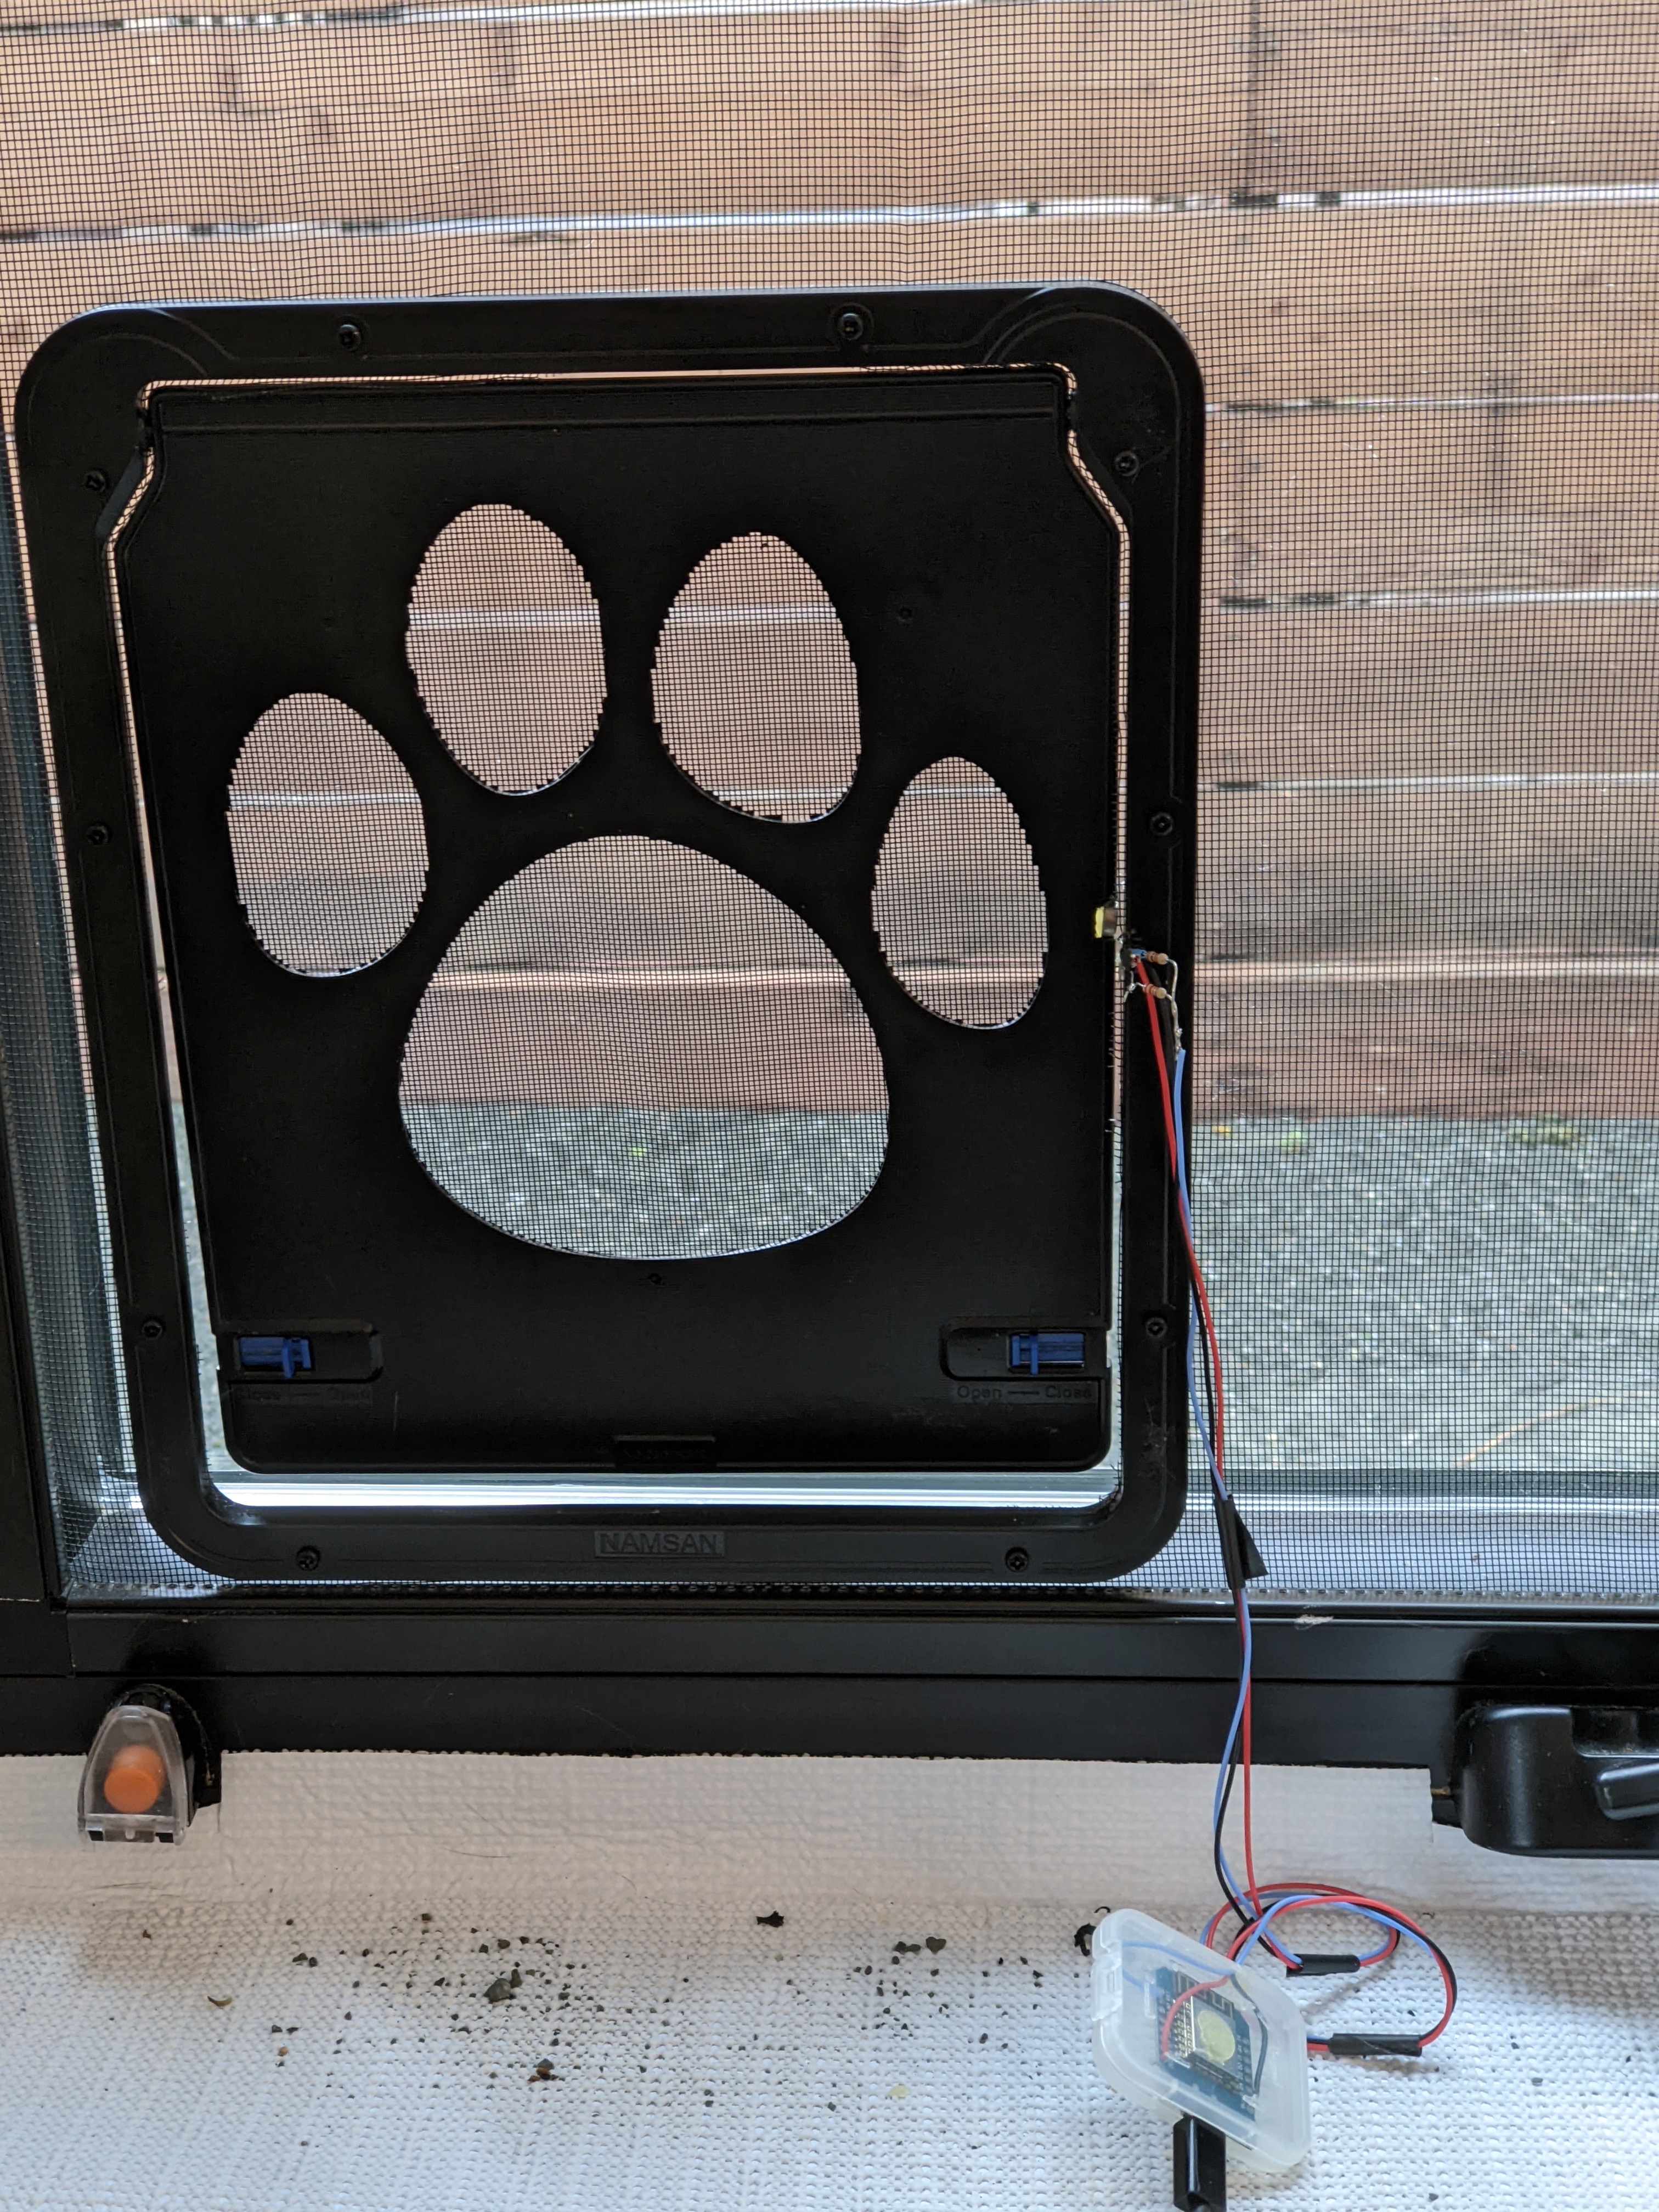
Next I needed a way to differentiate when the door opened and closed. I could use multiple sensors, or multiple magnets in opposite orientations. Since I wanted the sensor(s) to be on the portion of the window that wasn’t moving, I decided to go with two sensors, and one magnet on the swinging part of the door.
In an effort to do this as fast as possible, I picked the first sensor I saw that could work with the 3.3V supply from an ESP8266 the 49E Linear Hall-Effect Sensor.
I was hoping the one of the voltage swings would be able to trigger a digital input transition. Unfortunately, the voltage without a magnetic field is at half the supply voltage which meant that I couldn’t easily trigger a digital input change. Instead I would need to use the analog-to-digital converter (ADC).
I’m using a D1 Mini Lite which has a single ADC with a voltage divider. I needed a way to read the output of two sensors with a single input. To solve this, I used the following circuit:

The output of the two sensors are connected to each other through a voltage divider. They are triggered with the positive side of a single magnet. This results in the following outputs:
- Neither sensor triggered by a magnet - Both output 1.8V so the output is 1.8V
- The 10K olm sensor is triggered - 10K outputs 2.7V the 20K outputs 1.8V. There’s a 0.9V drop with the voltage divider dropping 1/3 for an output voltage of 2.4V.
- The 20K olm sensor is triggered - 20K outputs 2.7V the 10K outputs 1.8V. There’s a 0.9V drop with the voltage divider dropping 2/3 for an output voltage of 2V.
This would hopefully give a big enough voltage swing to consistently differentiate these 3 states.
I then put this together in an extremely hacky manner.
Software
The first thing I needed to decide was what to do when I detect that our cat went in our out. Since one of my previous LED projects (Fire Emblem Lights) is right next to the window I decided to have a portion of it turn on or off to show if the cat is in our out. This was trivial to accomplish with a simple HTTP POST to the WLED’s JSON API. There can be a fairly long delay between going through the door and the light change, but that’s fine for this application.
With this settled I made a basic state machine to trigger the lion to light up when the door was flapped inward and turn off when the door flapped outward. This sort of worked but hit a few problems:
- Since I was sampling the ADC in a loop, it was possible to miss sensor triggers. This was especially true since the loop blocked for seconds to send the POST requests.
- The door would flap back and forth which could cause an unwanted trigger.
- Sometime the door would stick slightly opened causing continuous triggering.
The first issue I looked into fixing by sampling on interrupts instead of in the main processing loop. I realized that there wasn’t an easy way to sample on either ADC value changes or on ADC completion. I could have sampled on a timer, but in the end it seemed like this wasn’t that big of an issue because of my next fix.
For the second issue, I fixed by only counting the first sensor trigger, then ignoring further triggers for the next 10 seconds. This works in most cases, though could have issues when the cat waits for over ten seconds half way through the flap. That case would be pretty hard to handle without additional sensors though.
The 3rd issue here would be best fix by cleaning the door up, but I added some additional logic to the state machine to ignore a value if it seems like the door is stuck. This was probably the hackiest part of the code.
With these hacks in place I got a fairly accurate indication of cat status:
Adding Logging
As a simple follow on, I wanted to log my cat’s comings and goings along with some diagnostic information to make things a little more robust.
Boy did I not expect it to be as much of a time sink as this was. I wasn’t doing anything particularly different from my previous MQTT projects (Custom PCB Magic Card Game Life Tracker and A Sun Following Chair for my Cat) so I figured it should be pretty straight forward.
I immediately hit a an inexplicable issue where it would either never output anything, or only output a few messages. I went in circles for awhile trying to debug it logically, before I ended up resorting to process of elimination. Much to my surprise it was the ADC read that seemed to be causing issues.
Googling around I eventually found https://github.com/esp8266/Arduino/issues/1634 which explains the issue a bit. This section of the documentation mentions this problem in passing. It appears that since the ADC is used by the kernel for the Wifi management, there seems to be an interaction that causes it to disconnect when the ADC is read too frequently. This still doesn’t really make sense to me since the Wifi “thread” isn’t preempting the user code, but whatever.
It turns out this should have been an issue with my original code, but coincidentally, the example I based my script I used ESP8266WiFiMulti and reconnected for each message sent. That explained why it took a couple seconds for the lights to change. I was able to restructure my logging to cache the measurements and send everything in a burst after the door was still.
This of coarse led to a new problem where I would go over the size limit for the MQTT packet. This was easy enough to fix with a build flag and I finally had this “simple” extra feature working.
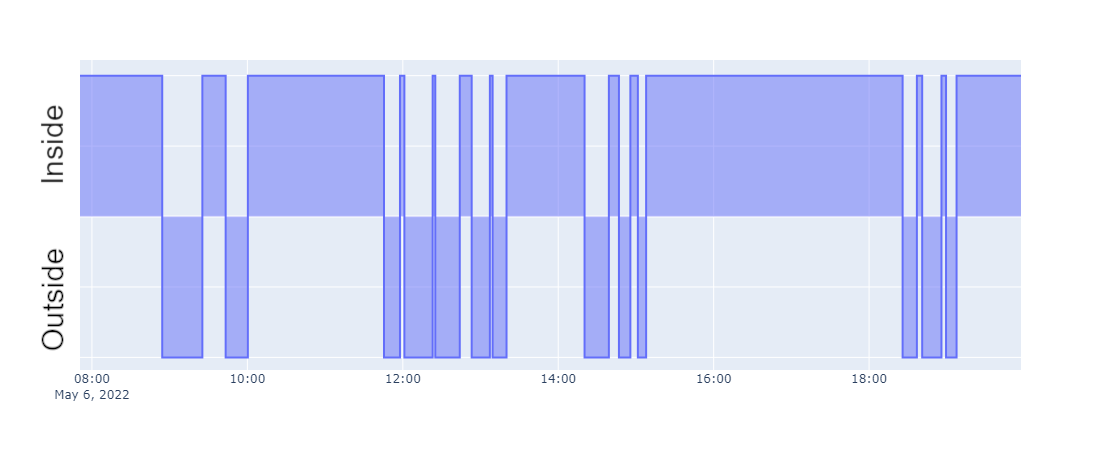
With this in place I was able to generate a report for her coming and going:
1
2
3
4
5
6
7
8
9
10
11
12
13
14
15
16
2022-05-06
	 Errors: 0
	 First Exit: 08:38:46
	 Last Enter: 19:11:37
	 Inside:
		 Count: 12
		 Total: 0 days 06:59:19 hours
		 Min: 0 days 00:02:02
		 Max: 0 days 03:18:01
		 Mean: 0 days 00:34:56
	 Outside:
		 Count: 13
		 Total: 0 days 03:13:58 hours
		 Min: 0 days 00:06:23
		 Max: 0 days 00:30:59
		 Mean: 0 days 00:14:55
And here’s that information as a plot:
This system is certainly not bullet proof. This project is a great example of how you pay for hardware compromises in software 10 fold. Here’s a recording of a typical “event” from a sampling of the sensor measurements:
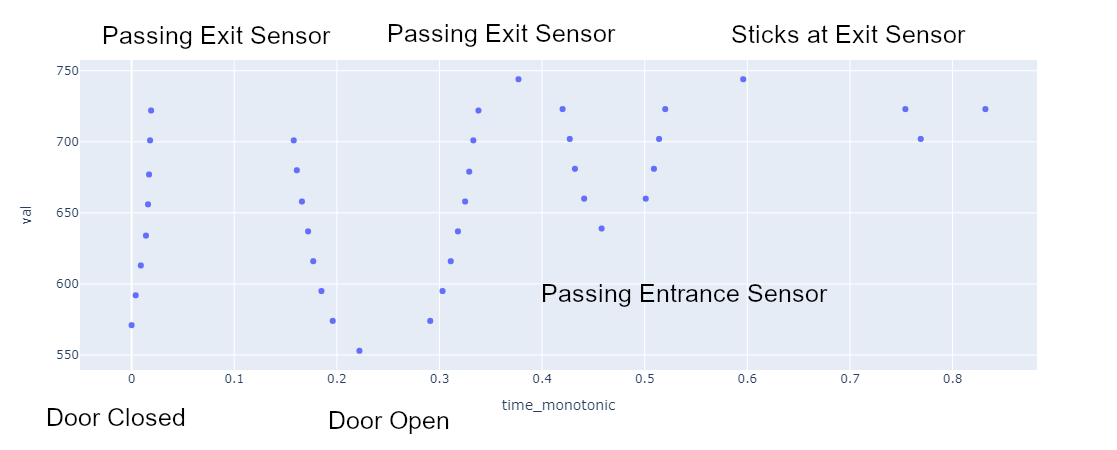
The peaks cut off since I’m only capture data that changes passed a certain threshold. The sensor goes from about 550 to 630 when the door swings inward, and from 550 to 740 when the door swings outward. In the above plot the door makes a big swing outward, then swings back in and out before sticking near the outside sensor. This all happened in less than a second.
Presumably, this was Nala quickly jumping out the window and the door oscillating a bit in her wake, possibly stuck open by her tail.